| Mohsin Ahmed
In this blog, we will be looking at Power Apps AI Builder, which is a recent addition to Microsoft Power Platform and allows app makers and users to add intelligence to their apps by creating AI models tailored to their requirements.
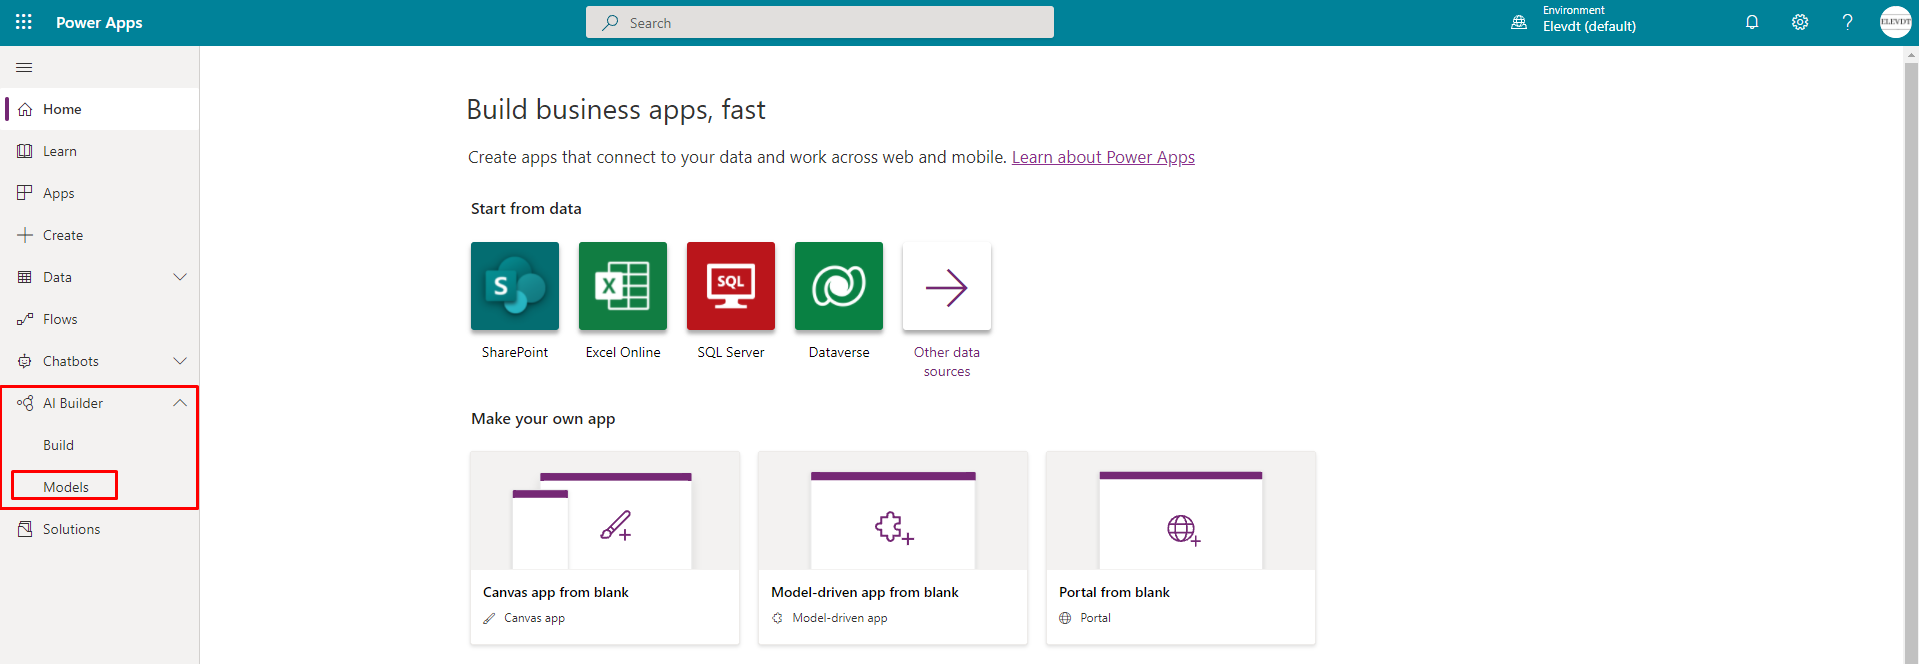
Getting started is straightforward. Just head onto the power apps maker portal (https://make.powerapps.com), select the environment which you would like to work in, navigate to AI Builder section in the navigation bar and select “Models” menu.
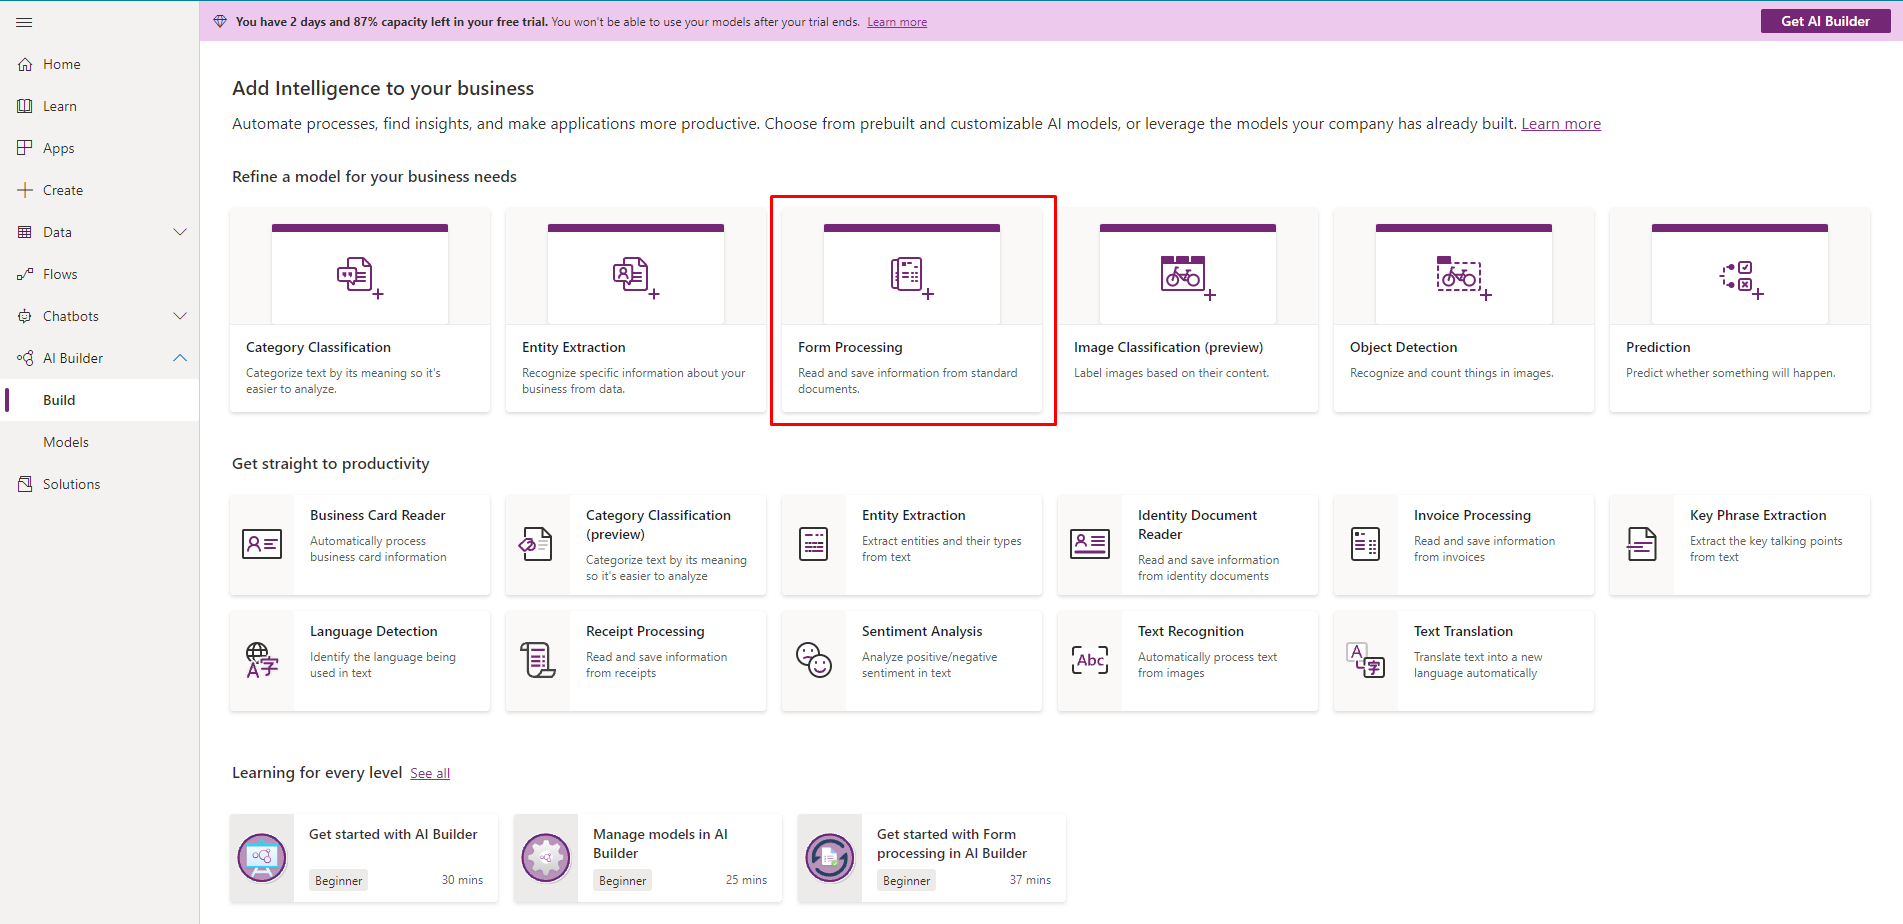
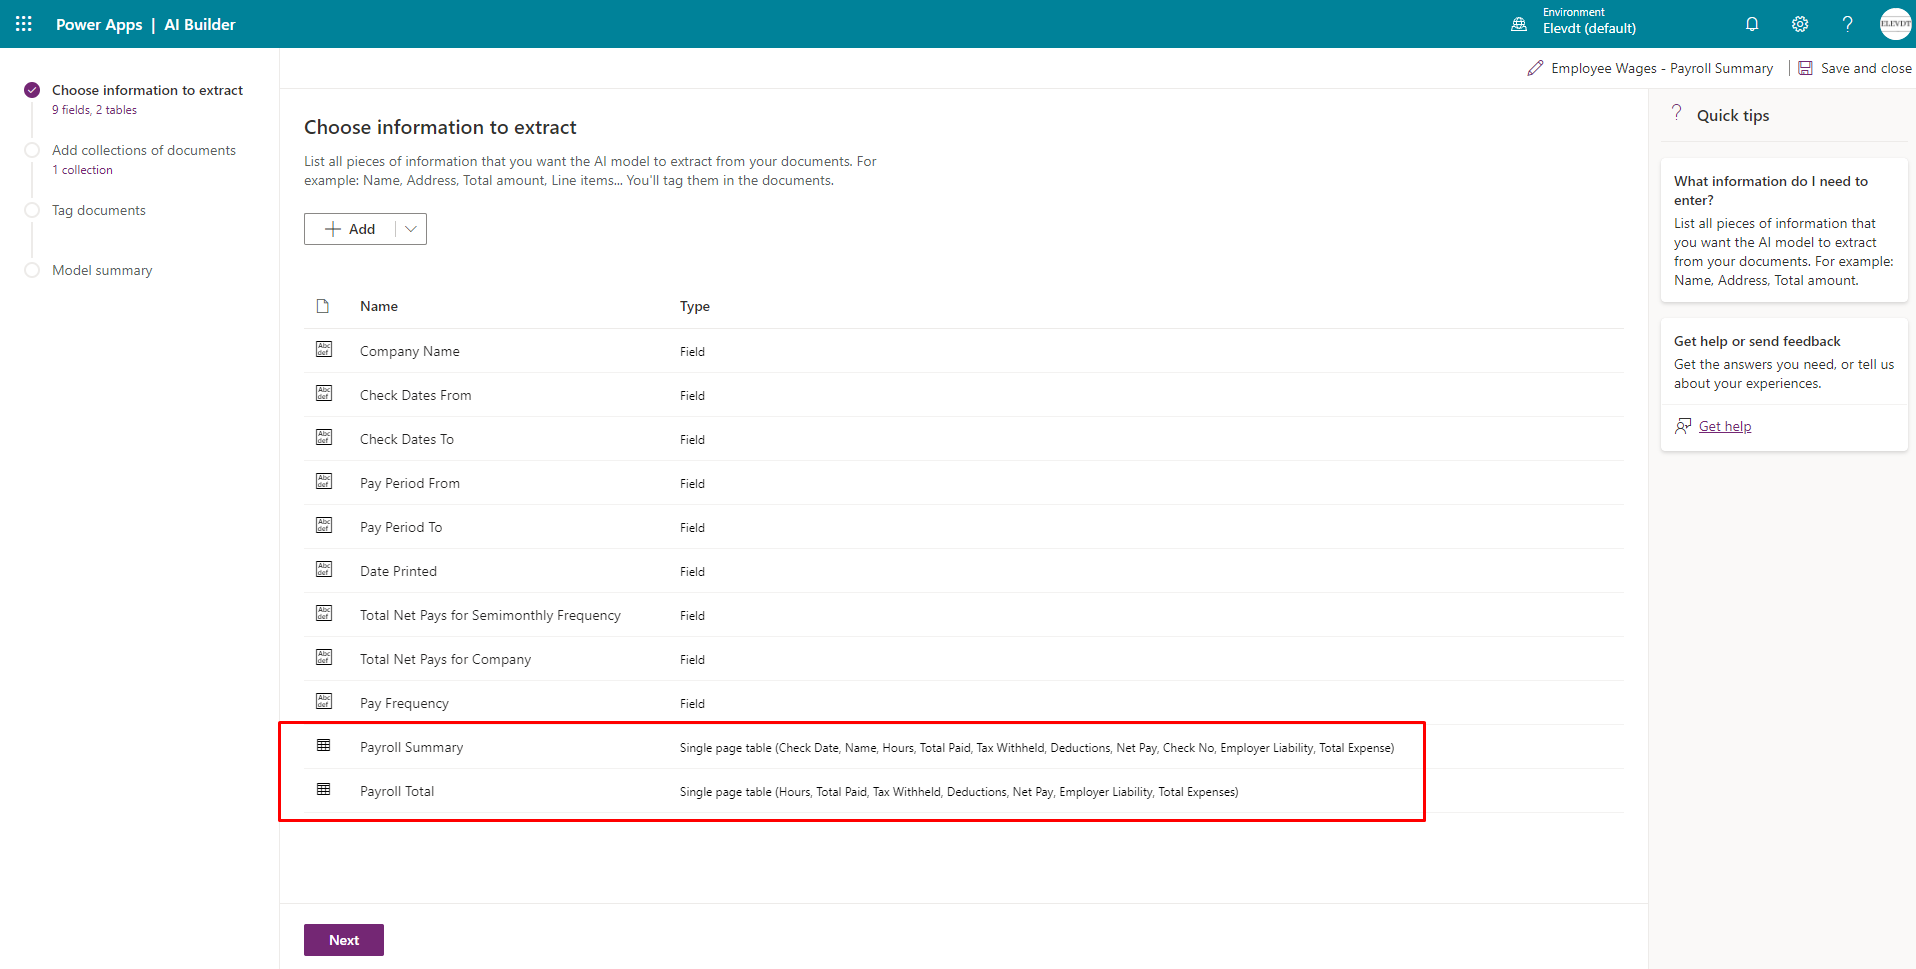
We will then be greeted with the “Choose information to extract” page. On this page, we need to outline the key pieces of information which must be extracted from the documents. Click on “Add” to start adding items.
There are 4 types of fields which can be extracted from documents:
- Field: Used for extracting printed or handwritten text. (For example: Name, Date, Age, Address)
- Single page table: Used for extracting information present in tabular format (For example: list of employees, sales order items list)
- Checkbox: Used for extracting selection-based information like checkboxes and radio buttons (For example: marital status, agreement)
- Checkbox: Used for extracting selection-based information like checkboxes and radio buttons (For example: marital status, agreement)
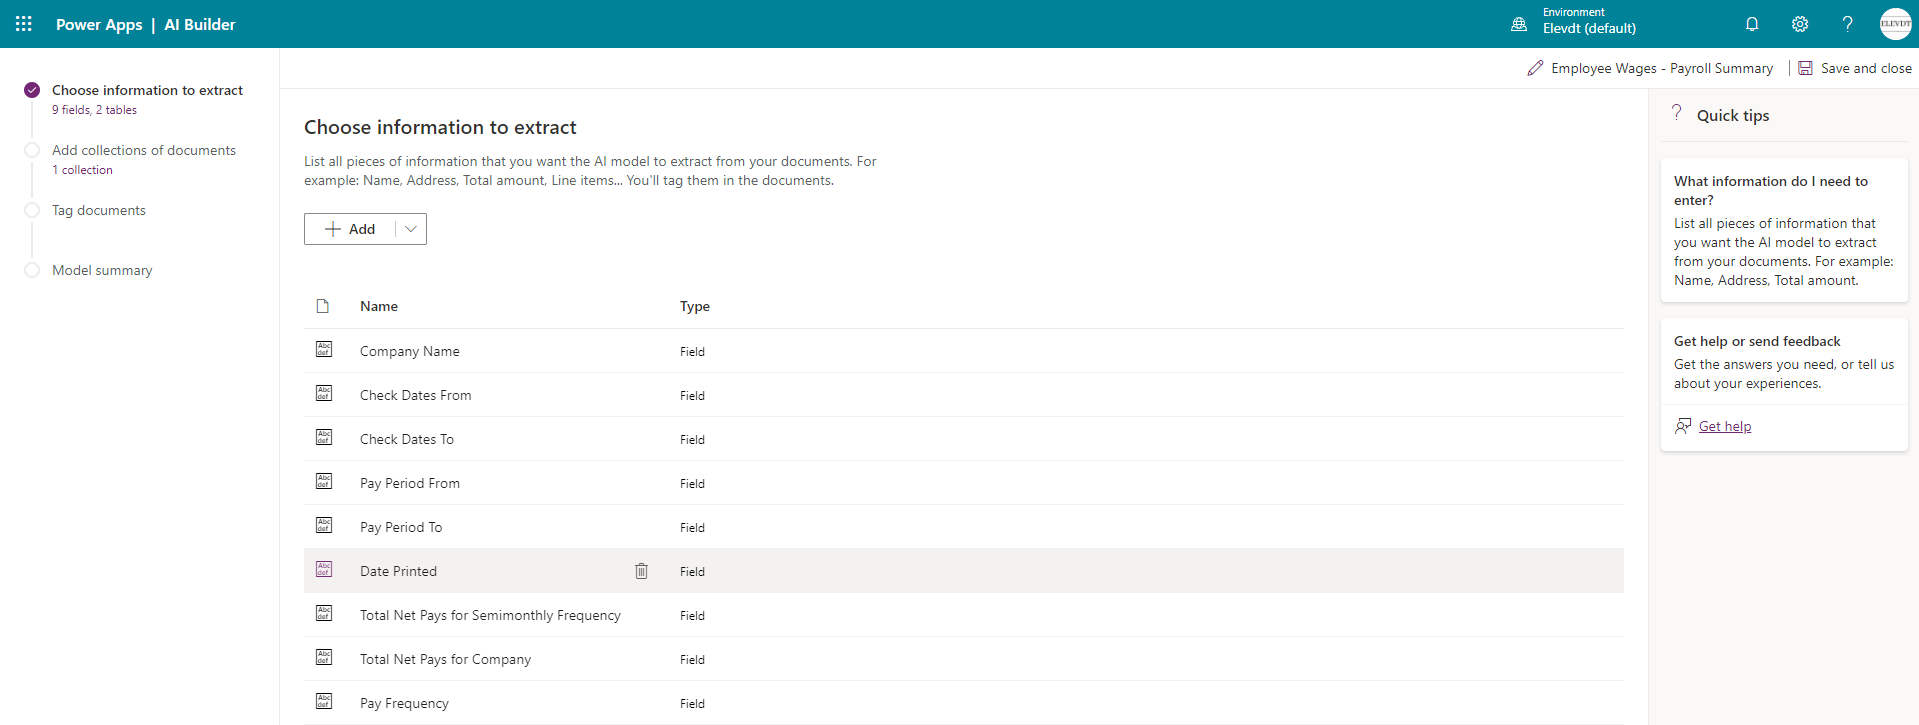
To add tables, we first need to give a name to our table. Next, we need to define the column names for this table. To rename “Column 1”, click on the first column header and select “Rename column” option for the dropdown menu. Now we can update the name of the table’s default column. We can continue to add more columns to our table until we have extracted all pieces of information from the table in our documents.
This is how the page should look like after adding columns to our table:
Join us next time, as we continue our journey of learning canvas apps.Click here to learn more about Imperium's Power Apps Services. We hope this information was useful, and we look forward to sharing more insights into the Power Platform world.
