| Mohsin Ahmed
In this blog, we will be going through the steps required to enable mailbox on Power Platform or Dynamics 365. Almost all Dynamics and Power Platform users would be familiar with the activity timeline and how we can easily send emails directly through the timeline or through the command bar. But to do so, we require our Mailbox to be enabled and configured for sending emails through the application. Have you ever tried to send an email through a model-driven application and wondered why the email did not go through? That is because the mailbox for an account should be enabled and configured, only then would the emails be sent successfully.
One important point to note is that Global Administrator privileges are required to enable mailbox. Following are the steps required to do so:
-
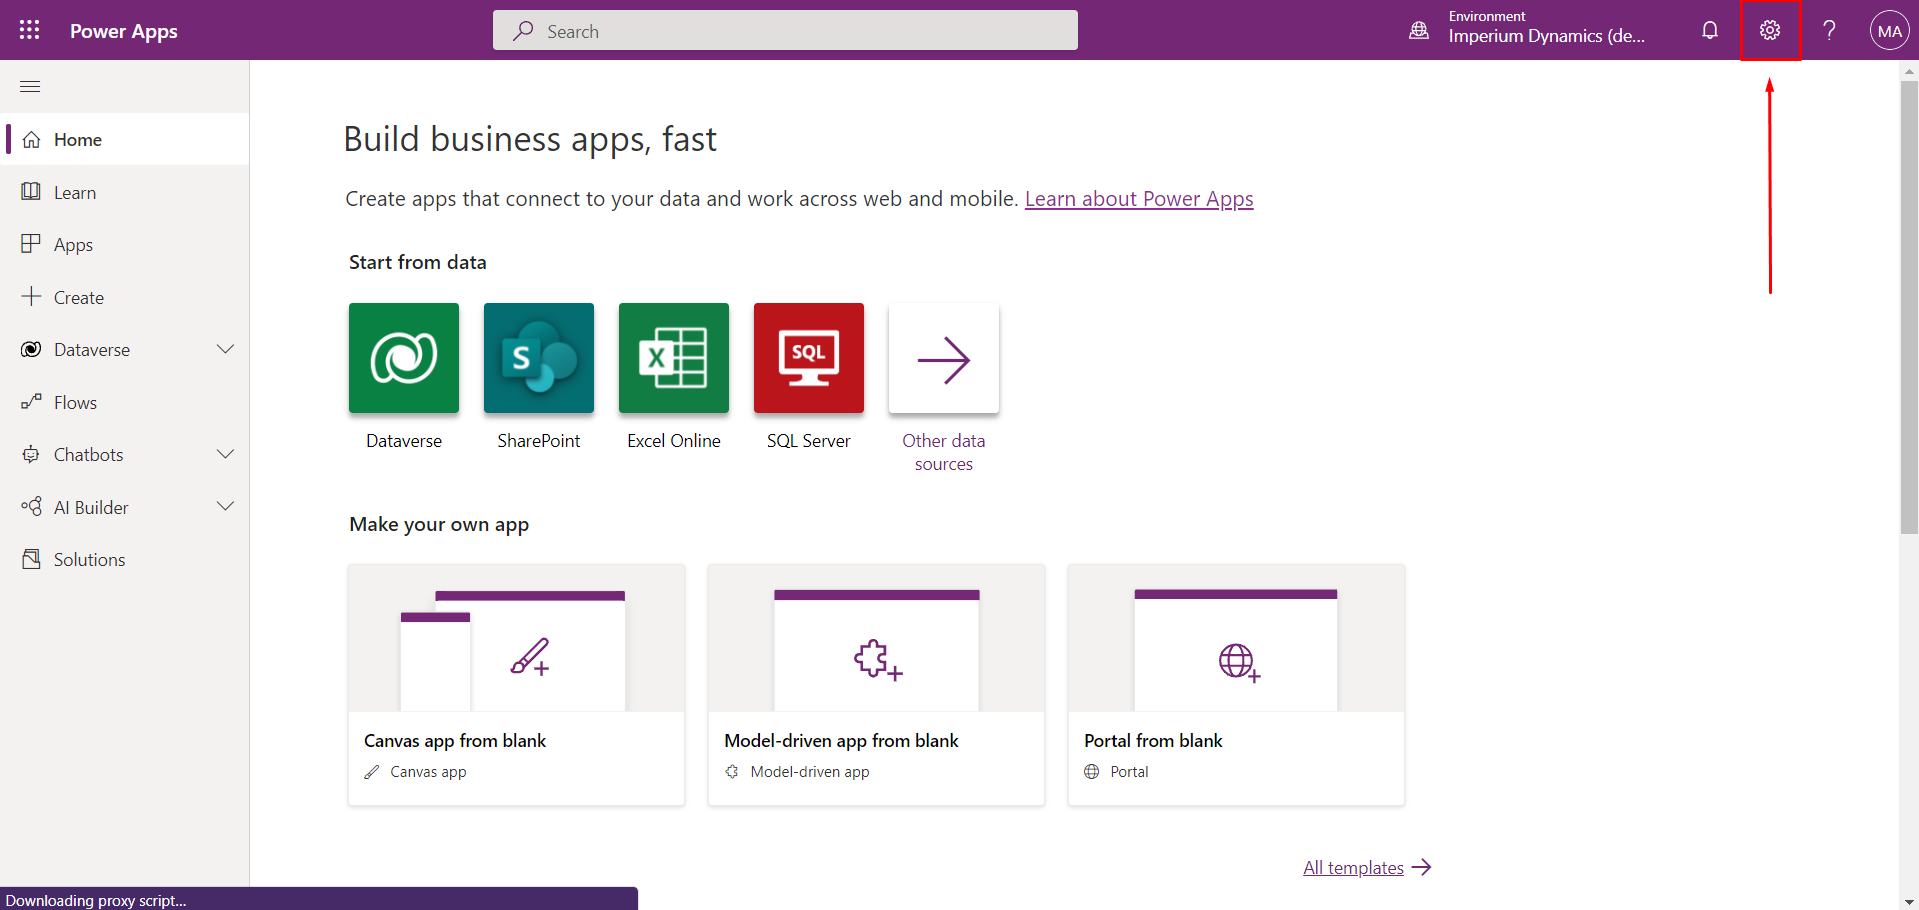
Go to Power Platform maker portal
(make.powerapps.com). Select the environment of your
choice. Click the settings icon to open the settings
sidebar
-
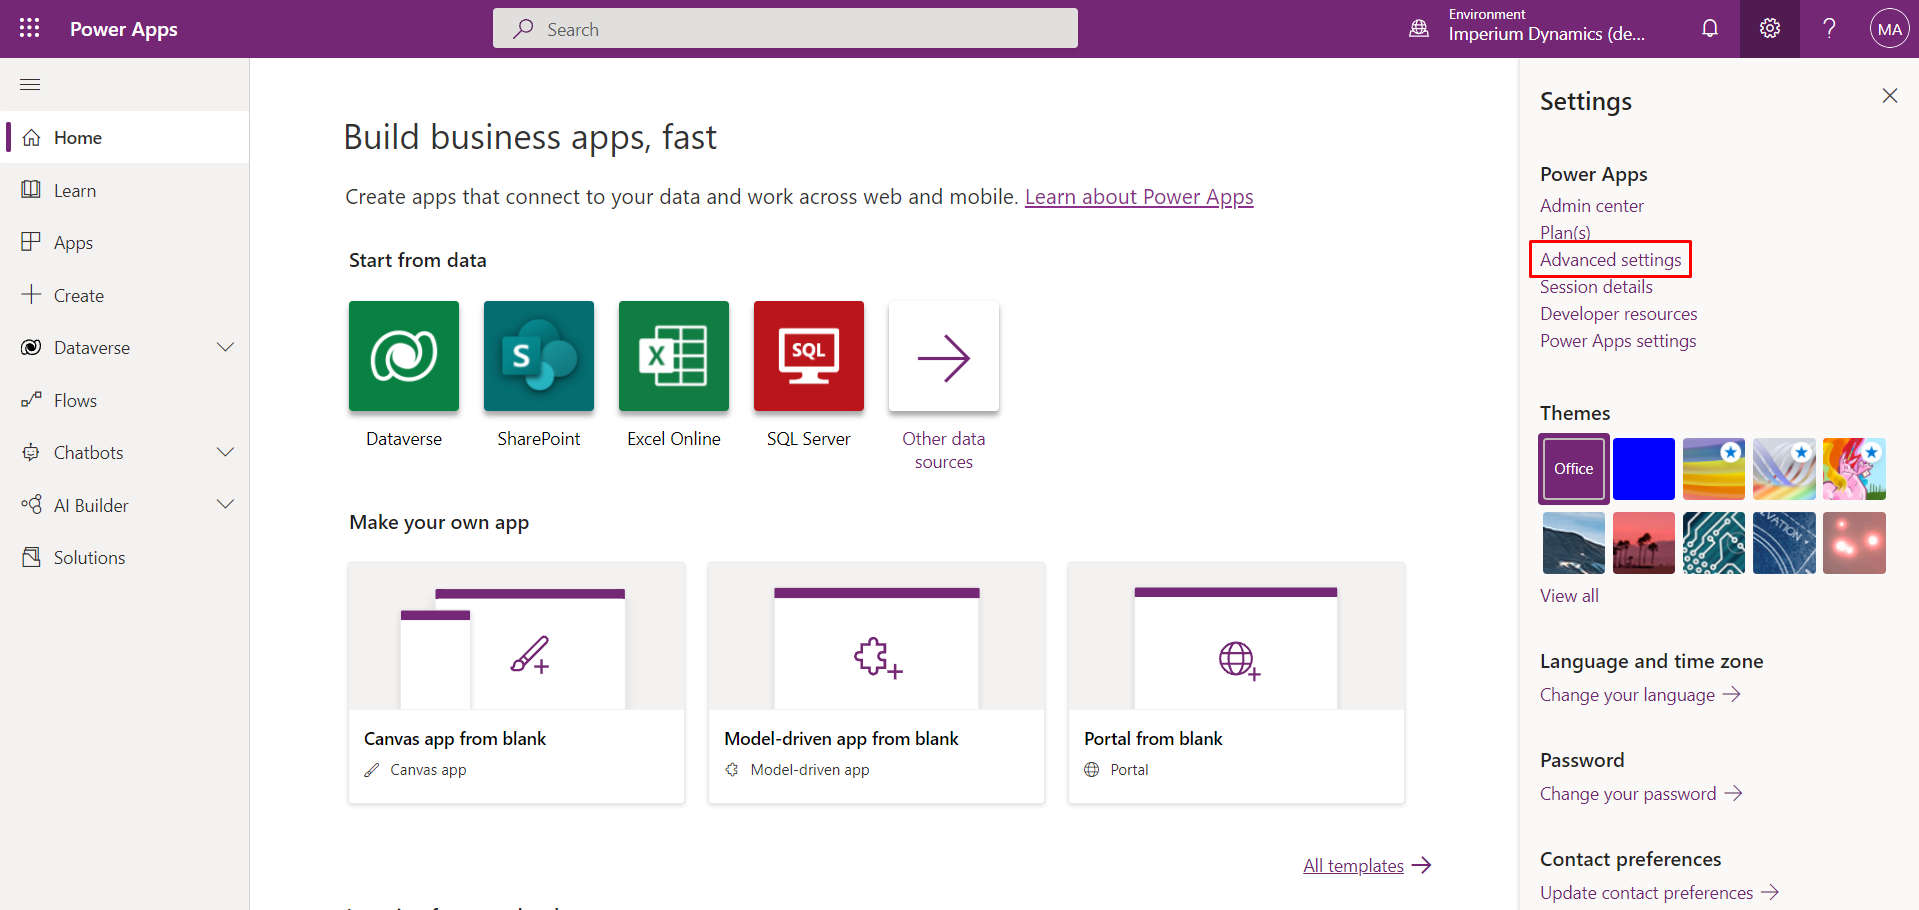
Go to Advanced Settings.
-
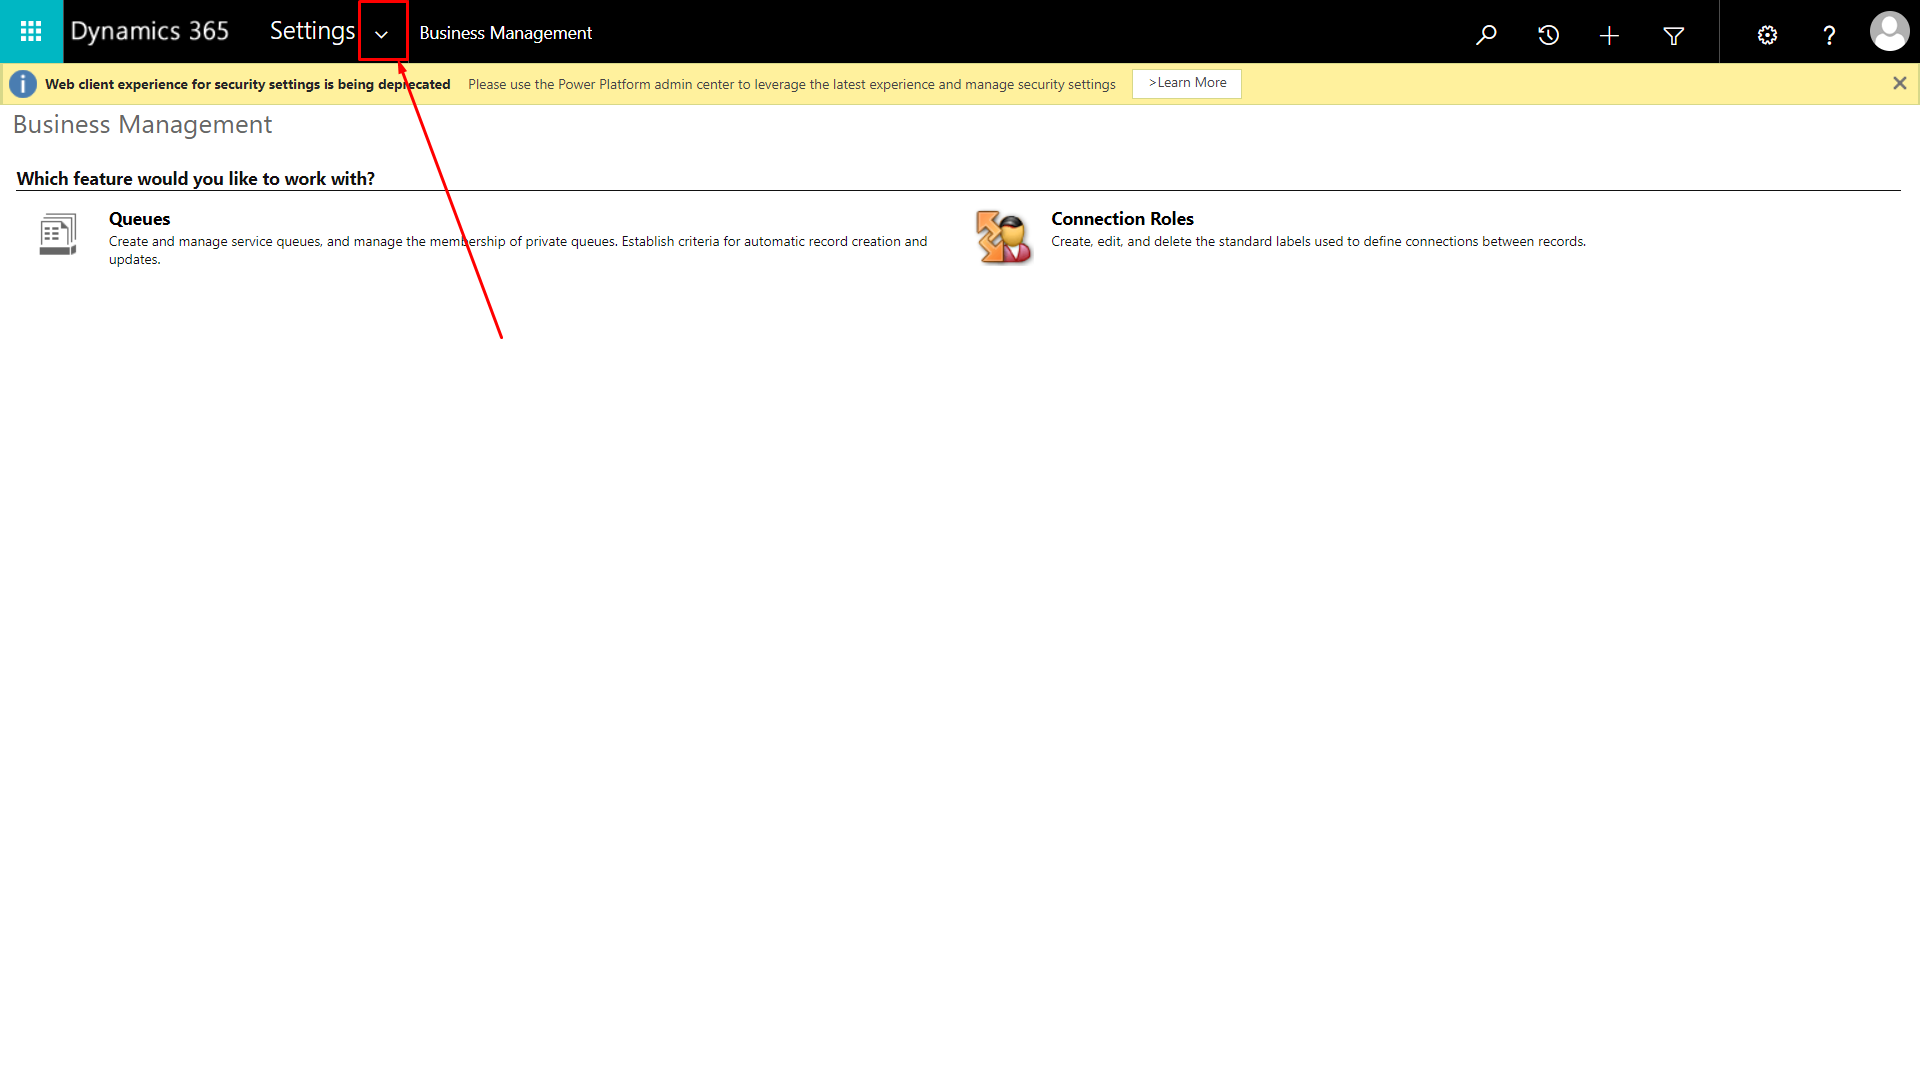
Expand the settings menu.
-
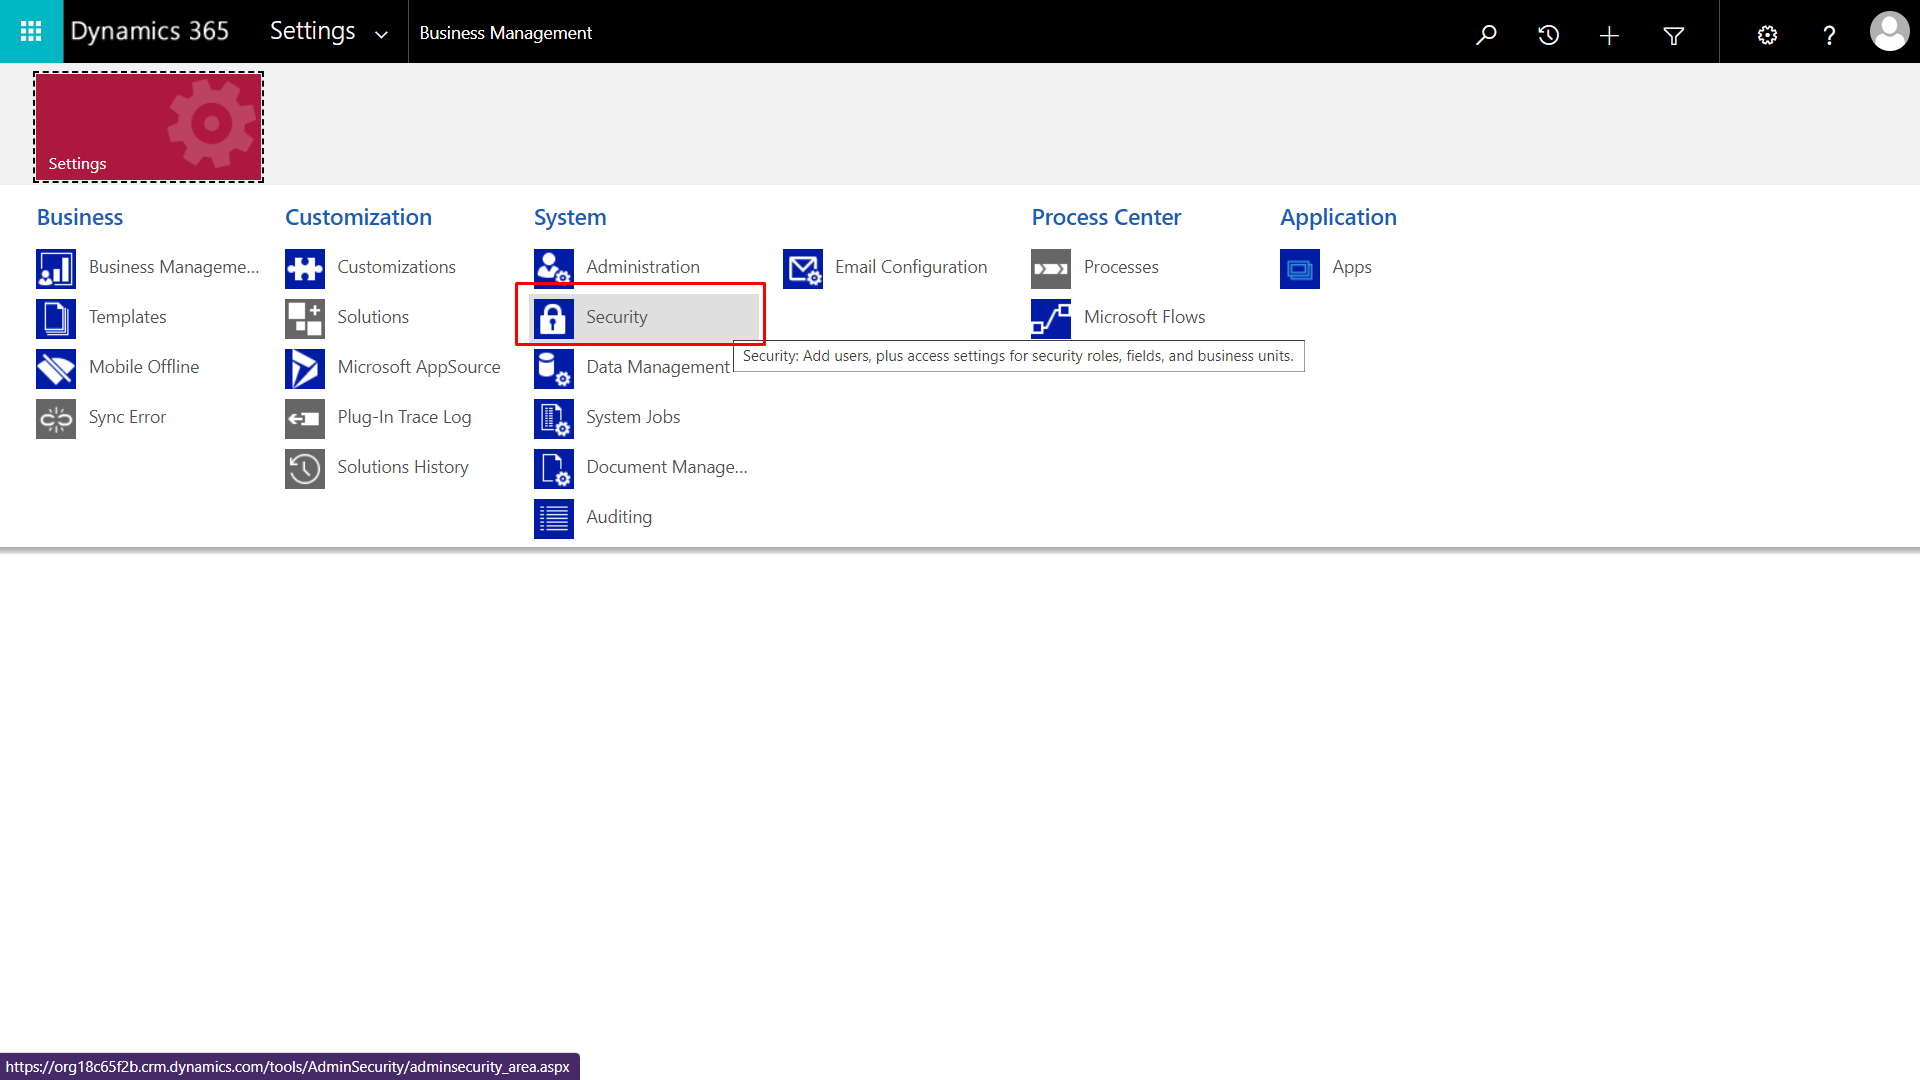
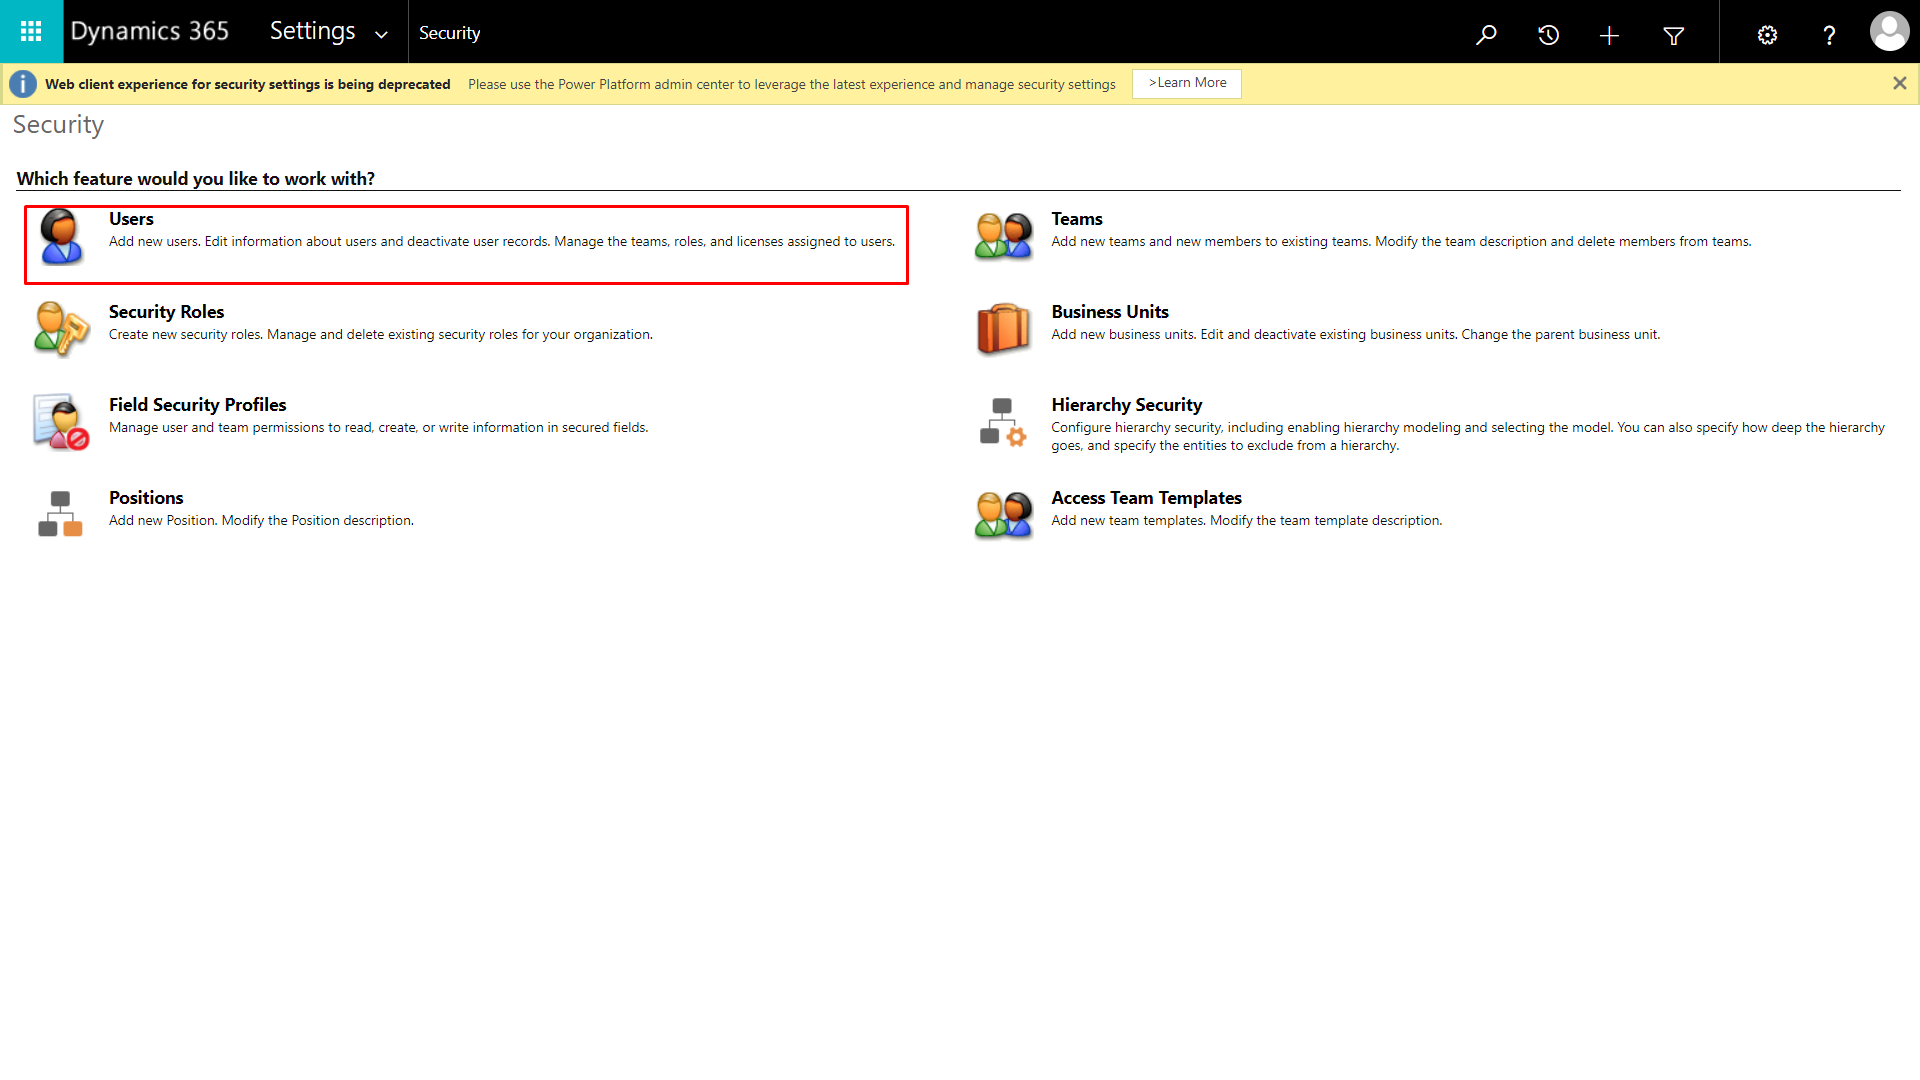
Under System section, go to Security settings.
-
Go to Users settings.
-
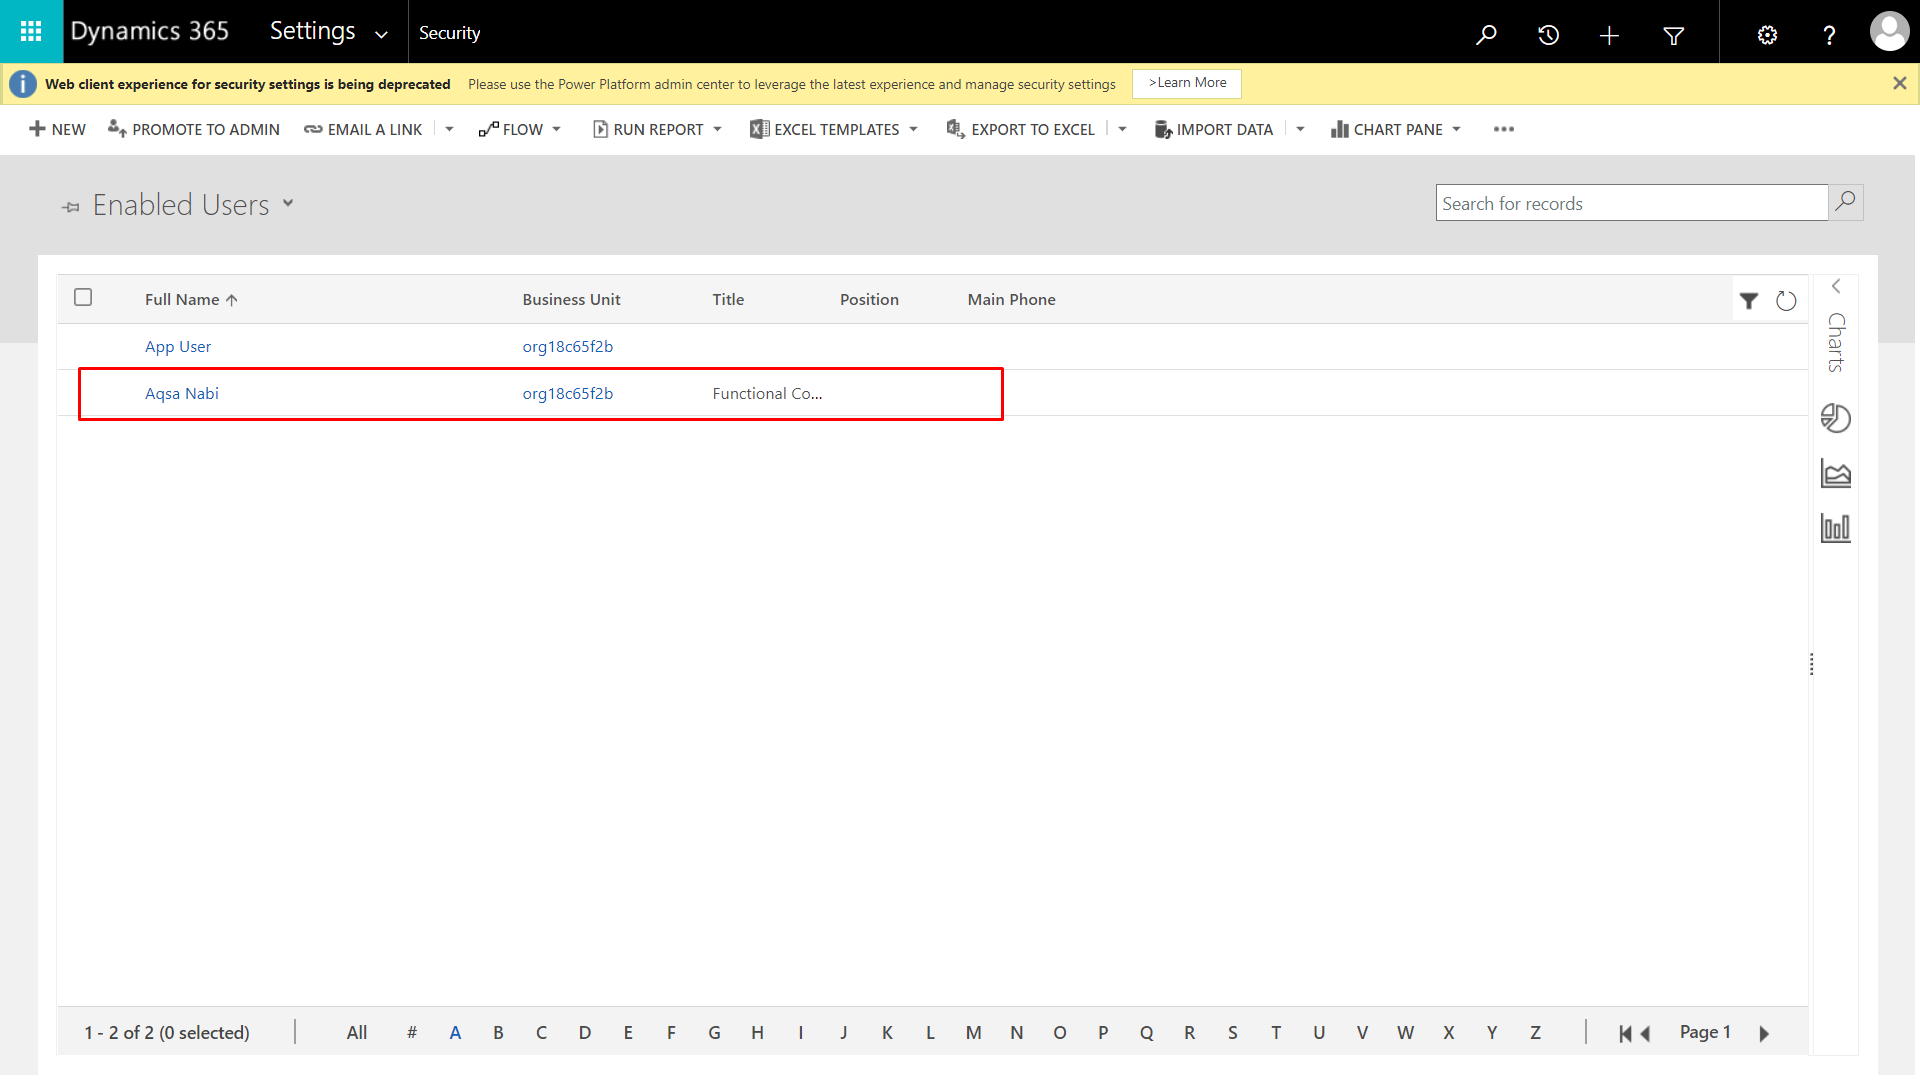
Select the user of your choice.
-
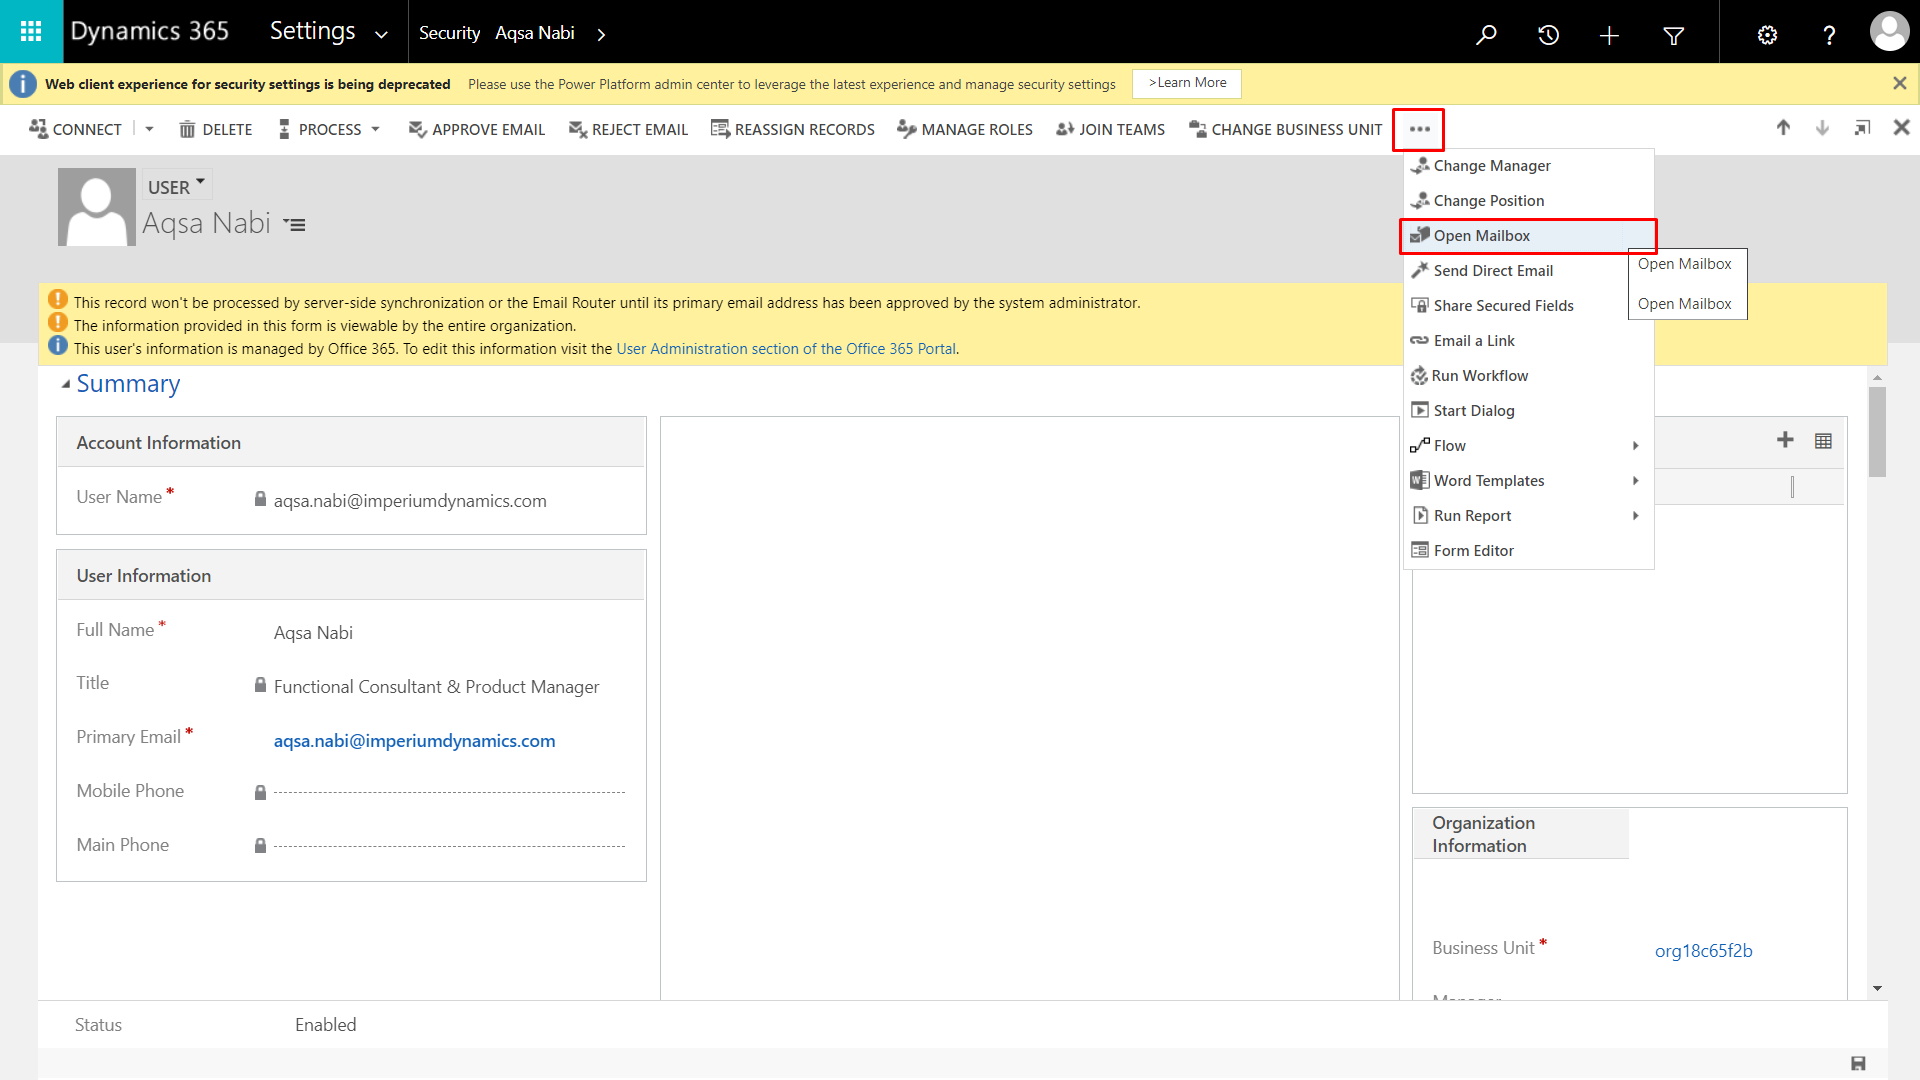
Click on the menu icon (3 dots) and select “Open
Mailbox”
-
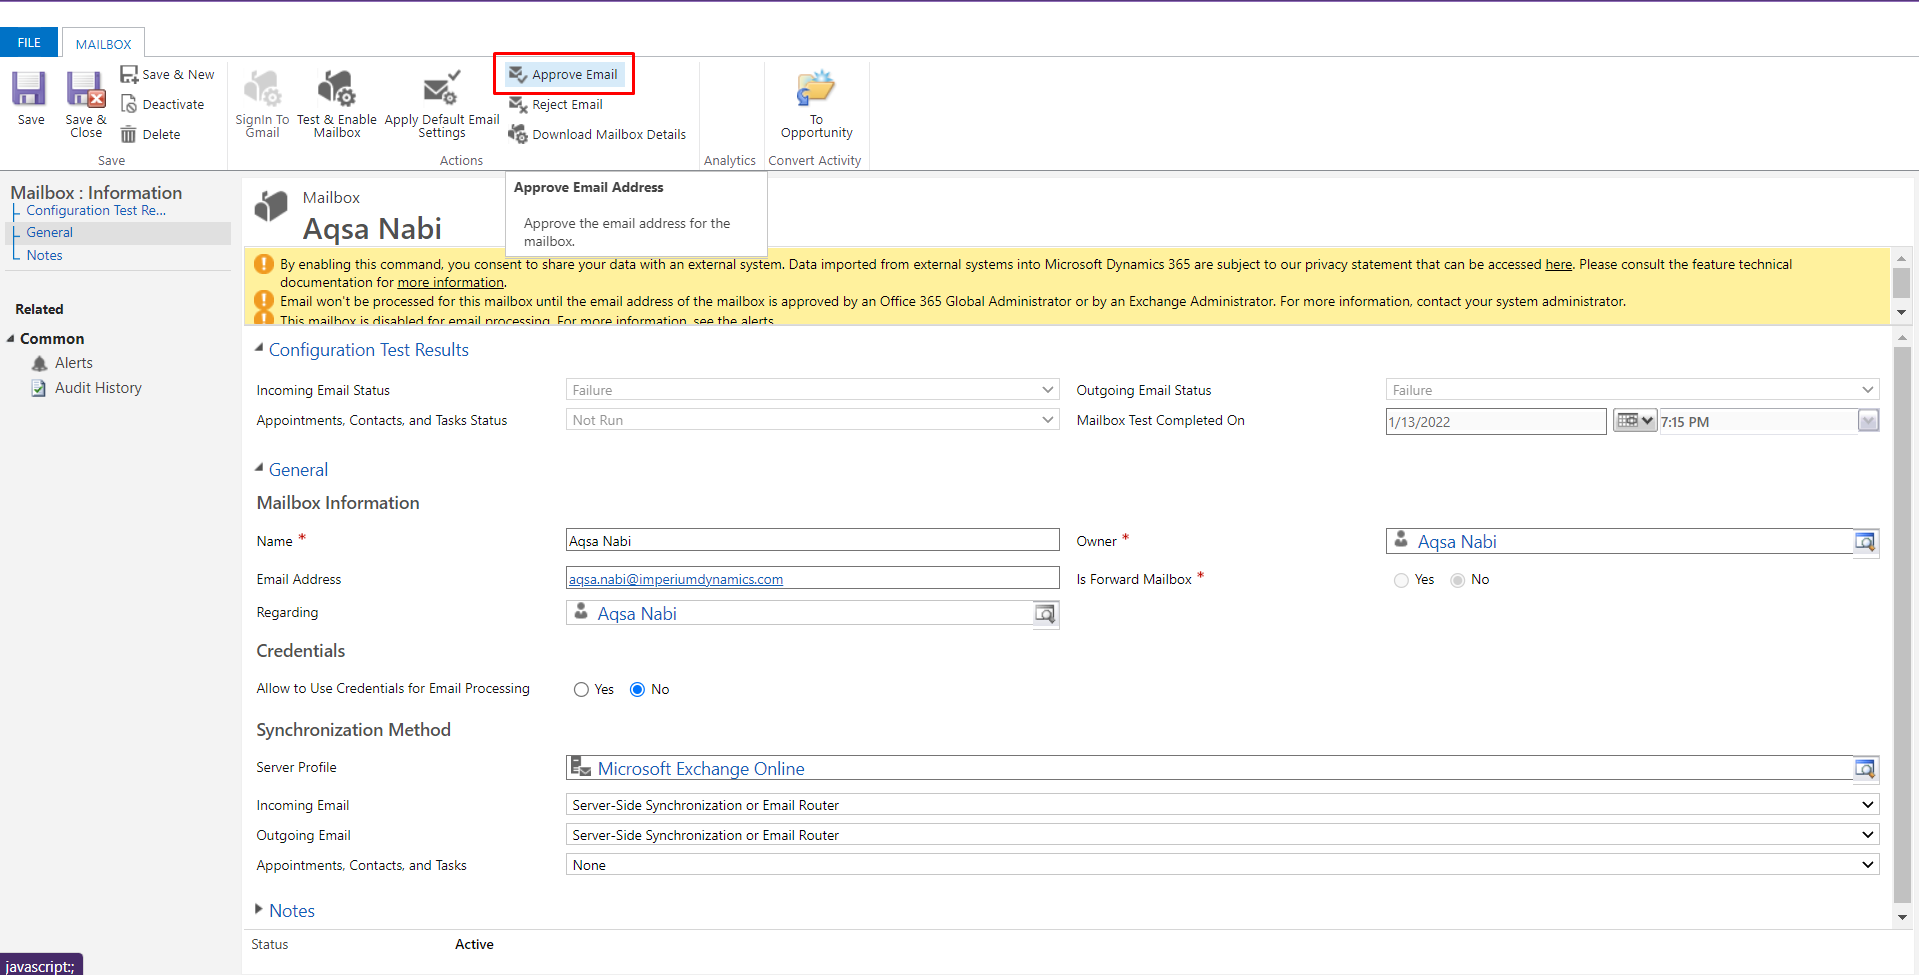
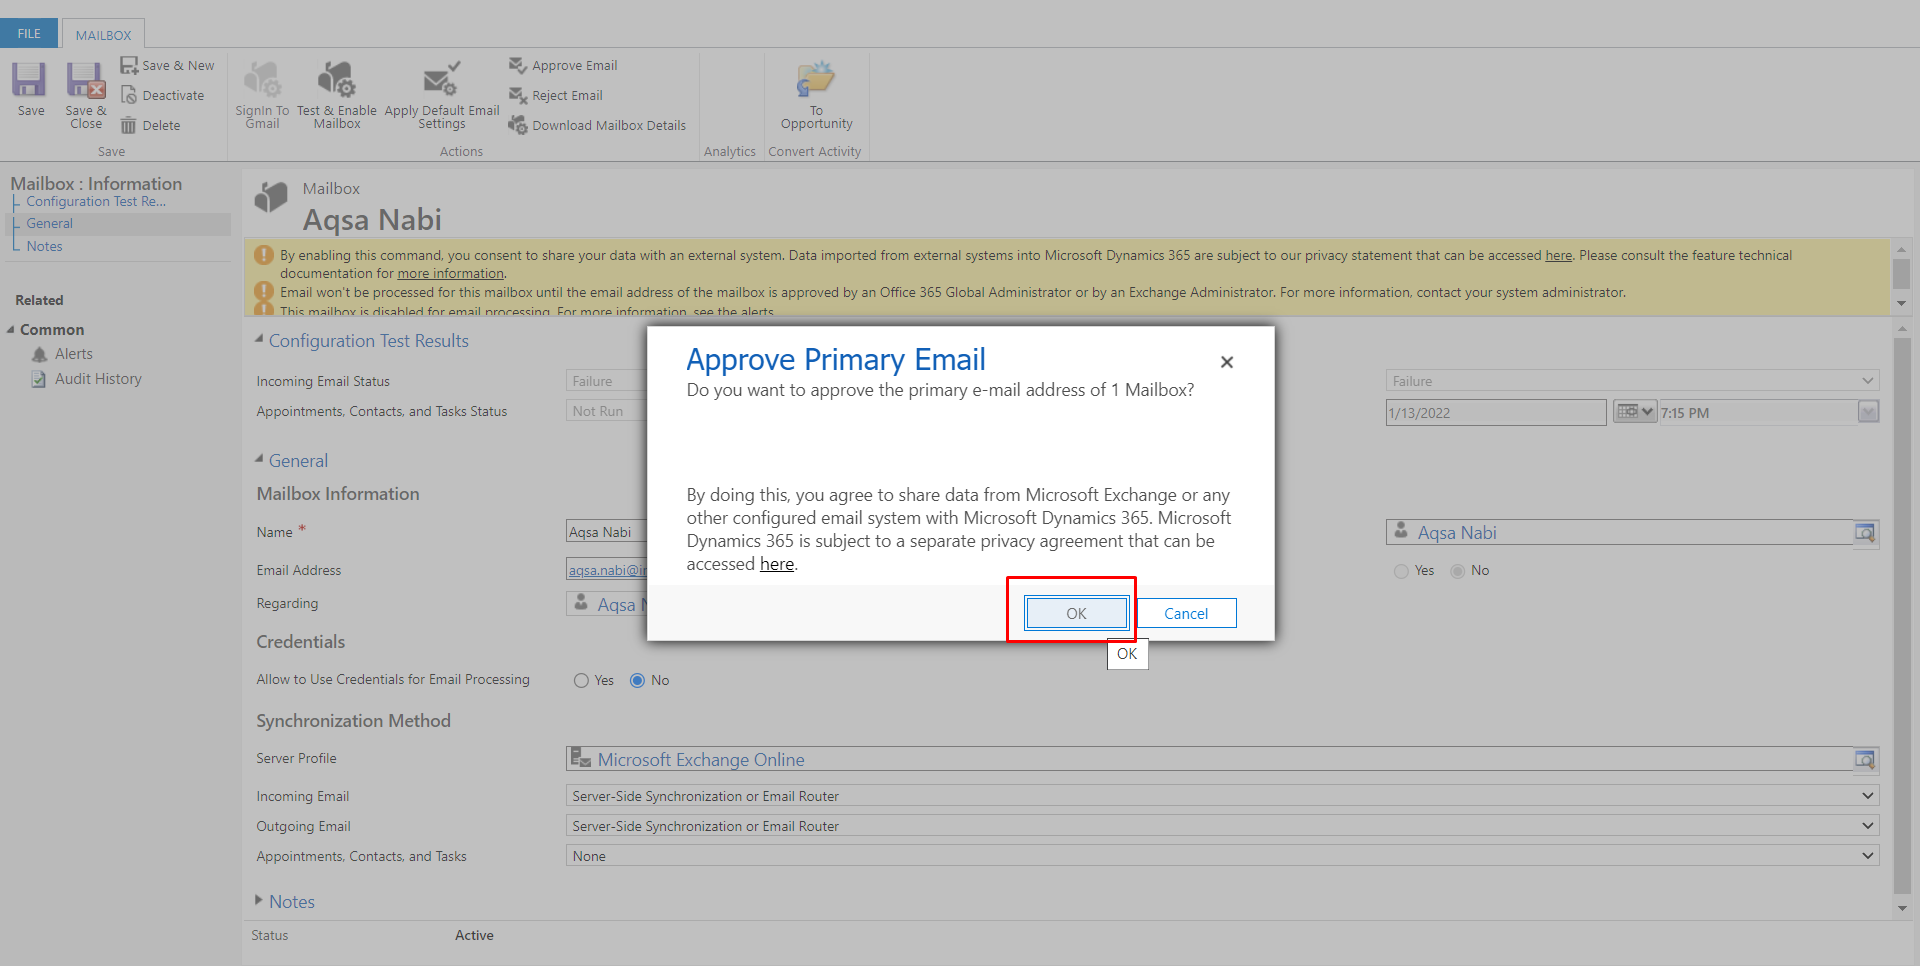
Click on “Approve Email” option
-
Click on “OK” to confirm
-
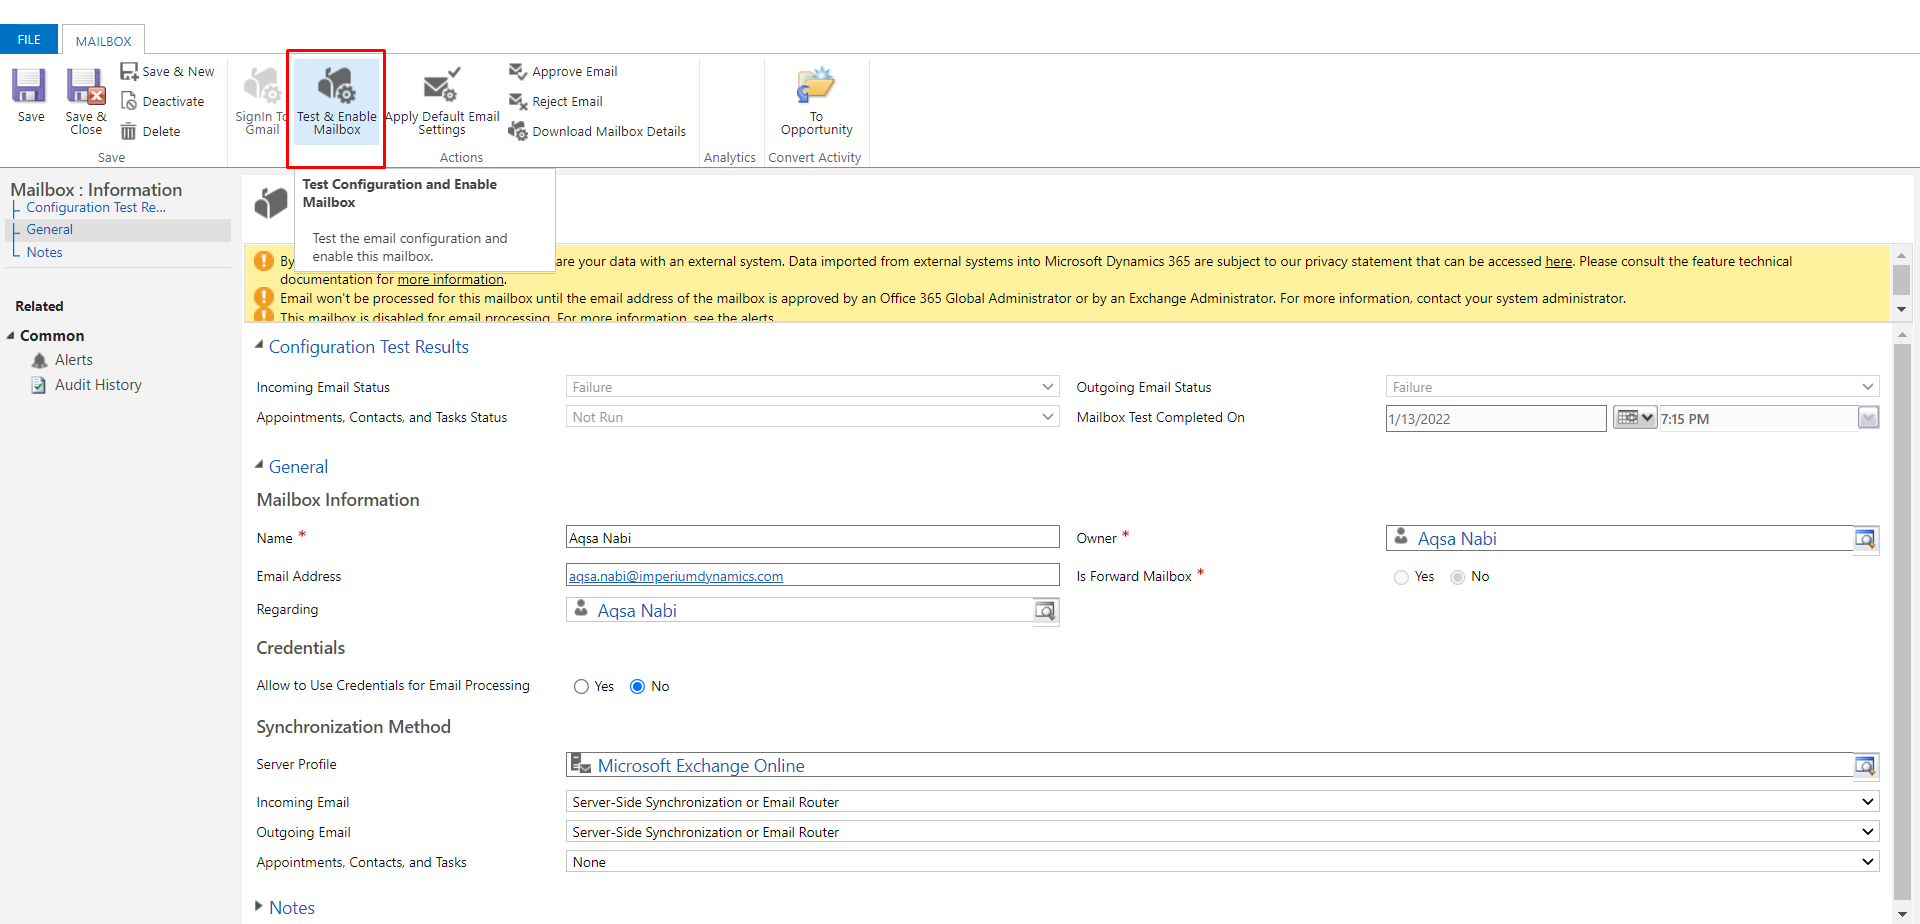
Click on “Test & Enable Mailbox” option
-
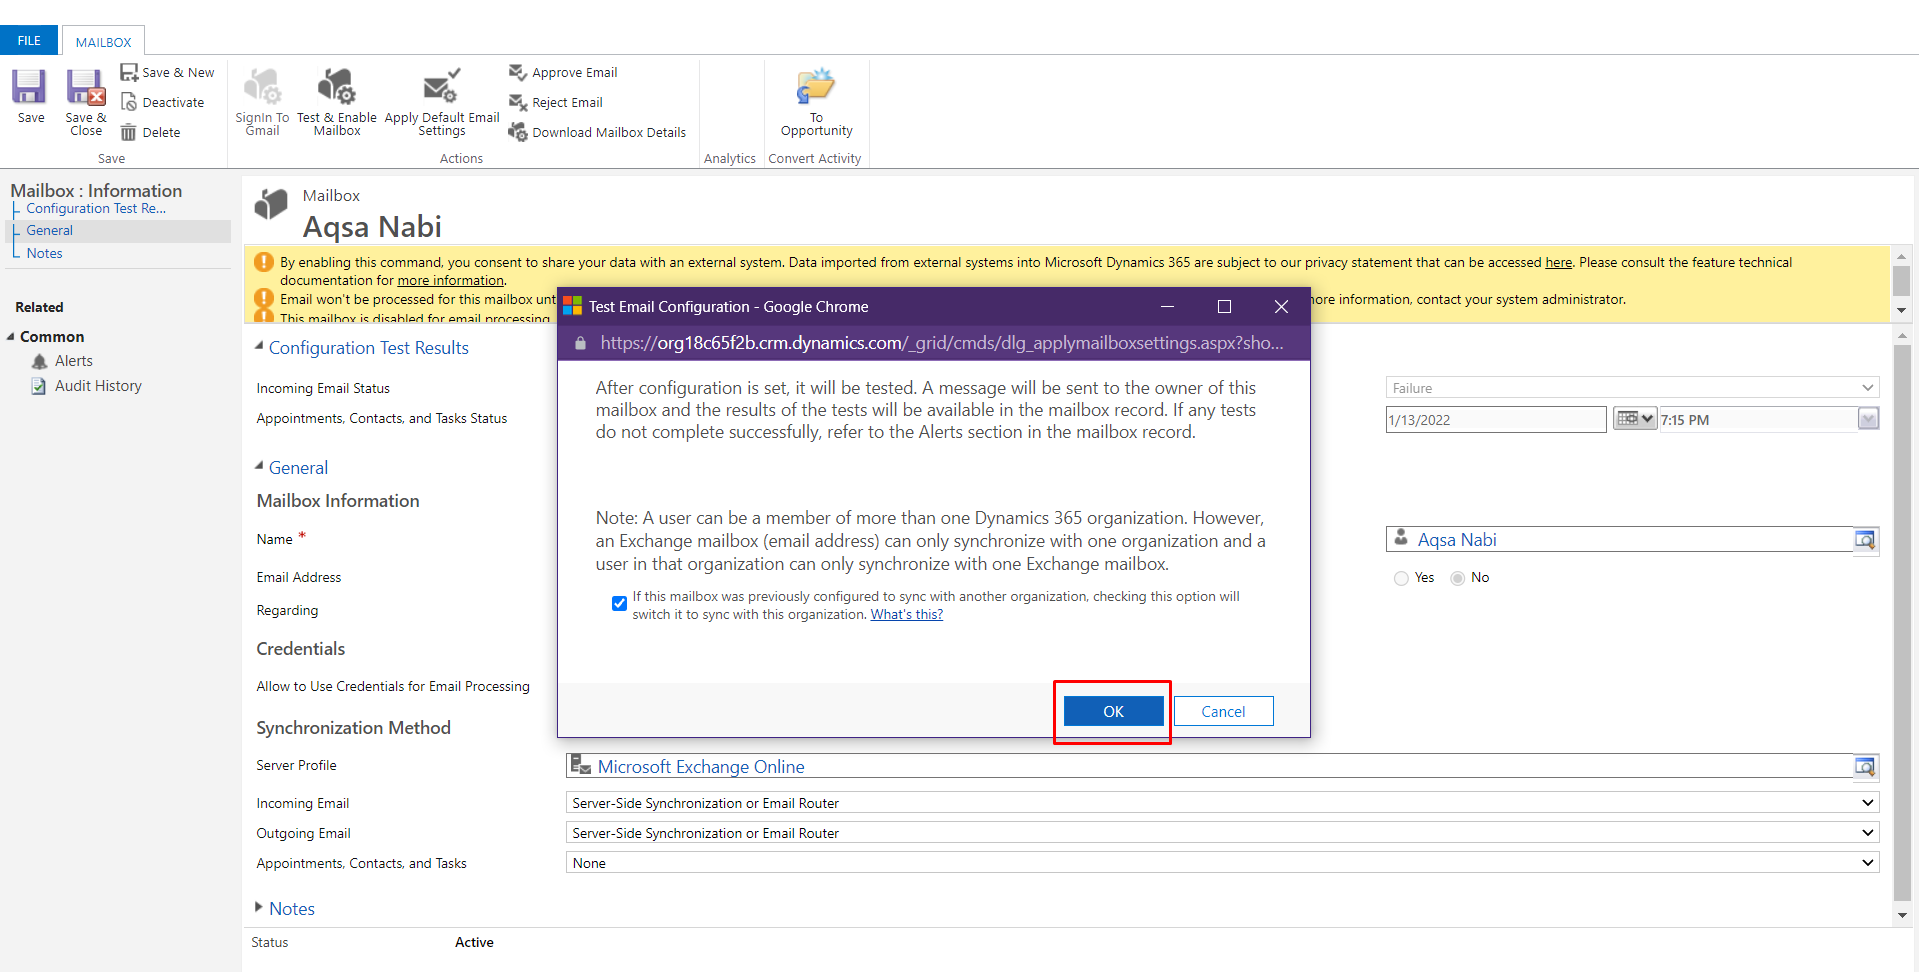
Click on “OK” to confirm.
If this process failed or did not work for you, then please check if you have the Global Administrator privileges for your environment. If not, then please contact your environment administrator for help.
And this is how you can easily enable Mailbox for your account on Power Platform and/or Dynamics 365. Easy, right?
Happy emailing!
Join us next time, as we continue our journey of learning canvas apps.Click here to learn more about Imperium's Power Apps Services. We hope this information was useful, and we look forward to sharing more insights into the Power Platform world.
