| Muhammad Yaseen
We want to send an email to specific user selected on the model driven form on specific selected Time, Day, Once a week, once in twice a Week, Monthly on selected Date/Time and Yearly on selected Date/Time of the month.
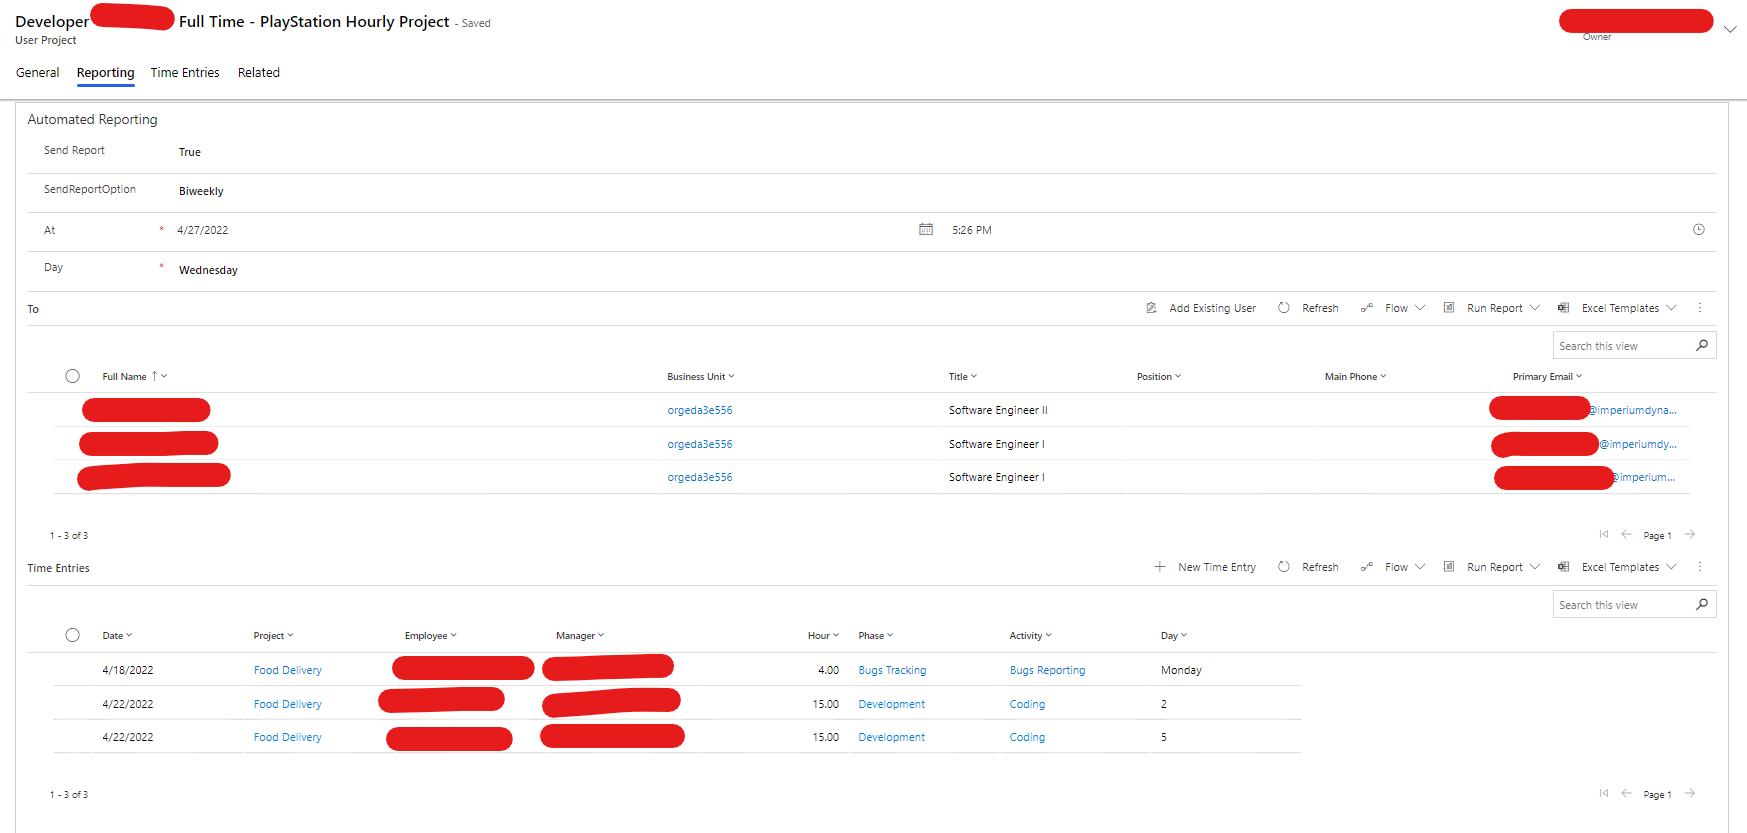
So, we have already created a Model-Driven Form
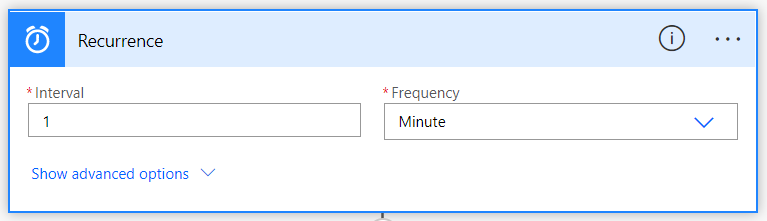
For this purpose we make the flow recurrence that will runs at 1 minute interval.
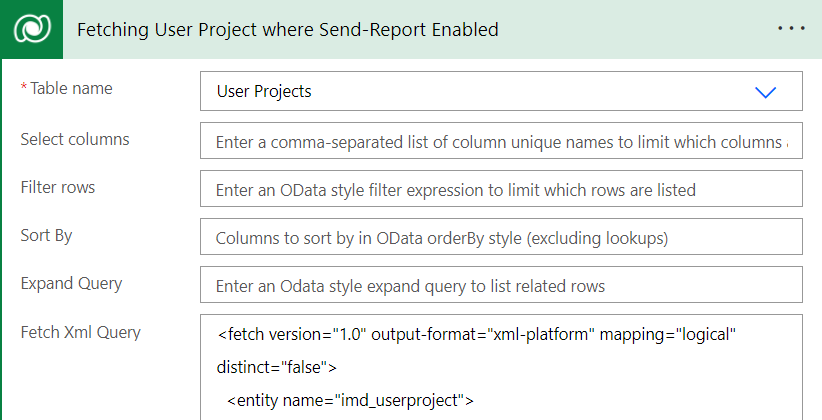
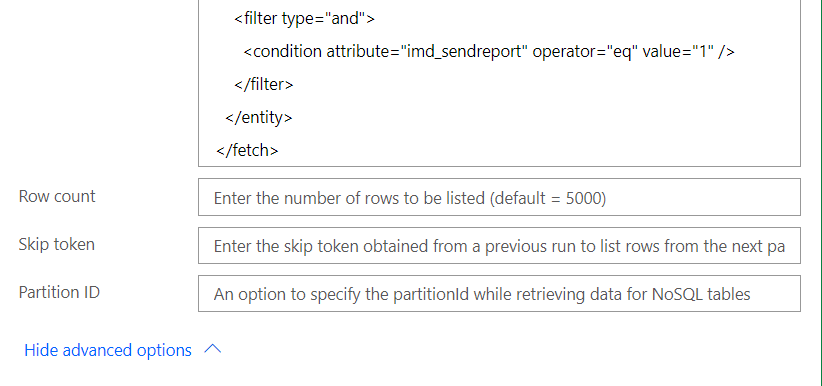
If the send report toggle is set to true then flow will get the data from this entity using list rows and we used FetchXml to filter the data
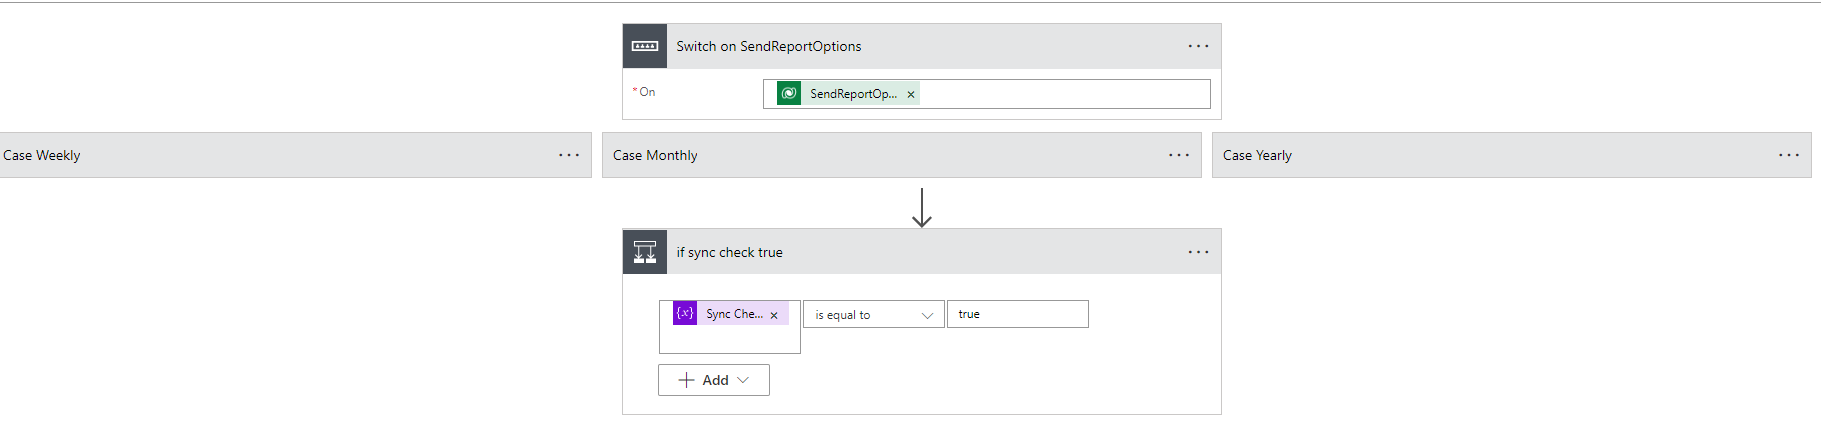
Then we used switch cases to select the related case to show data of Time Entries in according to the selection like Now, Daily, Weekly, Bi-Weekly, Monthly, Yearly
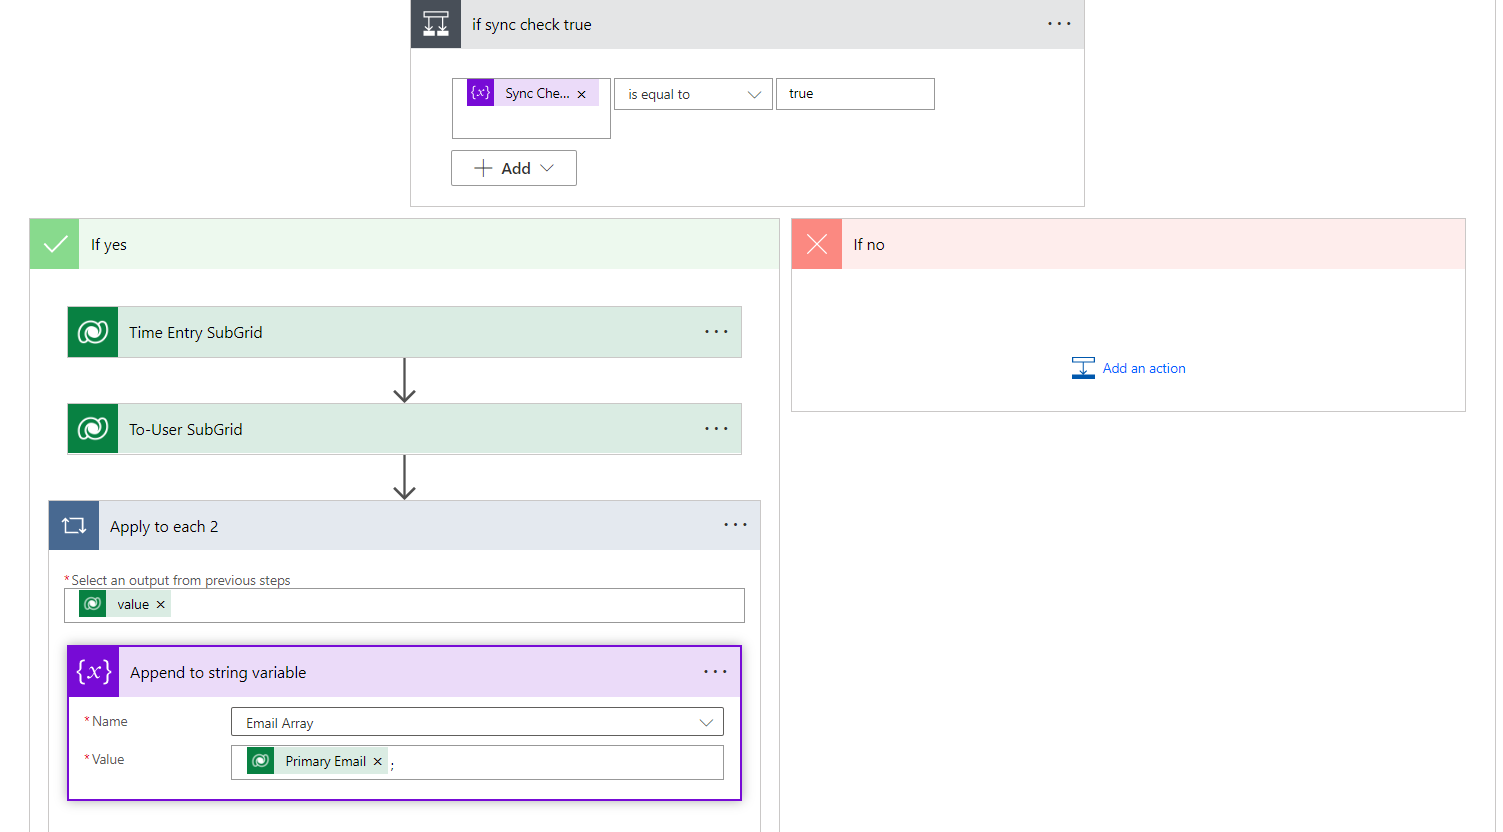
And in each case like time, Date, Day, Month and Year we check the condition if condition satisfied then we set the variable FetchXml (with Time Entries FetchXml According to filter Date and Project) and Sync Check to True.
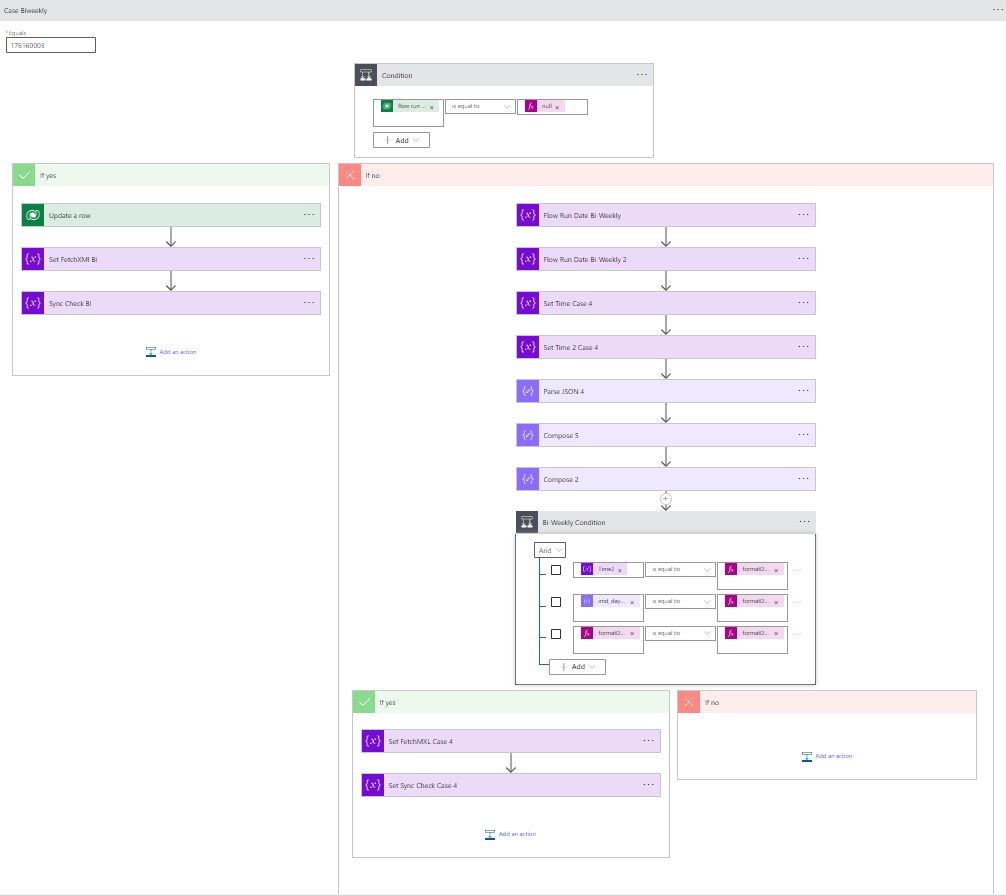
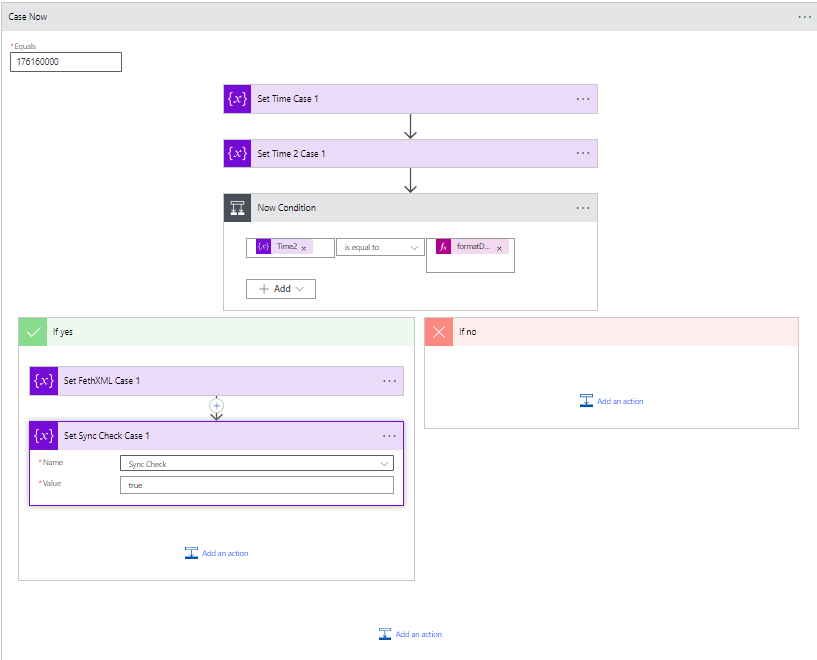
If one of the condition satisfies we used FetchXml that we created on above case to fetch records from the list of rows from the desired Time Entries Table.
And here we also fetched the selected user from the Sub Grid of the form. And stored it semicolon separately in the array of string.
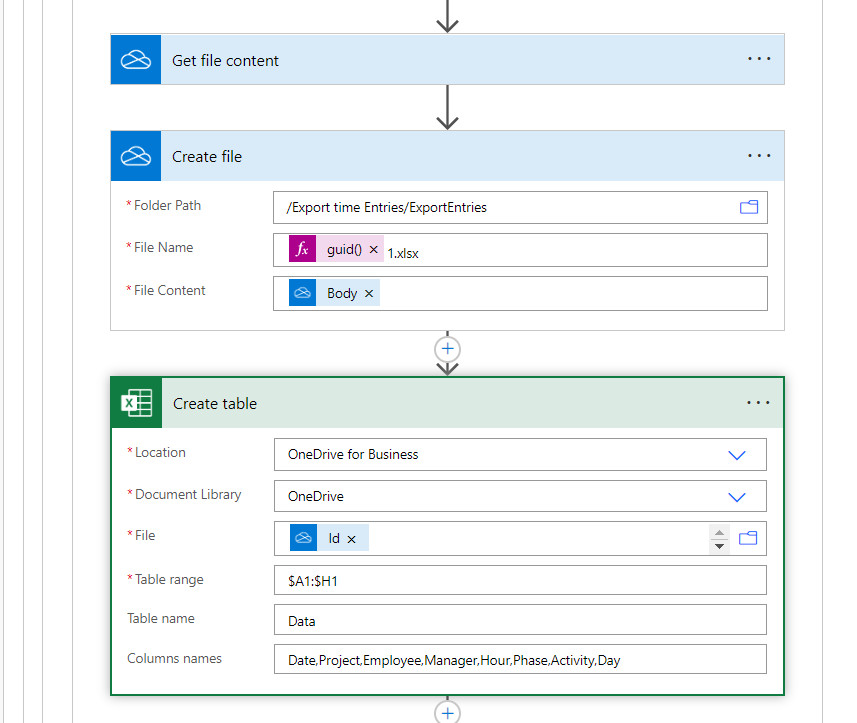
Then we used Get File Content connector for one drive to select an empty .XLSX file which we will be used to add rows in it then send this file as an attachment. And use a Create file connector to create an empty file with unique name and pass the body of Get File Content connector to this in file content field, and in this file we will create table in excel file with the desired headers which coming from the FetchXml of Time Entries. And gave this table a name.
Then we used the select connector to map the columns from our Time Entries List of rows Output
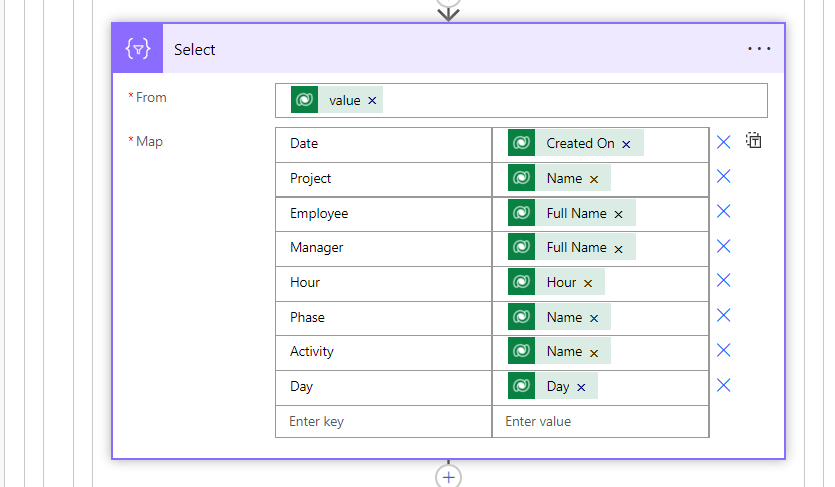
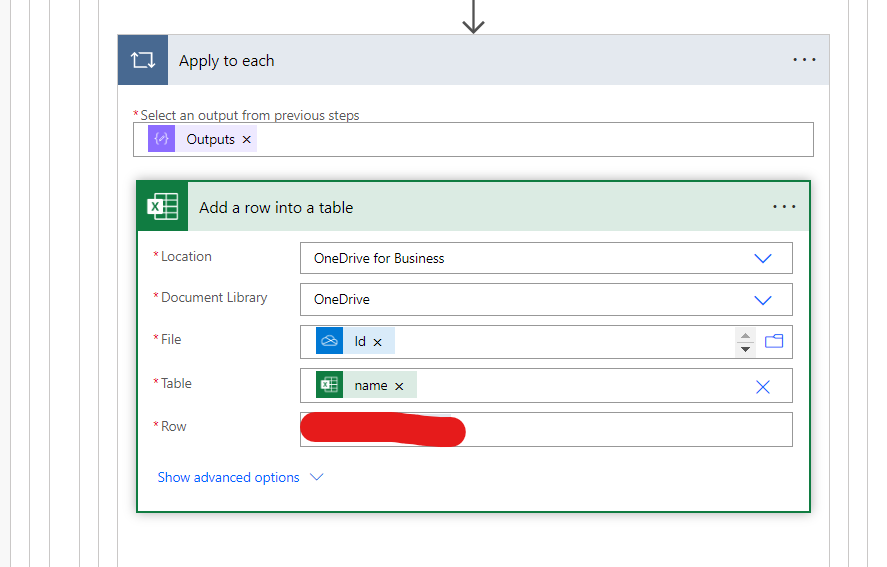
And by using this select output we will add rows into a table by using Excel Add Rows into a table and passed the body of select to Row field.
Then we pick this excel file from one drive and then used send an email using an Email Connector and attached excel file output in the attachment.
That’s it 😊
Join us next time, as we continue our journey of learning canvas apps.Click here to learn more about Imperium's Power Apps Services. We hope this information was useful, and we look forward to sharing more insights into the Power Platform world.