| Saim Ali
Scheduled flow allows you to run an automated flow on a specific date or time, on daily or weekly basis.
To create schedule flow follow the steps outlined.
-
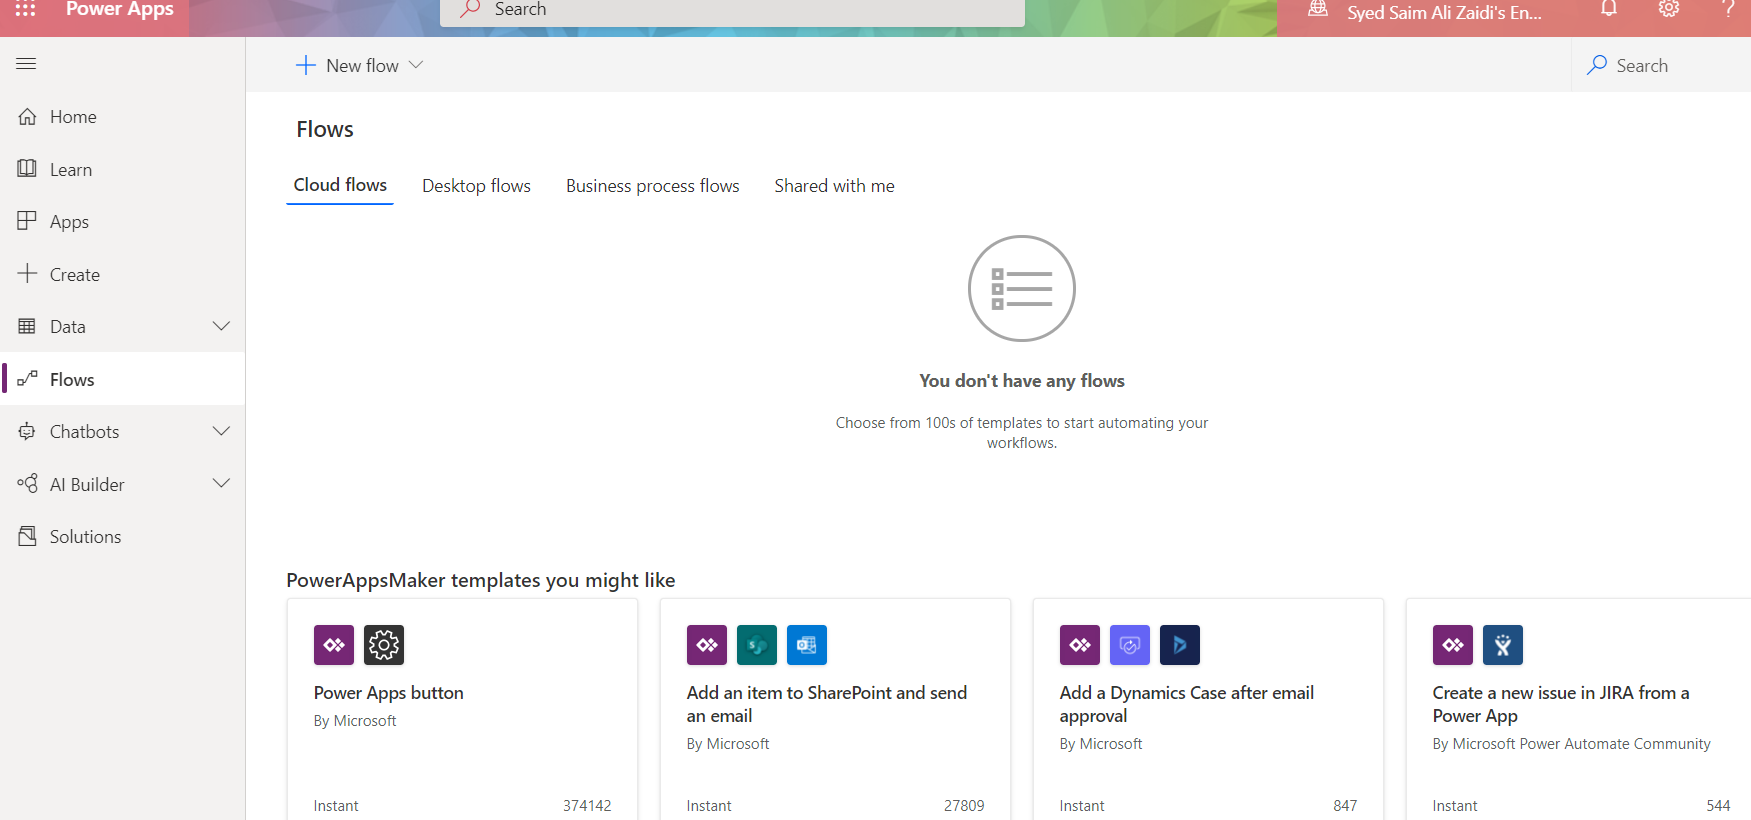
Go to your environment and select the Flows tab from the sidebar.
-
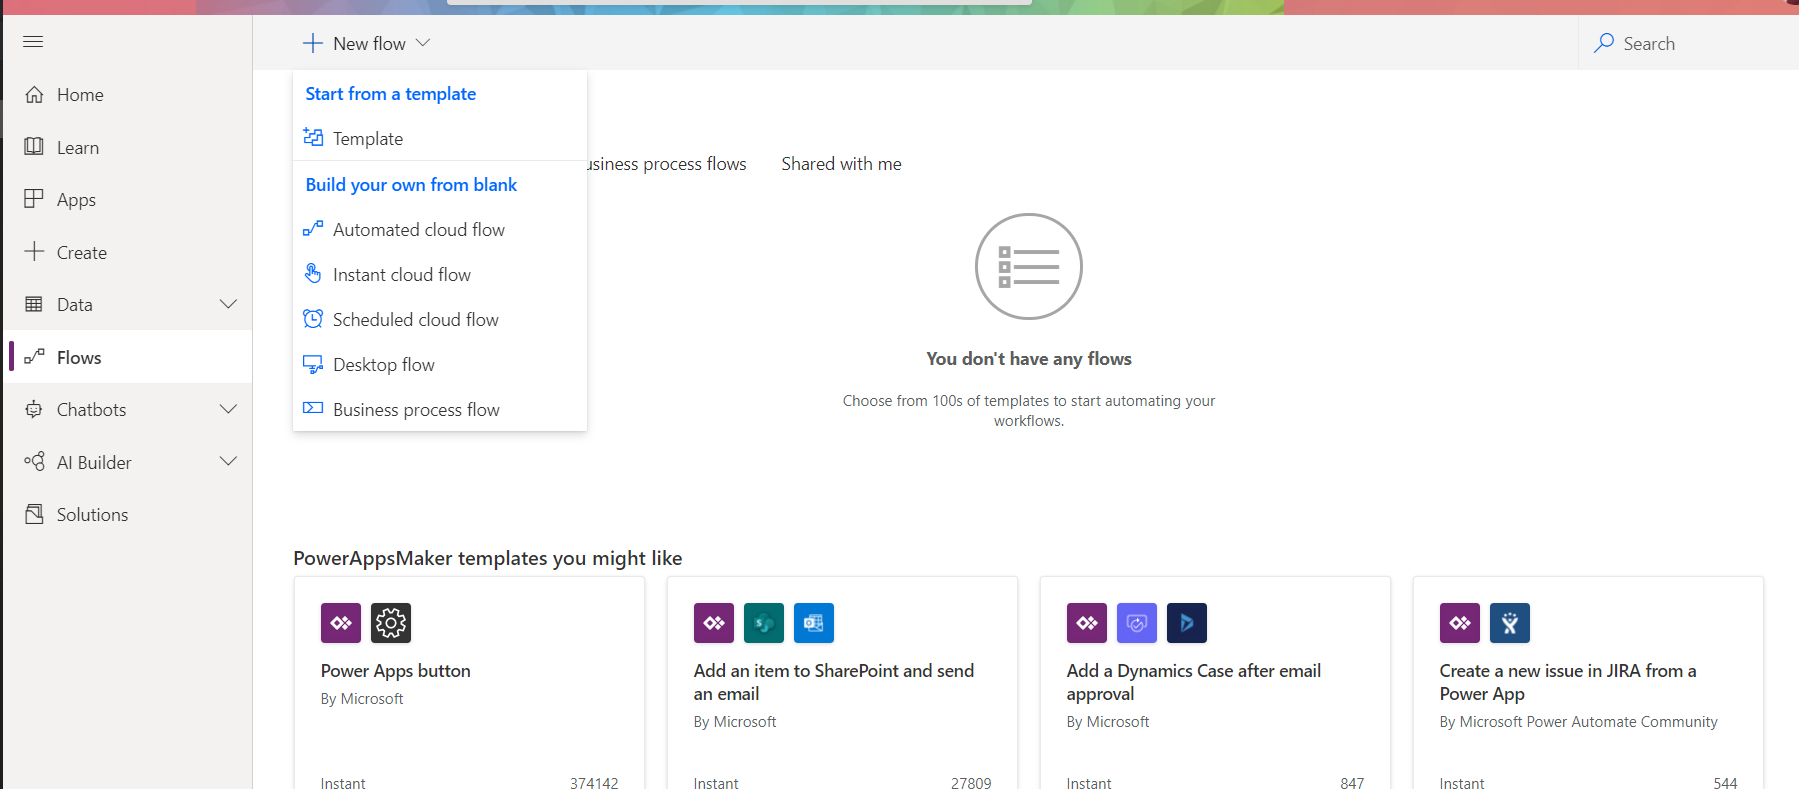
Press new flow button present on the top bar, a dropdown with different options will appear. Our requirement is to create a schedule flow, therefore, we will select Scheduled Cloud Flow option.
-
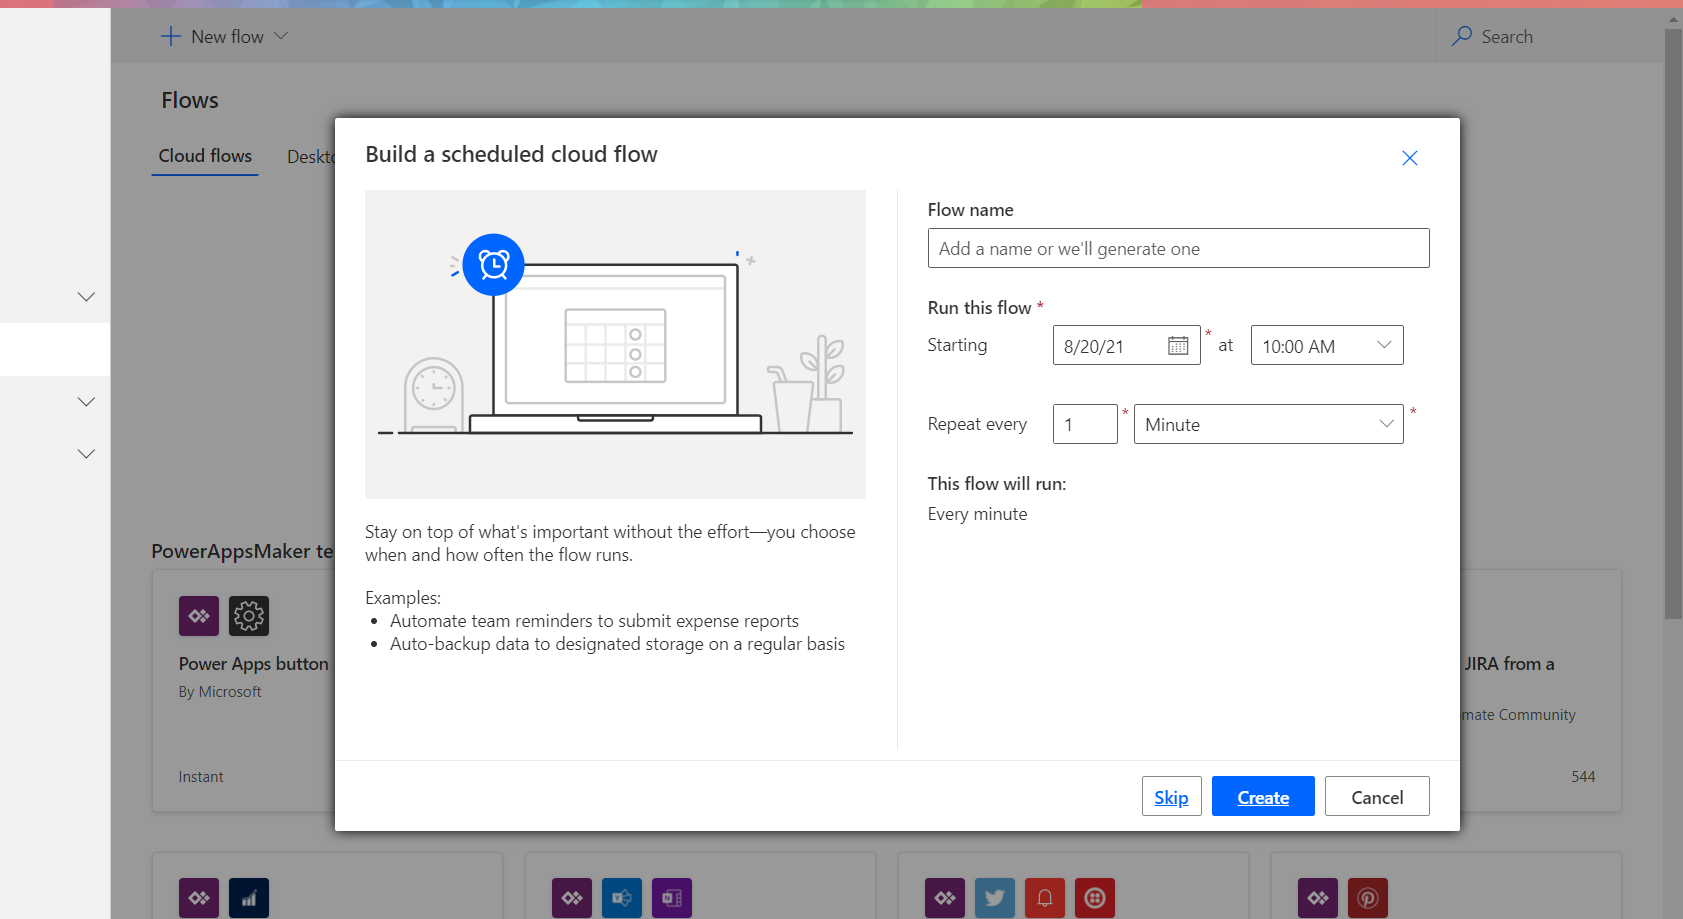
After, selecting the Scheduled Cloud Flow option a dialog box will appear. We need to set the required fields.
-
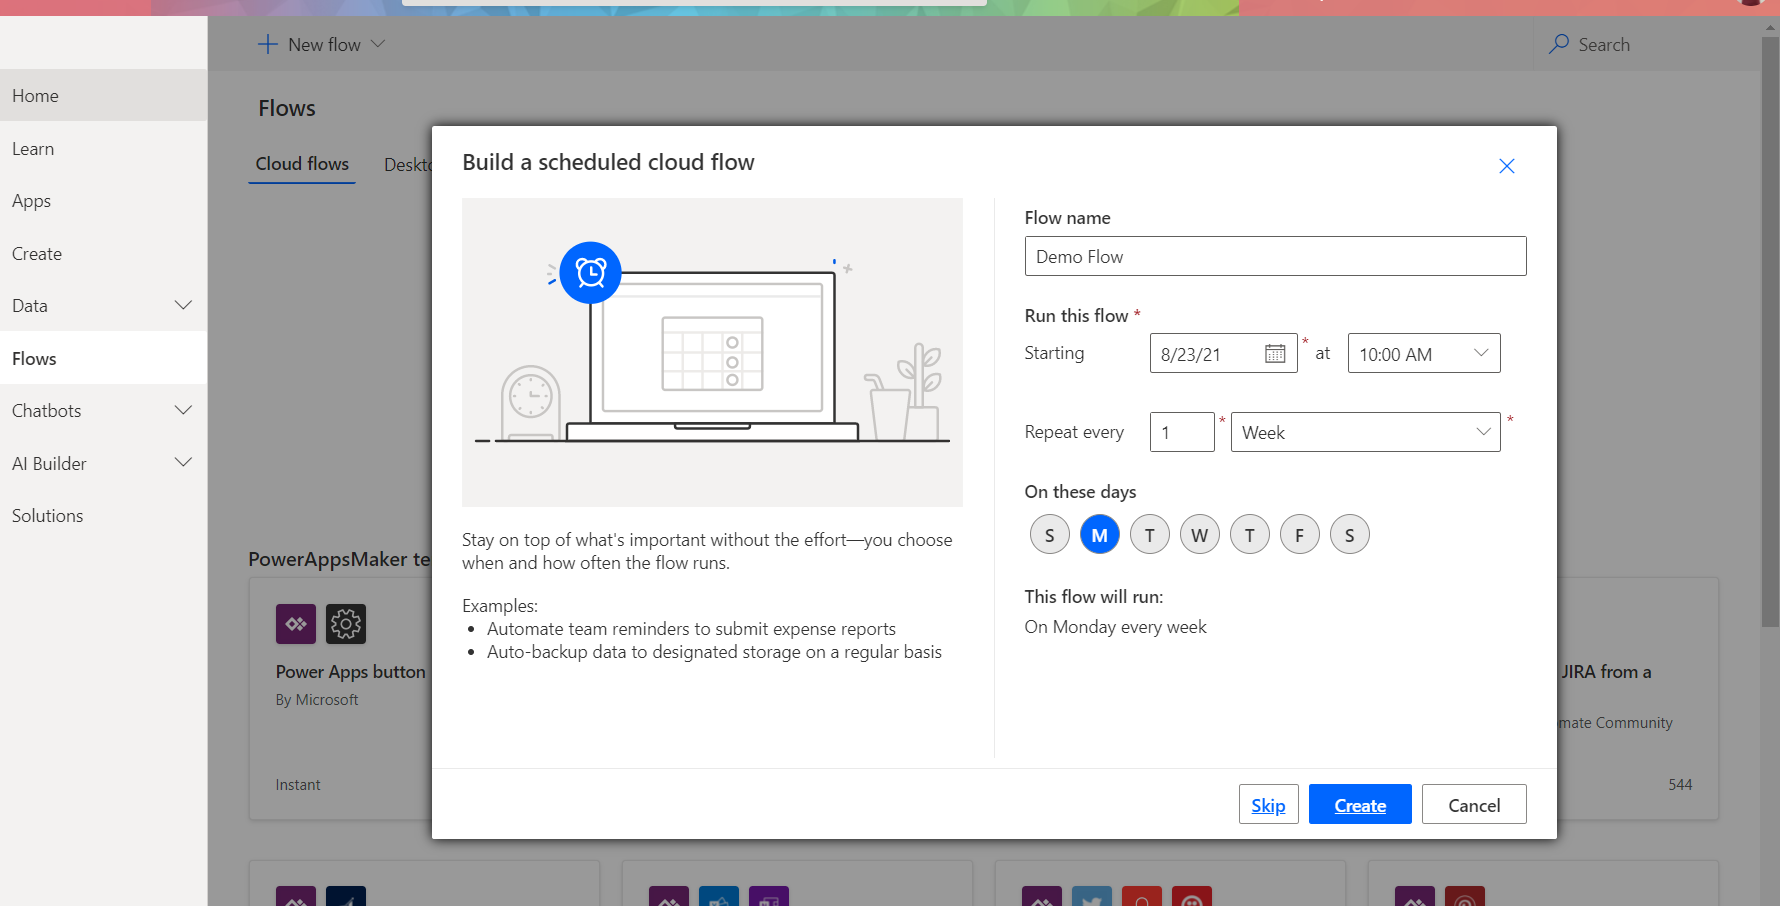
After, setting the required fields press create button. I want to trigger my flow every week on Monday, therefore, I have selected Repeat every field as week and on these days as Monday.
-
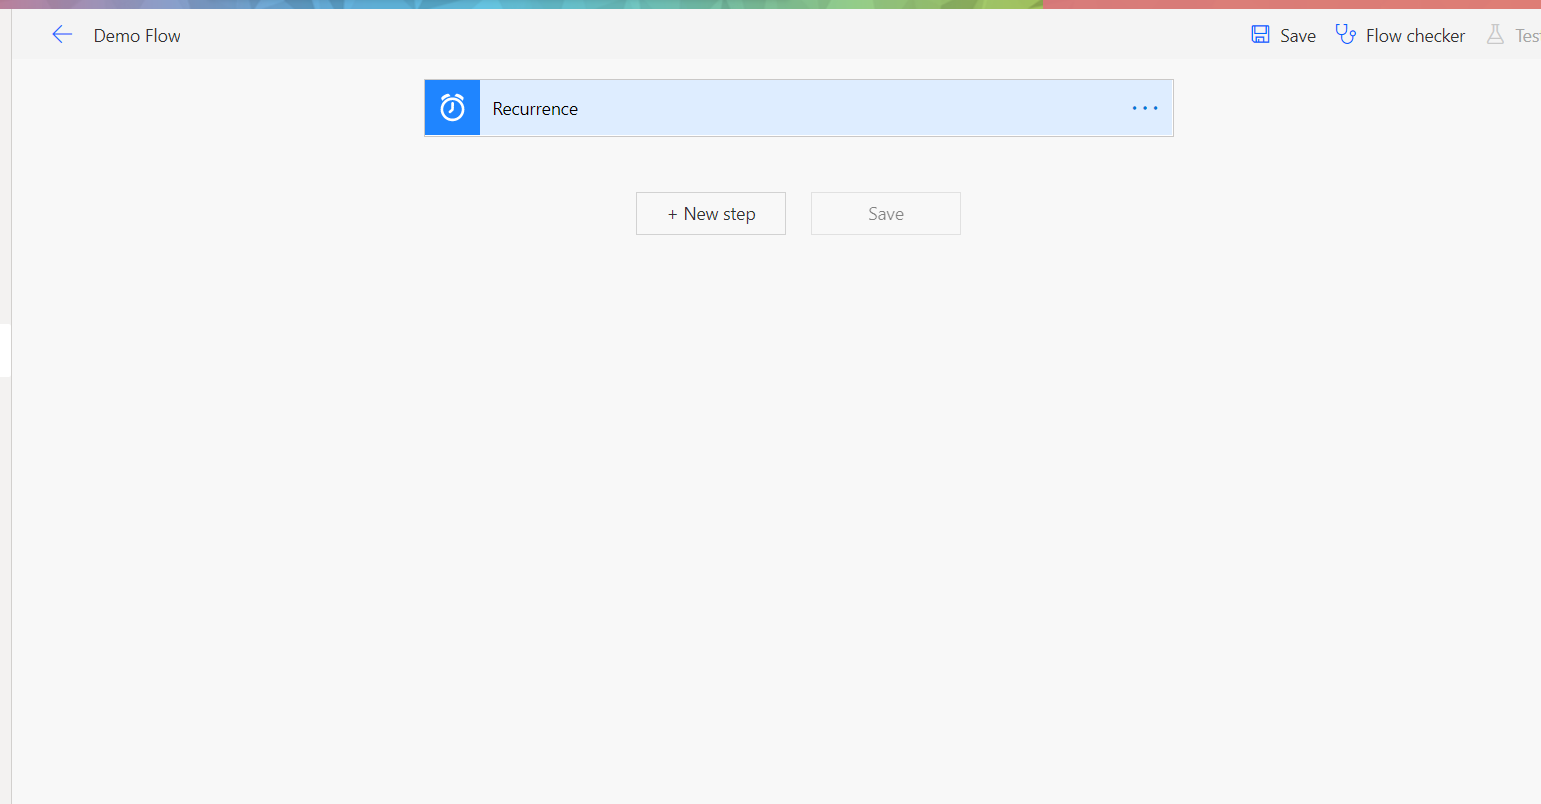
After, pressing the create button you will see this type of view.
-
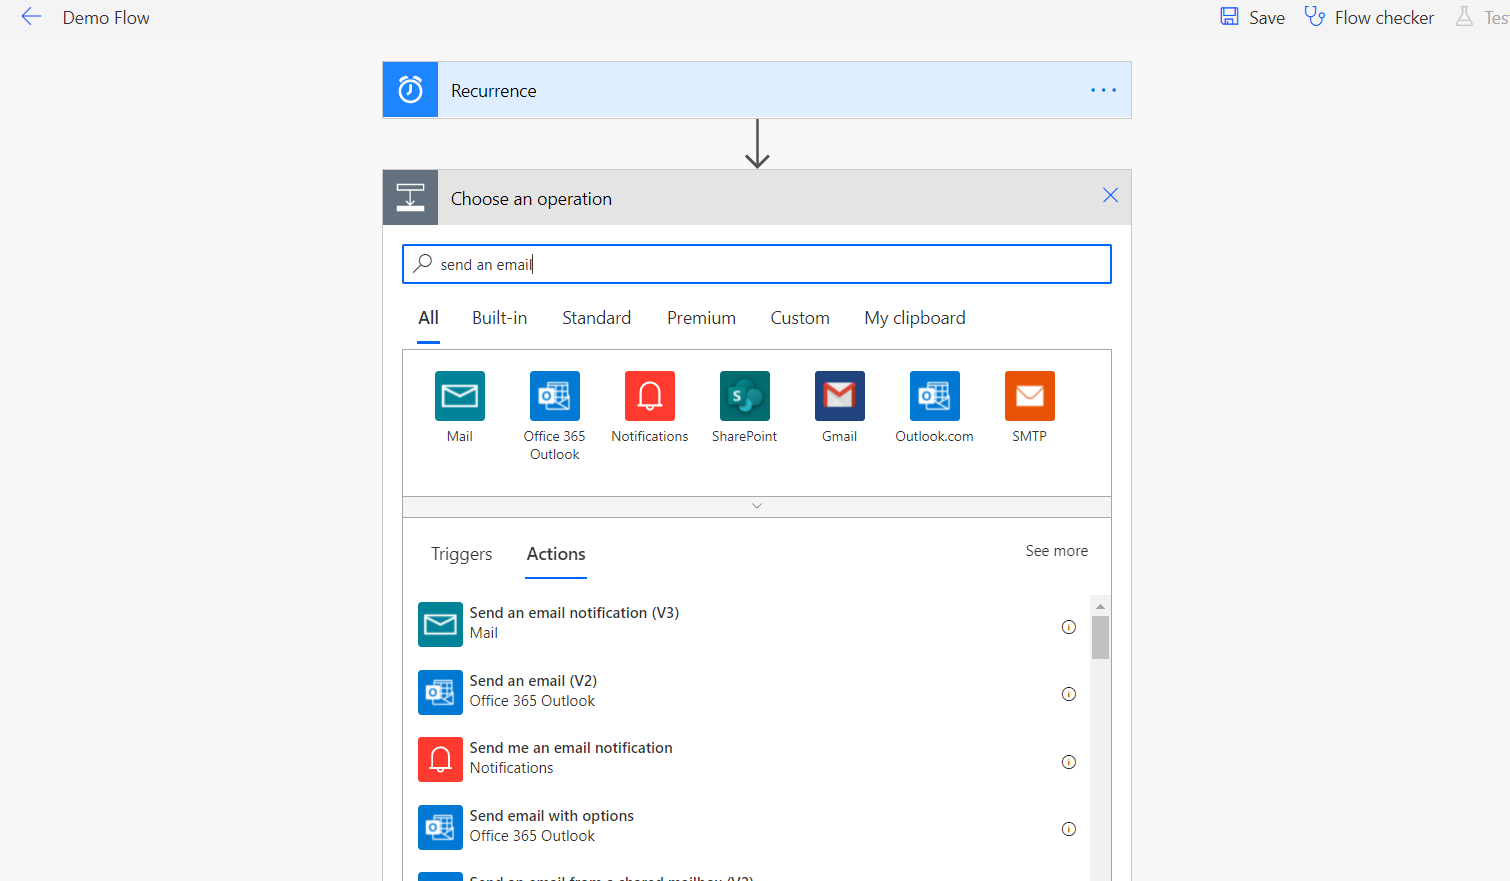
Now you can add multiple steps of your own choice. For example you can send an email . To add new step press the New step button shown in the above picture. Then a box with multiple options will appear, you can search the action you want to use. To send an email search for “send an email” action. In the picture the second option in the list is required.
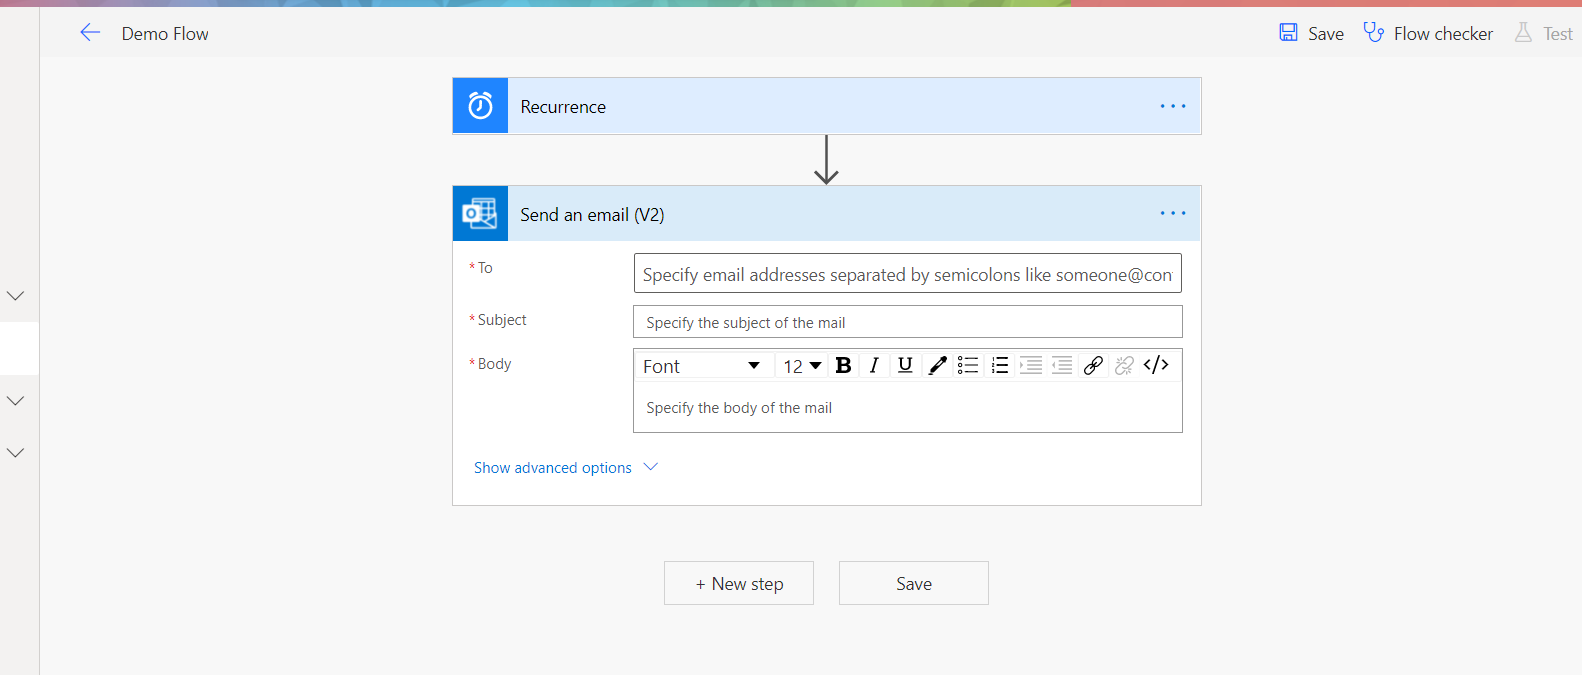
After selecting the second option from the actions list you will have a view of email. Now, you can fill the required fields and email will be generated on every monday. - Press save on each step completion. Once you have achieved your requirement you can test it.
Join us next time, as we continue our journey of learning canvas apps.Click here to learn more about Imperium's Power Apps Services. We hope this information was useful, and we look forward to sharing more insights into the Power Platform world.
