| Mohsin Ahmed
In the last part of this blog series, we covered ALM in-general and what it means to Power Platform. We also setup our Azure DevOps environment so that we are ready to start building pipelines. If you missed that one, please check it out and then continue with this blog.
As we described in the previous blog, source control should be the source of truth. Managing and updating source control manually is a tedious task. And without source control, we have no way of knowing what changes were made to our solution which may have broken it. This is where pipelines come into play. Pipeline can automate the processes involved in testing and deployment cycle, such as exporting solution from Dev environment to source control, which can make this process streamlined and easy.
We will be creating a pipeline to save a Power Platform solution to source control. So, let’s get started with creating our deployment pipeline.
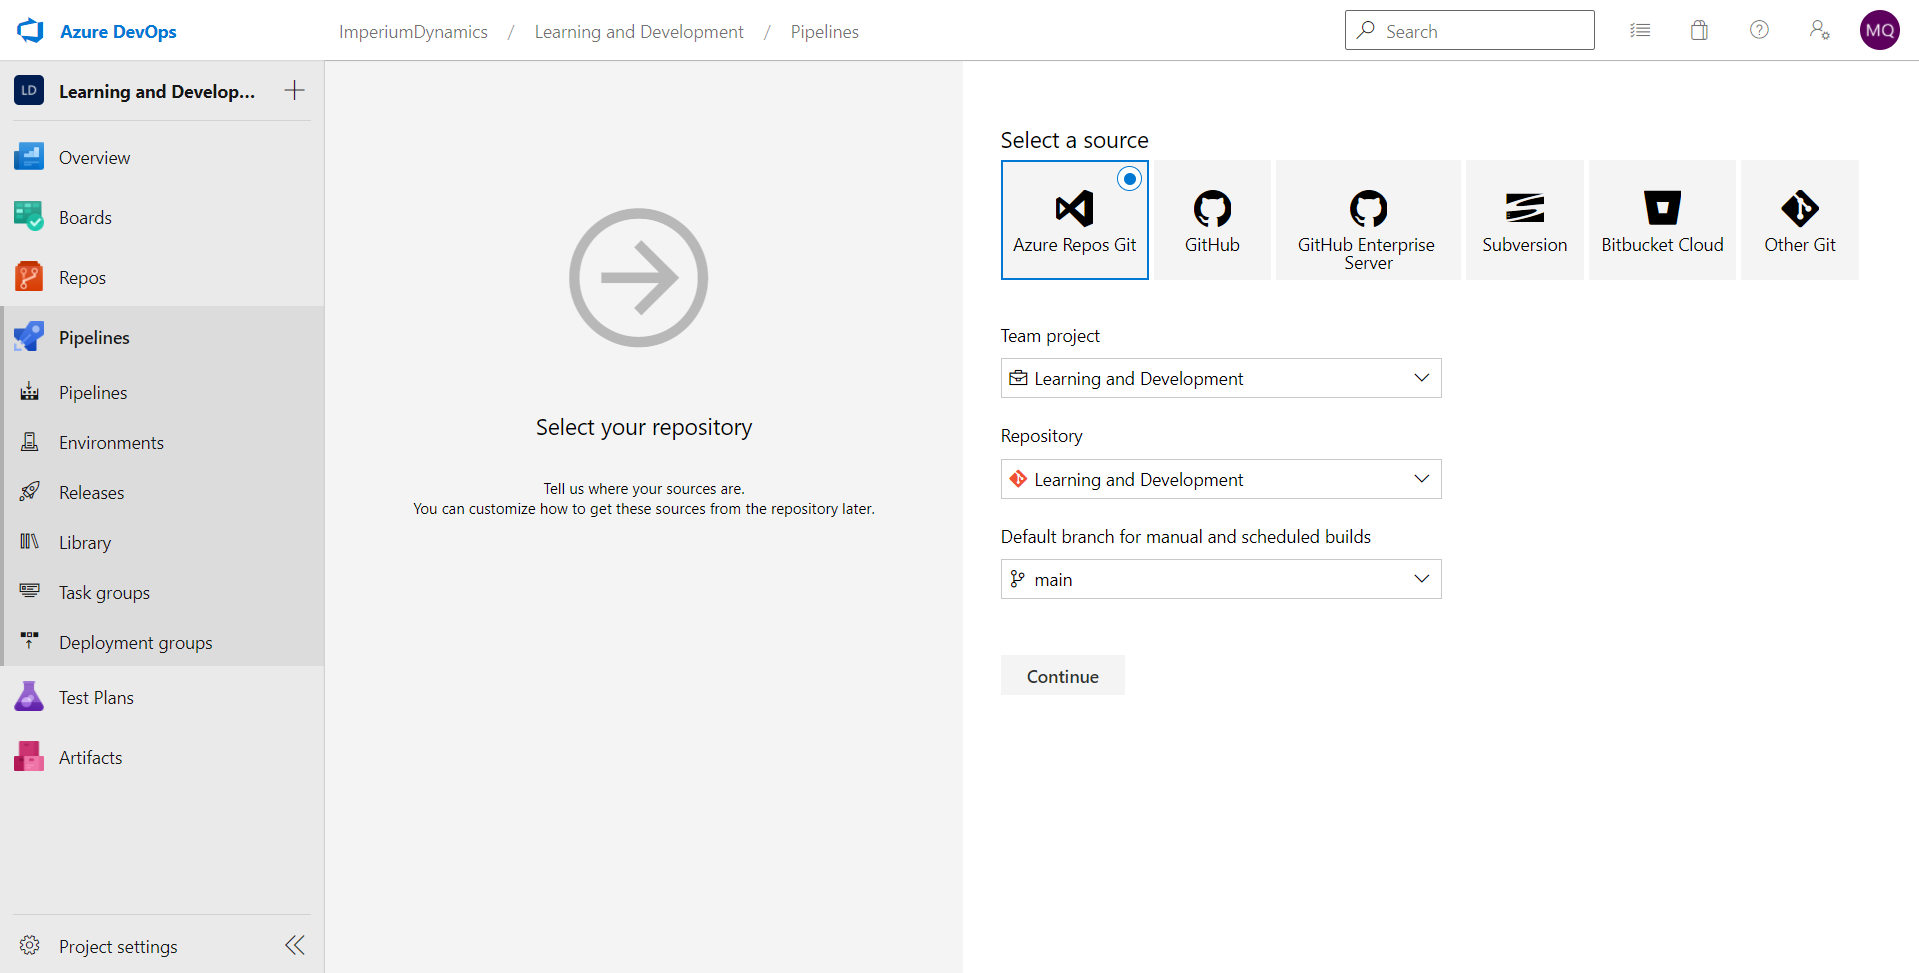
In Azure DevOps, click on the Pipelines link on the left side and create your first Pipeline.

We will use the default repository selection, Azure Repos Git for our repository.
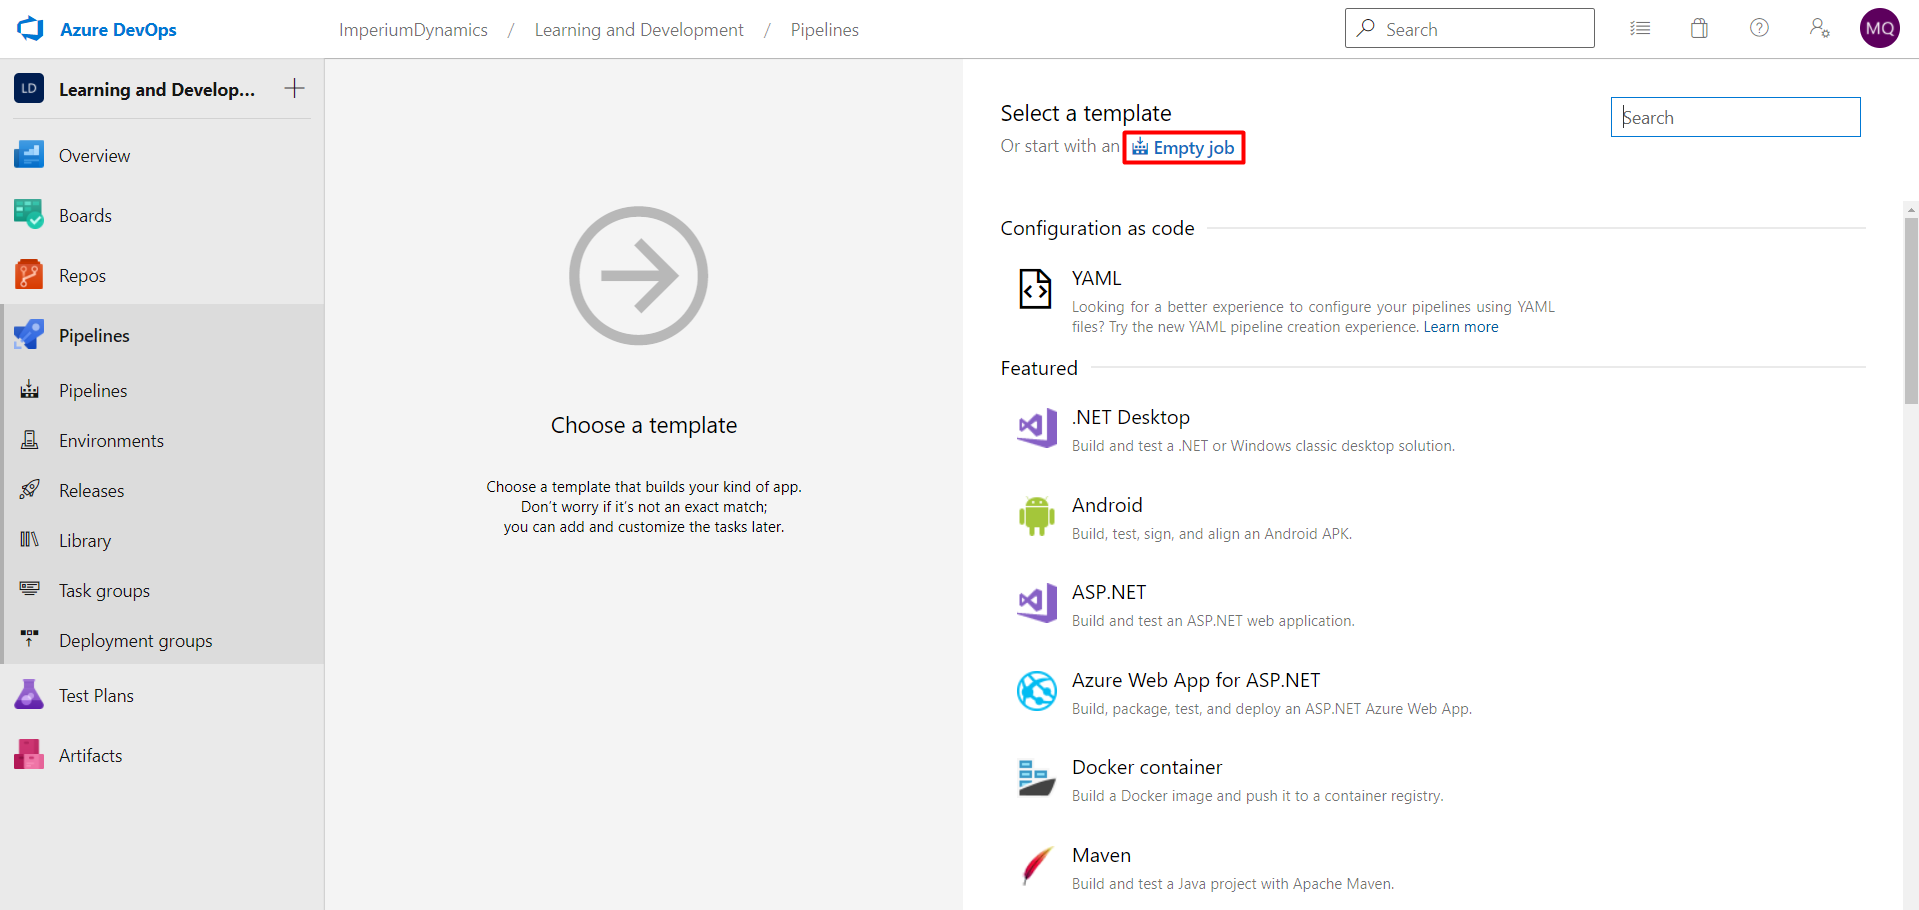
We will start with an empty job.
Give a name to your pipeline and save.
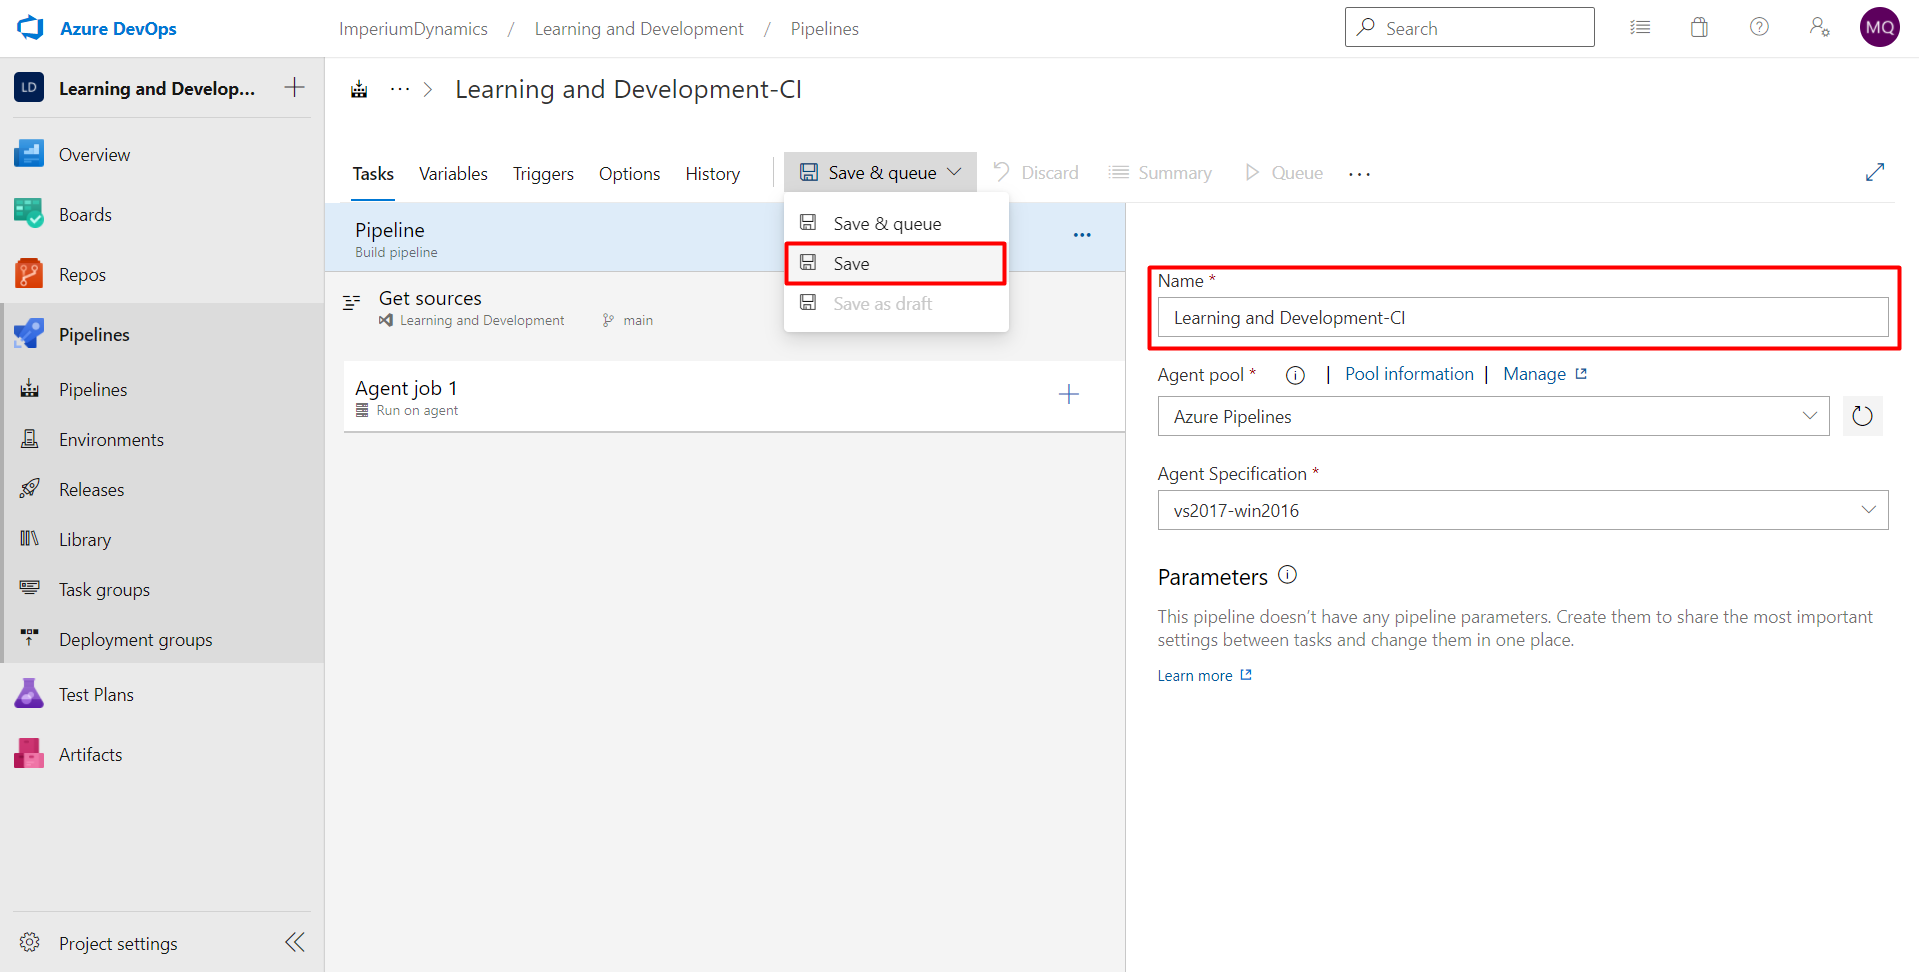
Upon saving, you will have the option to provide a comment to outline the change that have made. This is optional but is a good practice to follow.
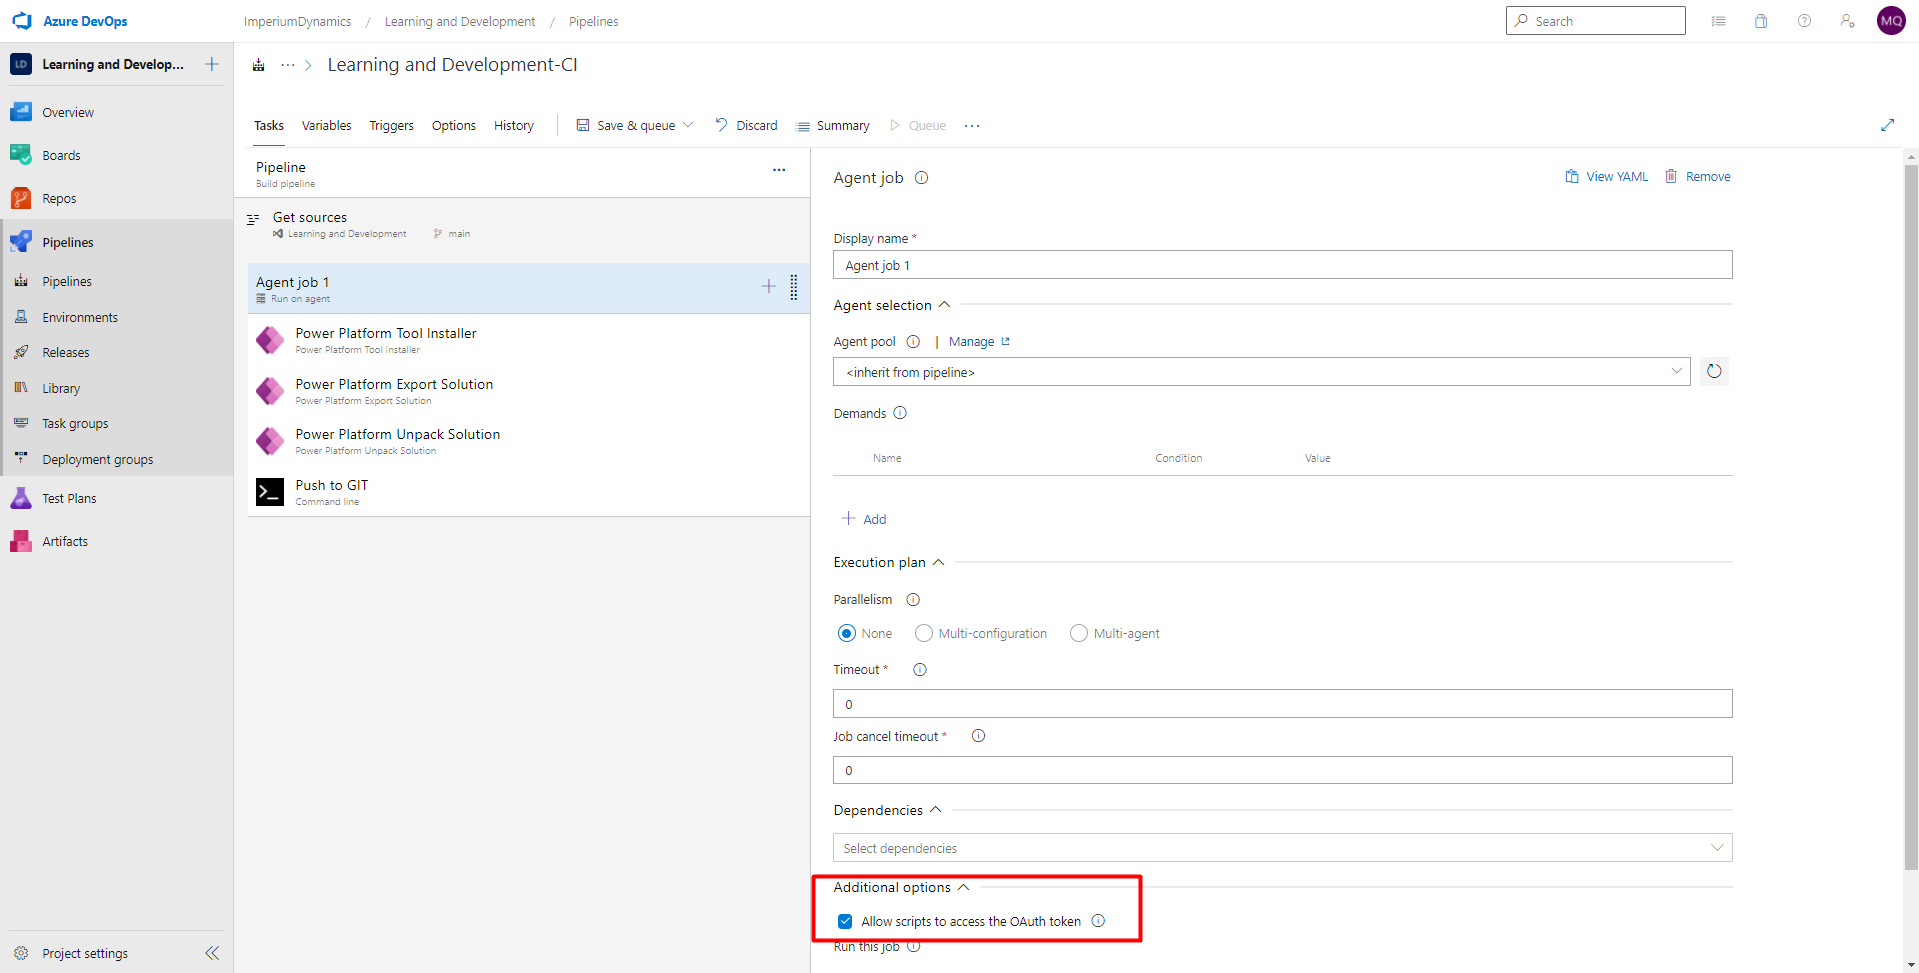
Before going ahead, we will first enable an additional setting for our job. This additional setting reads “Allow scripts to access the OAuth token” and can be found by clicking on “Agent Job 1” and scrolling down to “Additional Options” section. With this option disabled, the pipeline will fail to run successfully. So, this step is crucial to get our pipeline to work correctly.
Next, we will add the first task of our pipeline. Click on the add button beside the “Agent job 1”, then search for “power platform” and add “Power Platform Tool Installer” task.
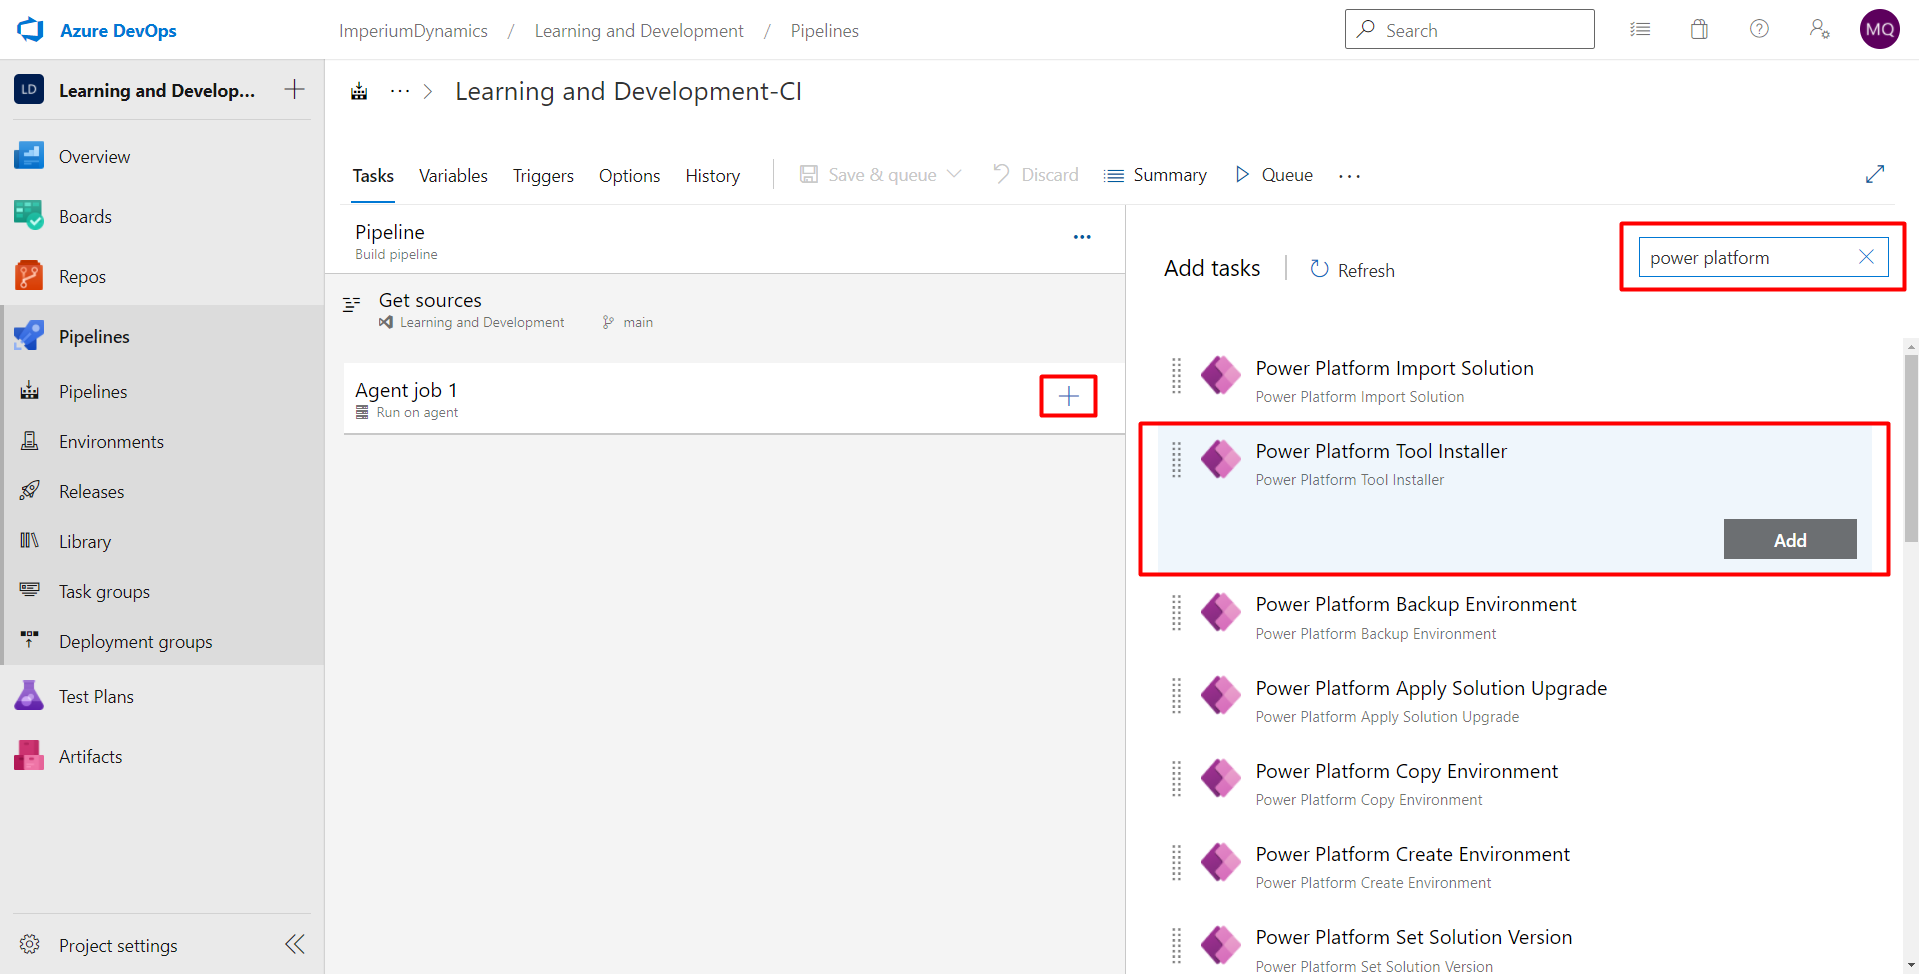
You may wonder why we need to install tools each time the pipeline runs? This is because each time the pipeline runs, Azure DevOps instantiates a new temporary virtual machine. Since the virtual machine starts with a clean state each time, thus we need to install tools upon every execution of a pipeline.
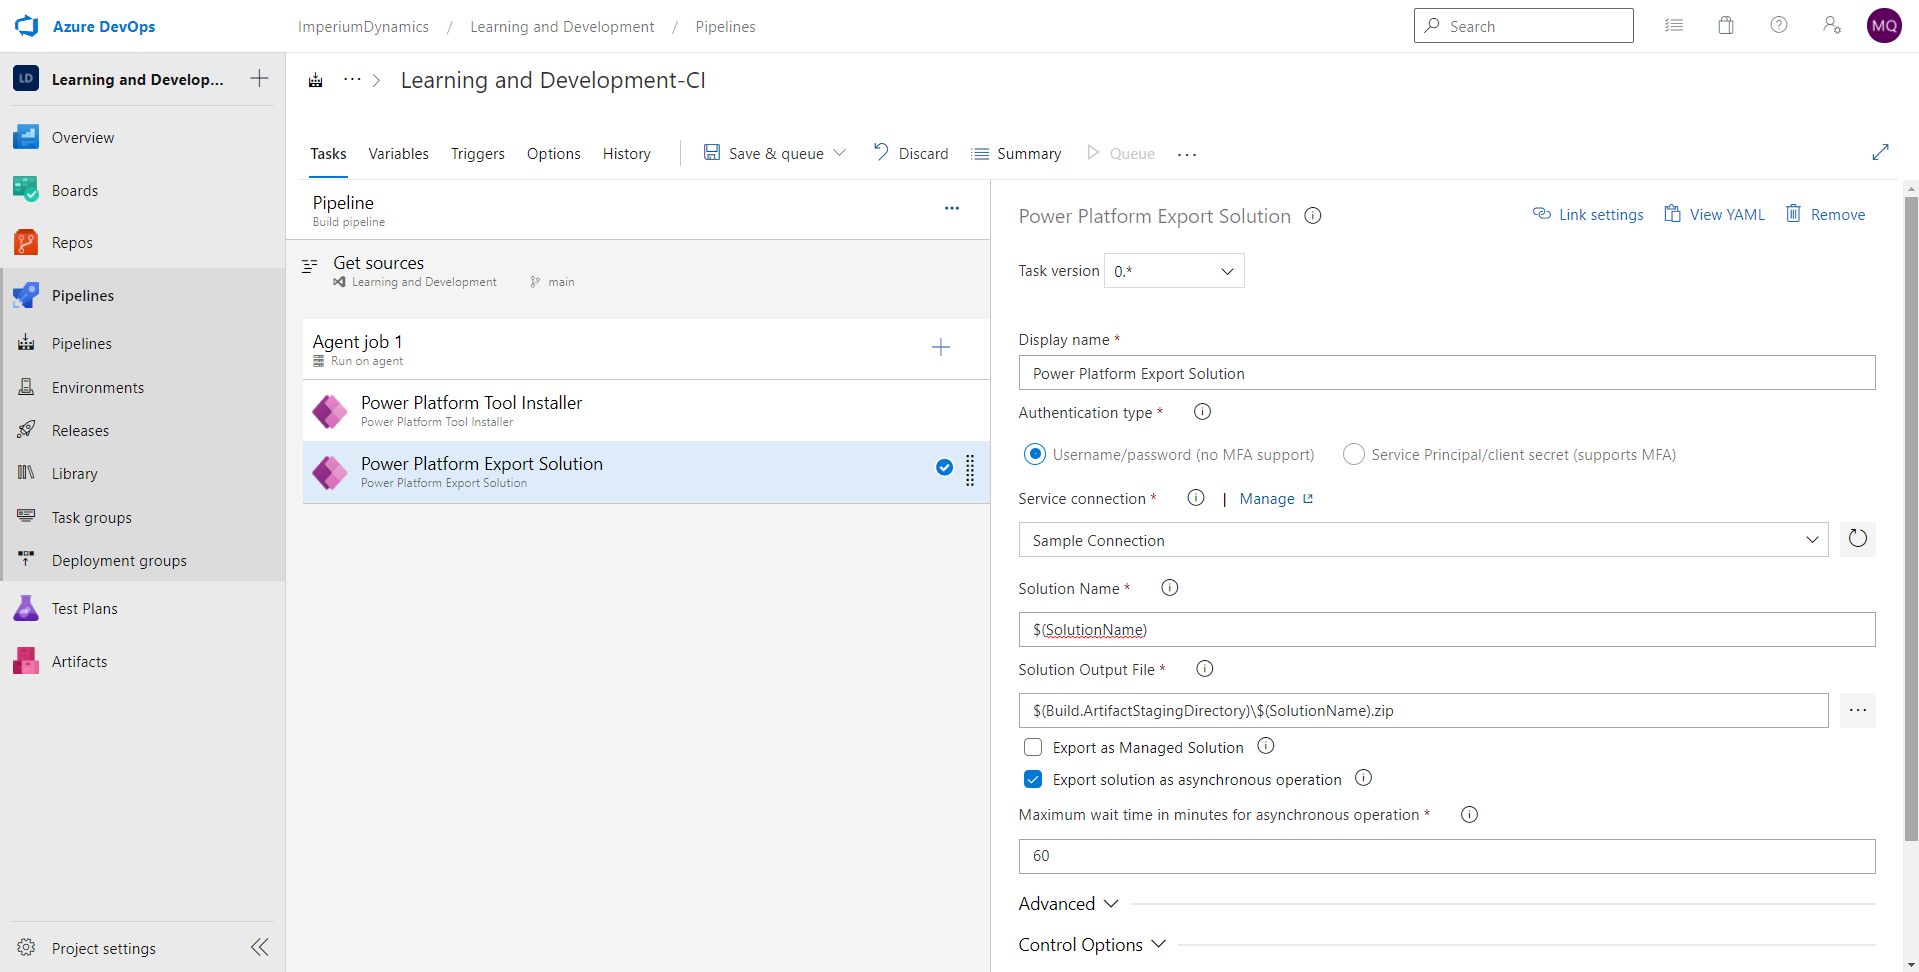
Next, we need to export our solution from Power Platform. We will follow the process outlined in the last step once again to add our next task called “Power Platform Export Solution”
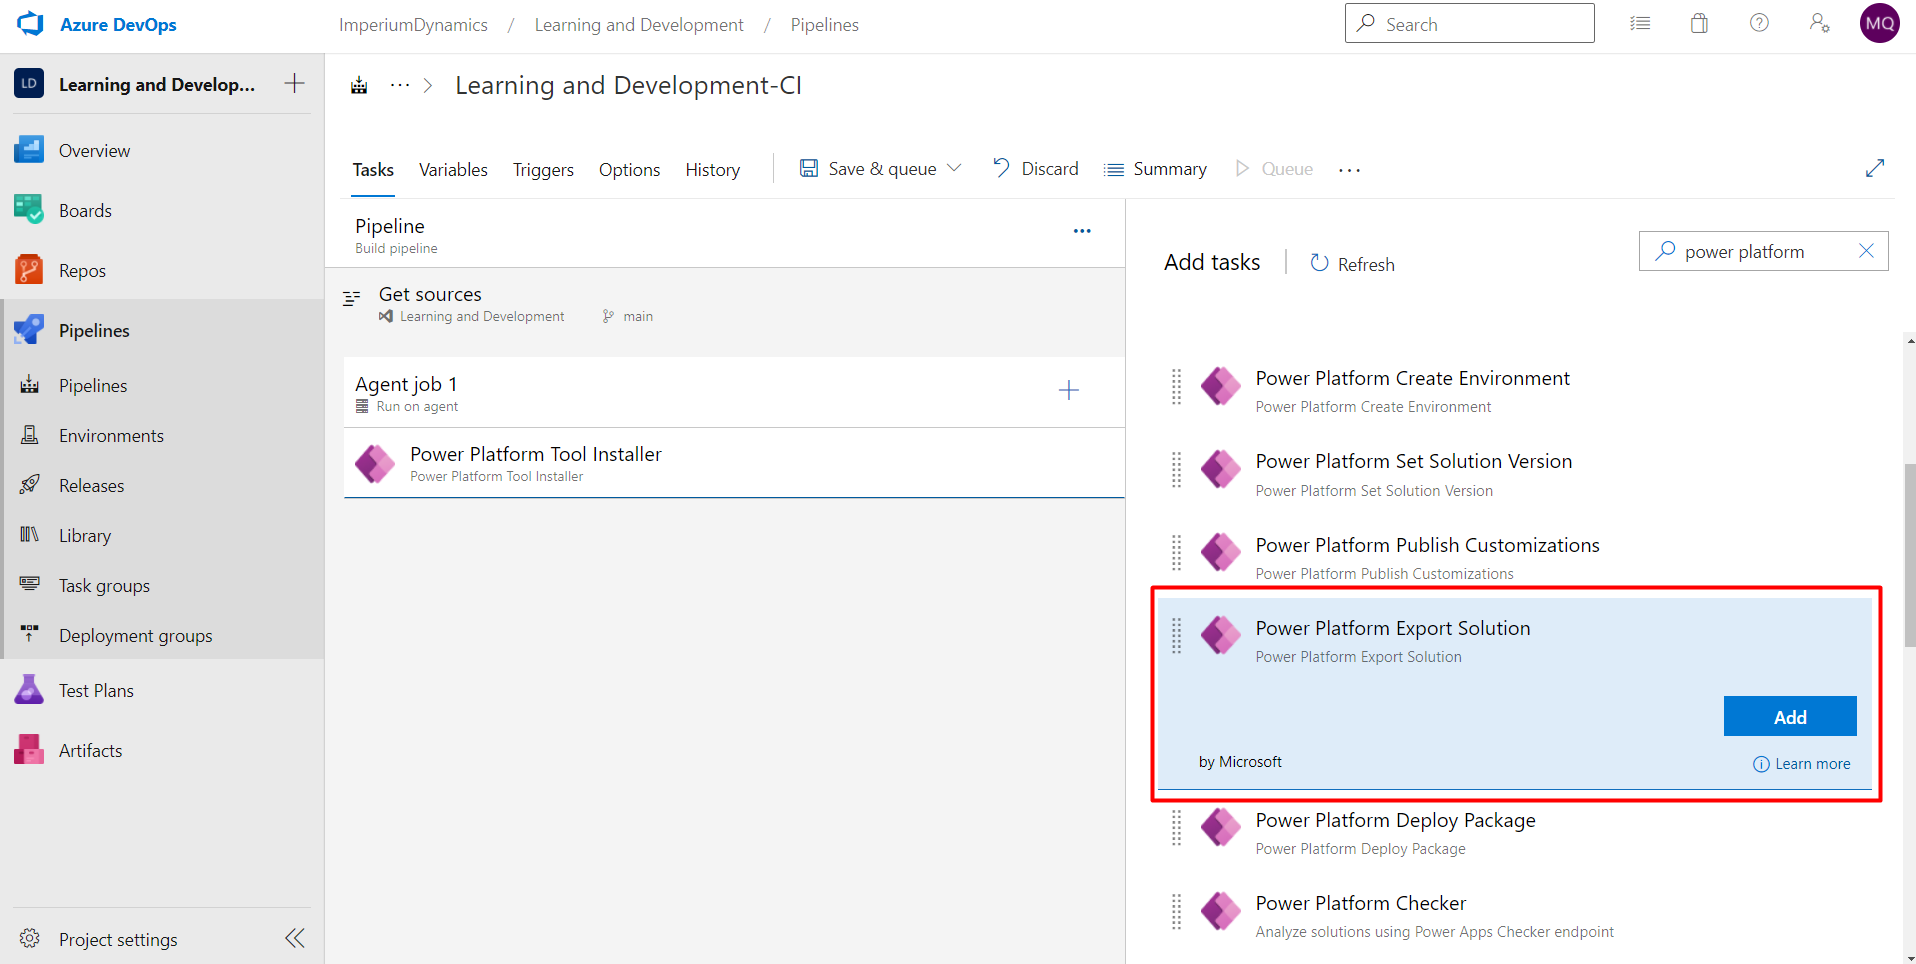
We will also need to configure some settings for this step.
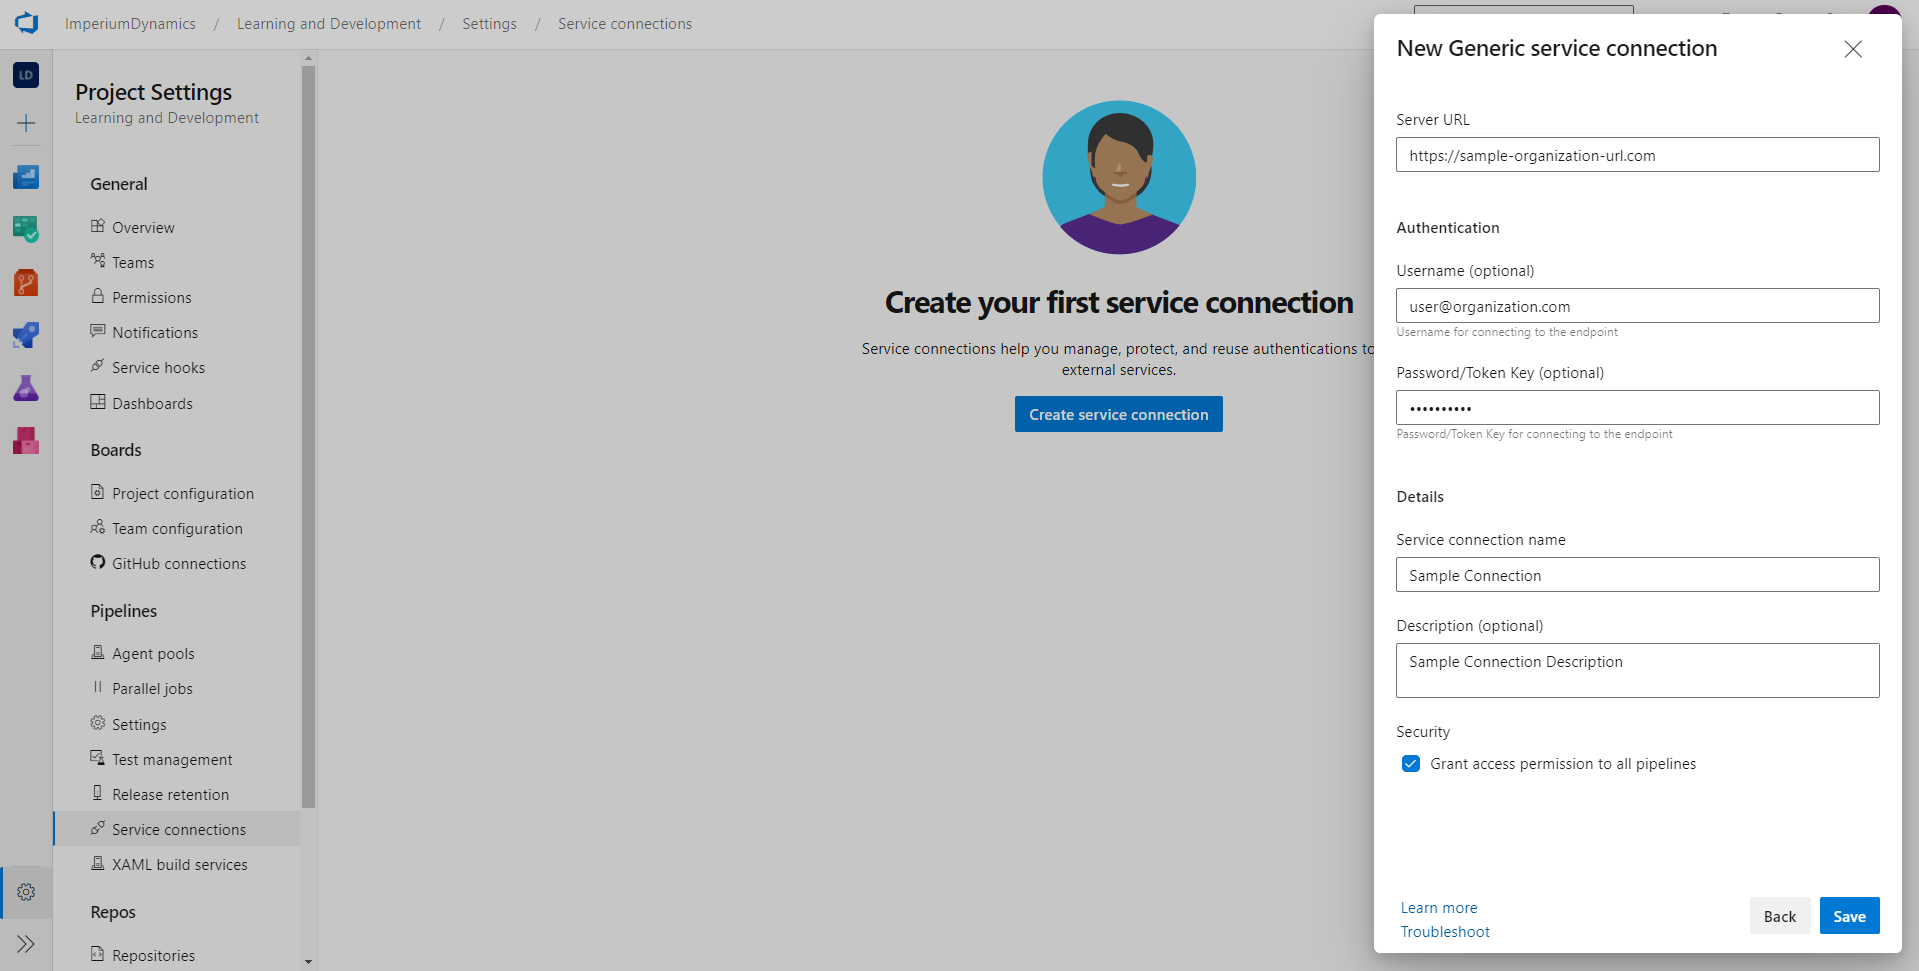
Firstly, we will have to create a Service Connection. Click on “Manage” beside service connection label to open the connection management window. Then click on “Create service connection”. Select “Generic” connection type. Fill in the required details and proceed to create a connection.
The server URL will be your environment URL. This can be found by going through the following steps:
- Go to link
- Login with your organization’s email address
- Go to Environments
- Select the environment for which you want to setup a pipeline
- The URL under the “Environment URL” label is what you are looking for
In the username and password field, add your email address and password respectively.
Finally, give an appropriate name and description to your service connection. That’s it, we’re good to go!
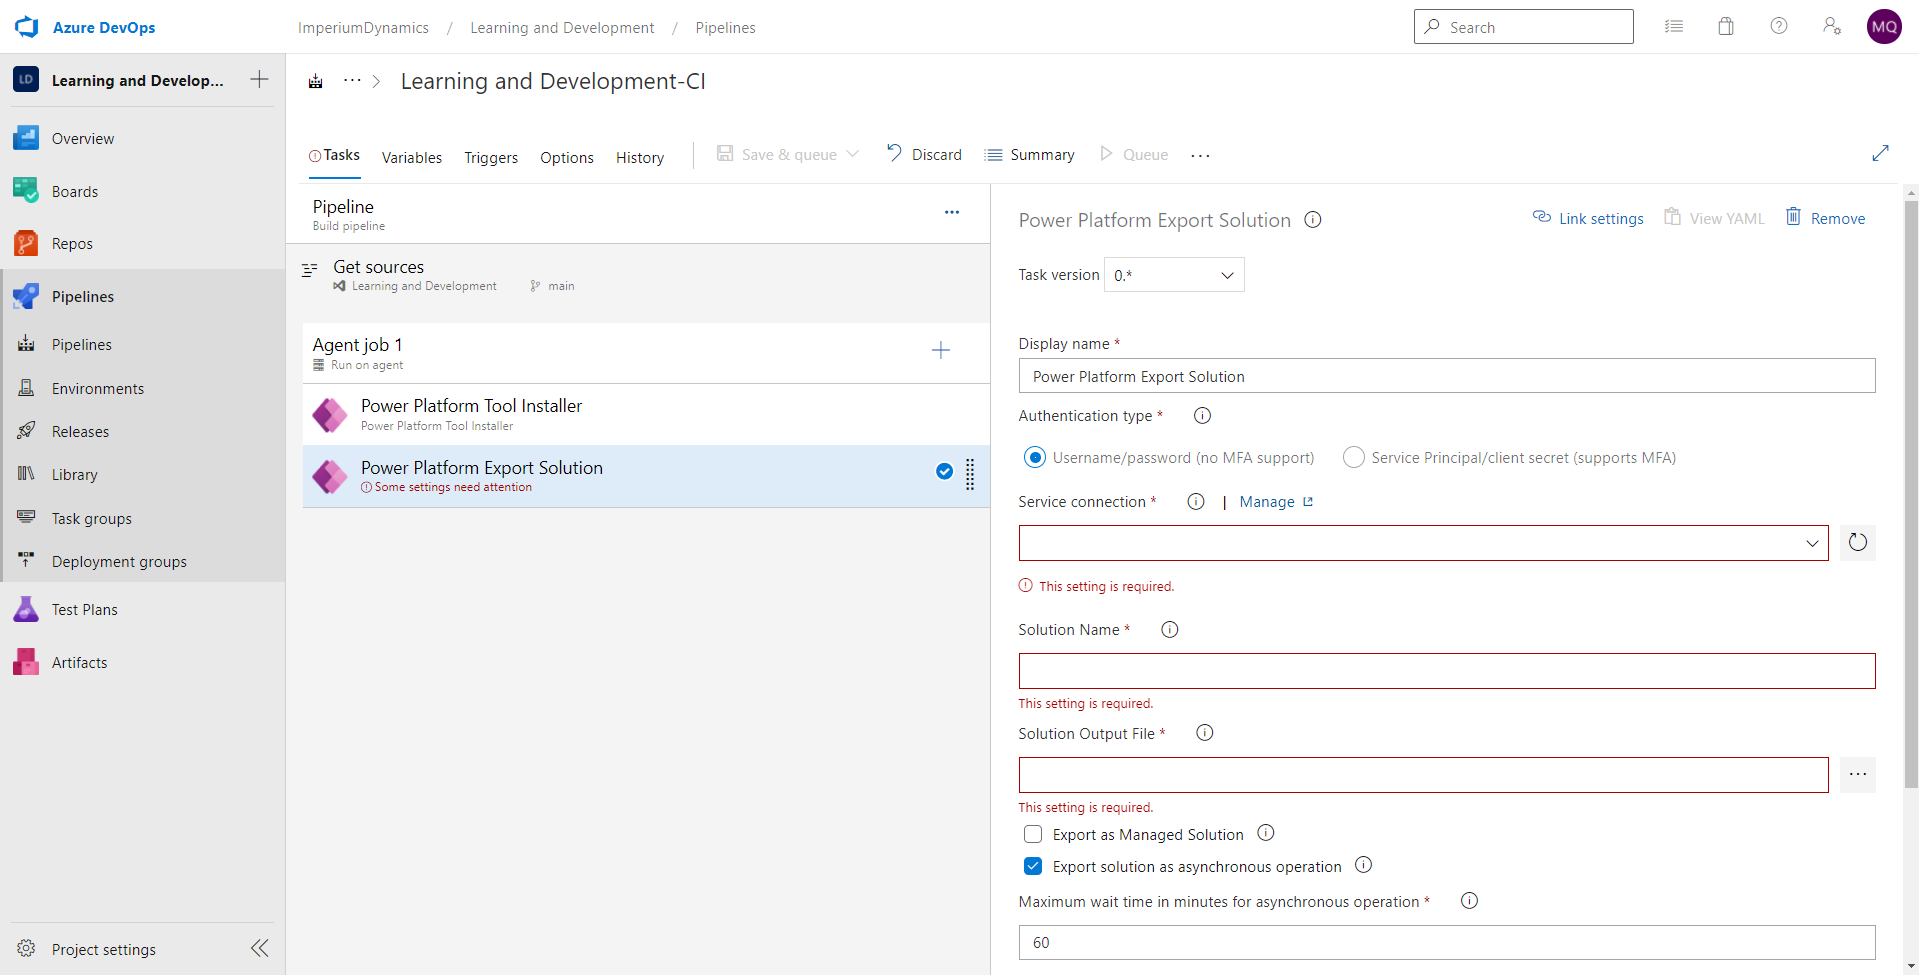
Now close this window. Go back to the previous window. Click on the refresh button beside the service connection dropdown. Your new connection should now show up in the dropdown. Select the newly created connection.
Next, in the solution name field, add
“$(SolutionName)”. And in the solution output file field, add “$(Build.ArtifactStagingDirectory)\$(SolutionName).zip”.
The solution name is actually a variable that we will setup in a few steps below. We can then reuse that variable in multiple places.
The “Build.ArtifactStagingDirectory” is a predefined variable which is defined by Microsoft as:
“The local path on the agent where any artifacts are copied to before being pushed to their destination. For example: c:\agent_work\1\a A typical way to use this folder is to publish your build artifacts with the Copy files and Publish build artifacts tasks. Note: Build.ArtifactStagingDirectory and Build.StagingDirectory are interchangeable. This directory is purged before each new build, so you don't have to clean it up yourself.”
In this way, we have completed this solution exporting step.
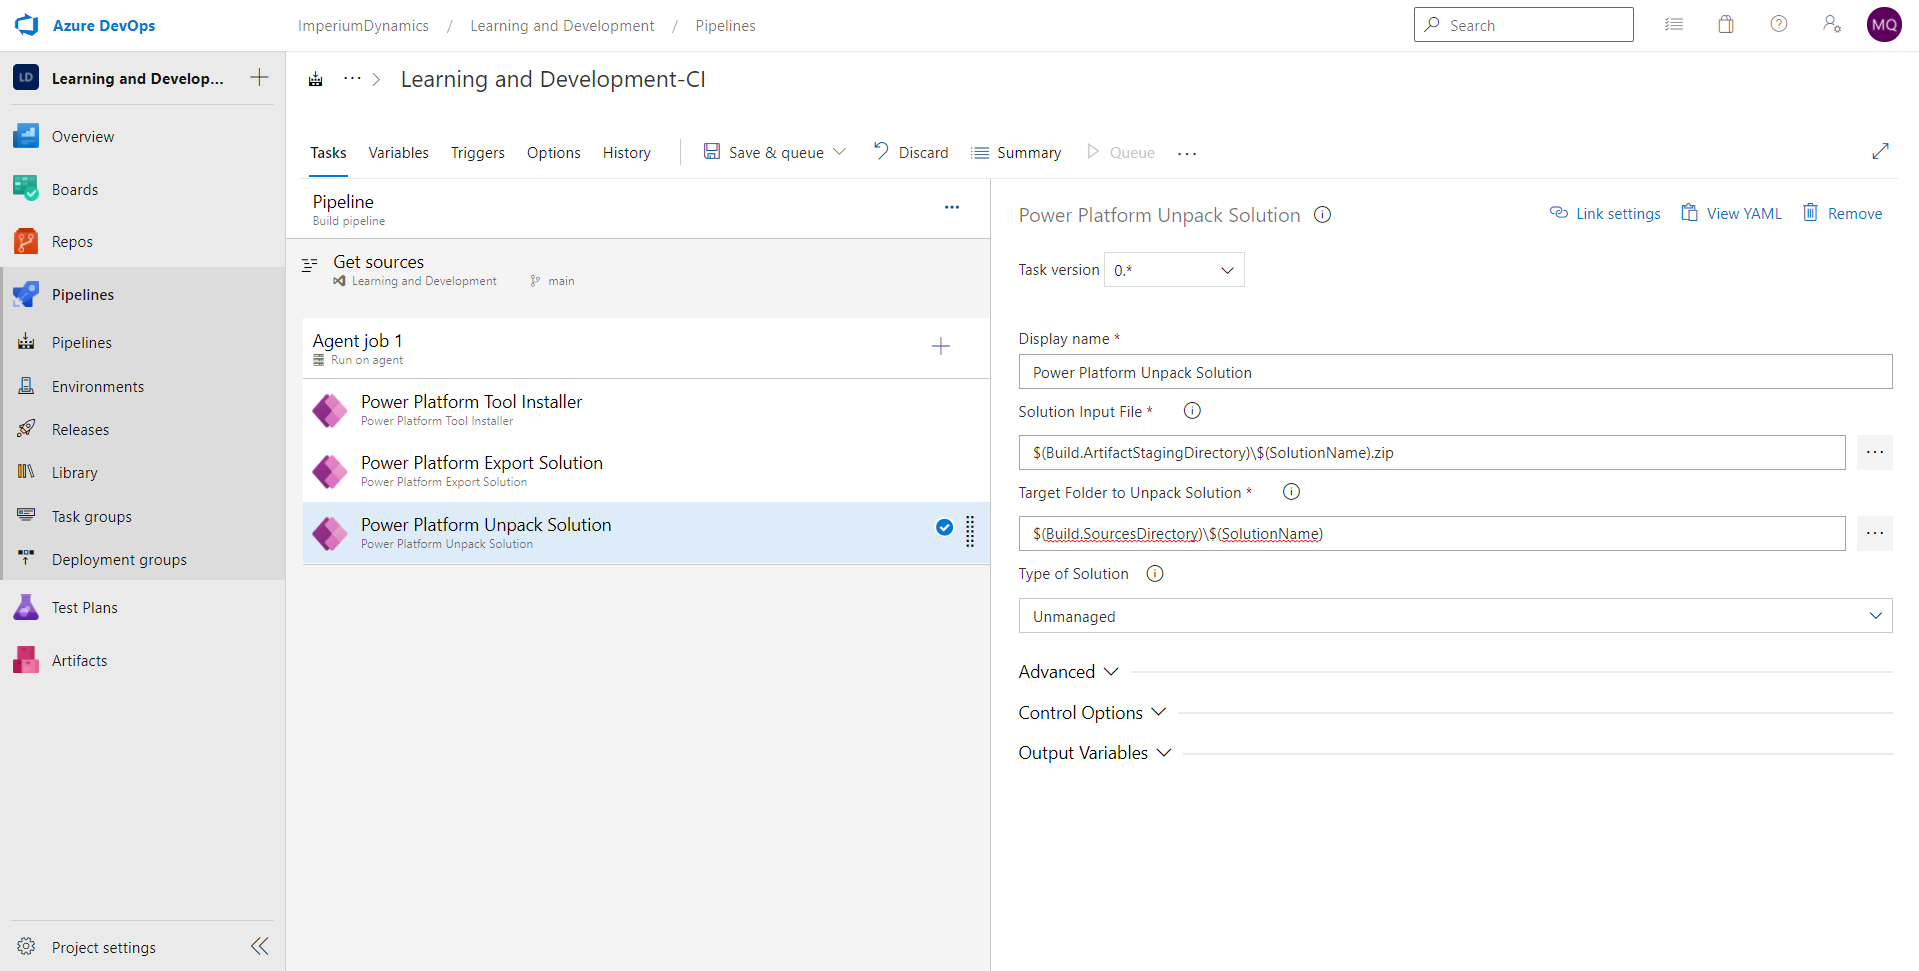
Next, we will be unpacking the solution that we exported in the previous step. In this step, we will use the same variables which we have described in the previous step.
Since we now have the solution exported from our sandbox environment, we need to unpack it into source files in order to check it into source control. The solution file is basically a “.zip” file. We won’t be able to track changes with a compressed file. Hence, we will need to unpack the solution zip file into source code in order to make full use of source control. We will keep it simple for now, so we will only be tracking changes made to the source code on a single branch. For advanced implementations, we can also create multiple branches for multiple tasks/developers and merge them into a main branch later. In this way, we can allow collaboration from multiple developers.
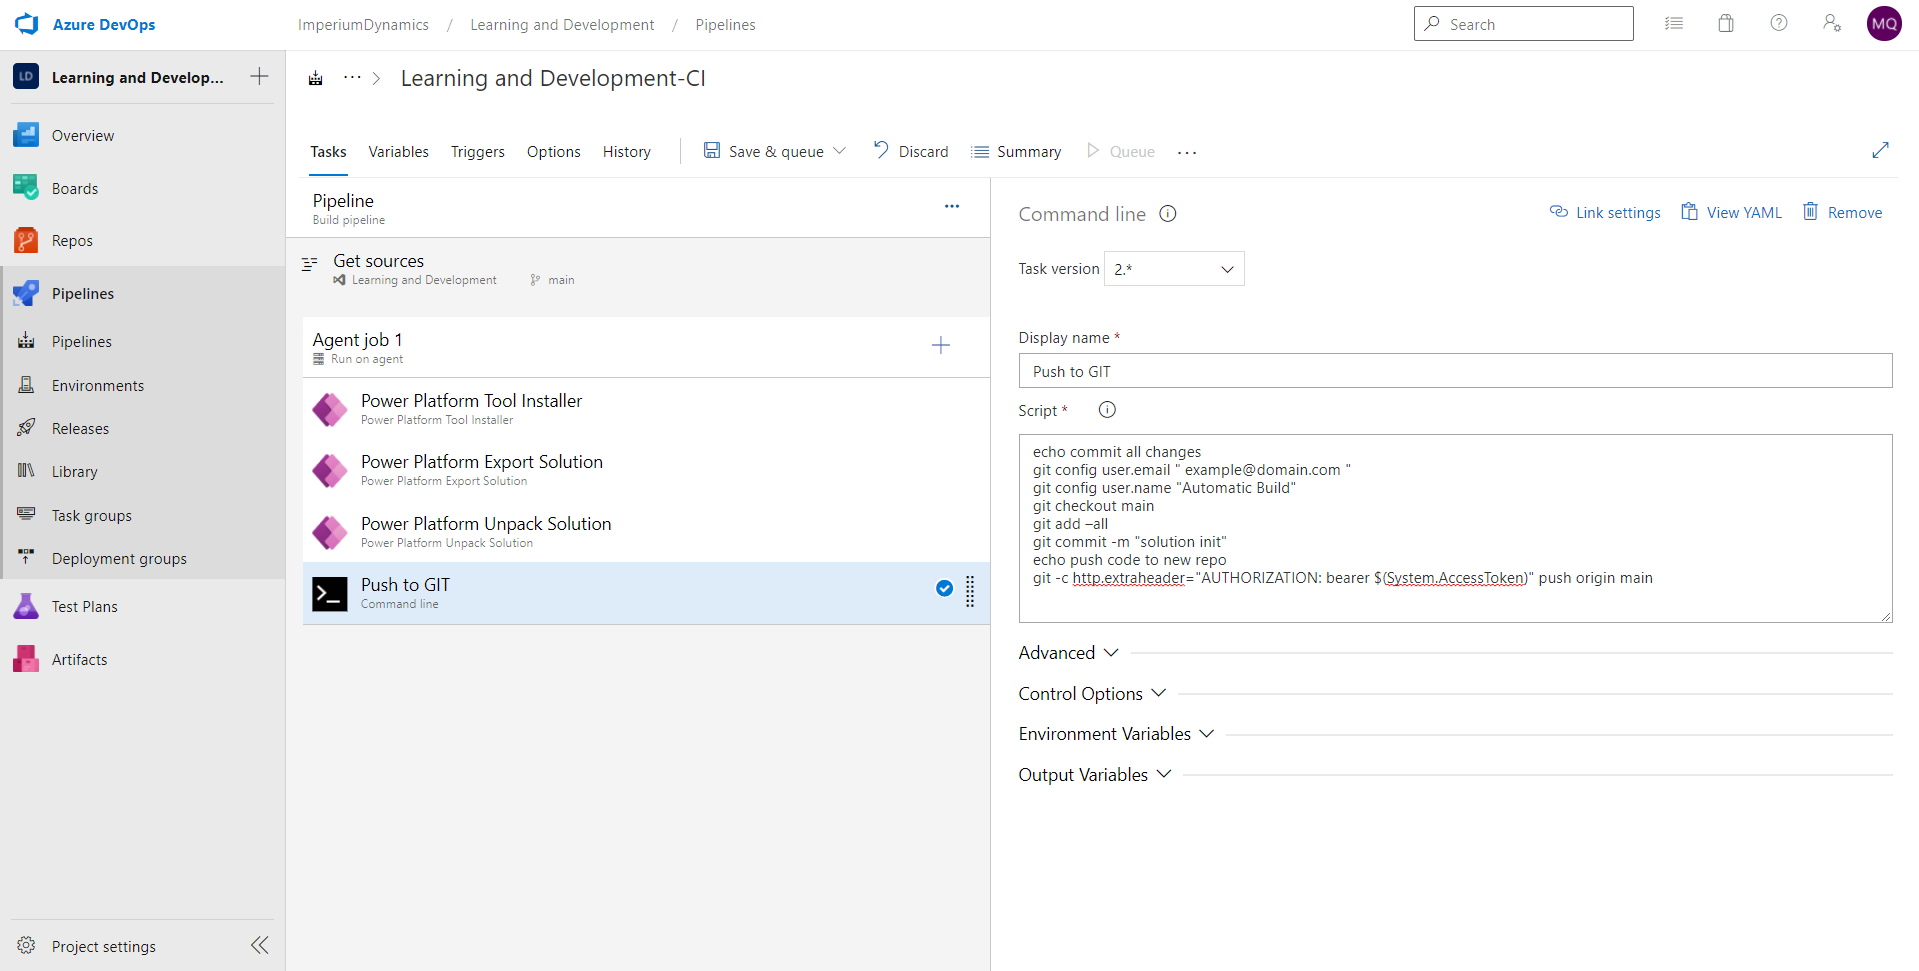
The final task in our pipeline is to push the unpack solution files to source control. Git is a command line tool, so we need to add the Command Line Script task to our pipeline.
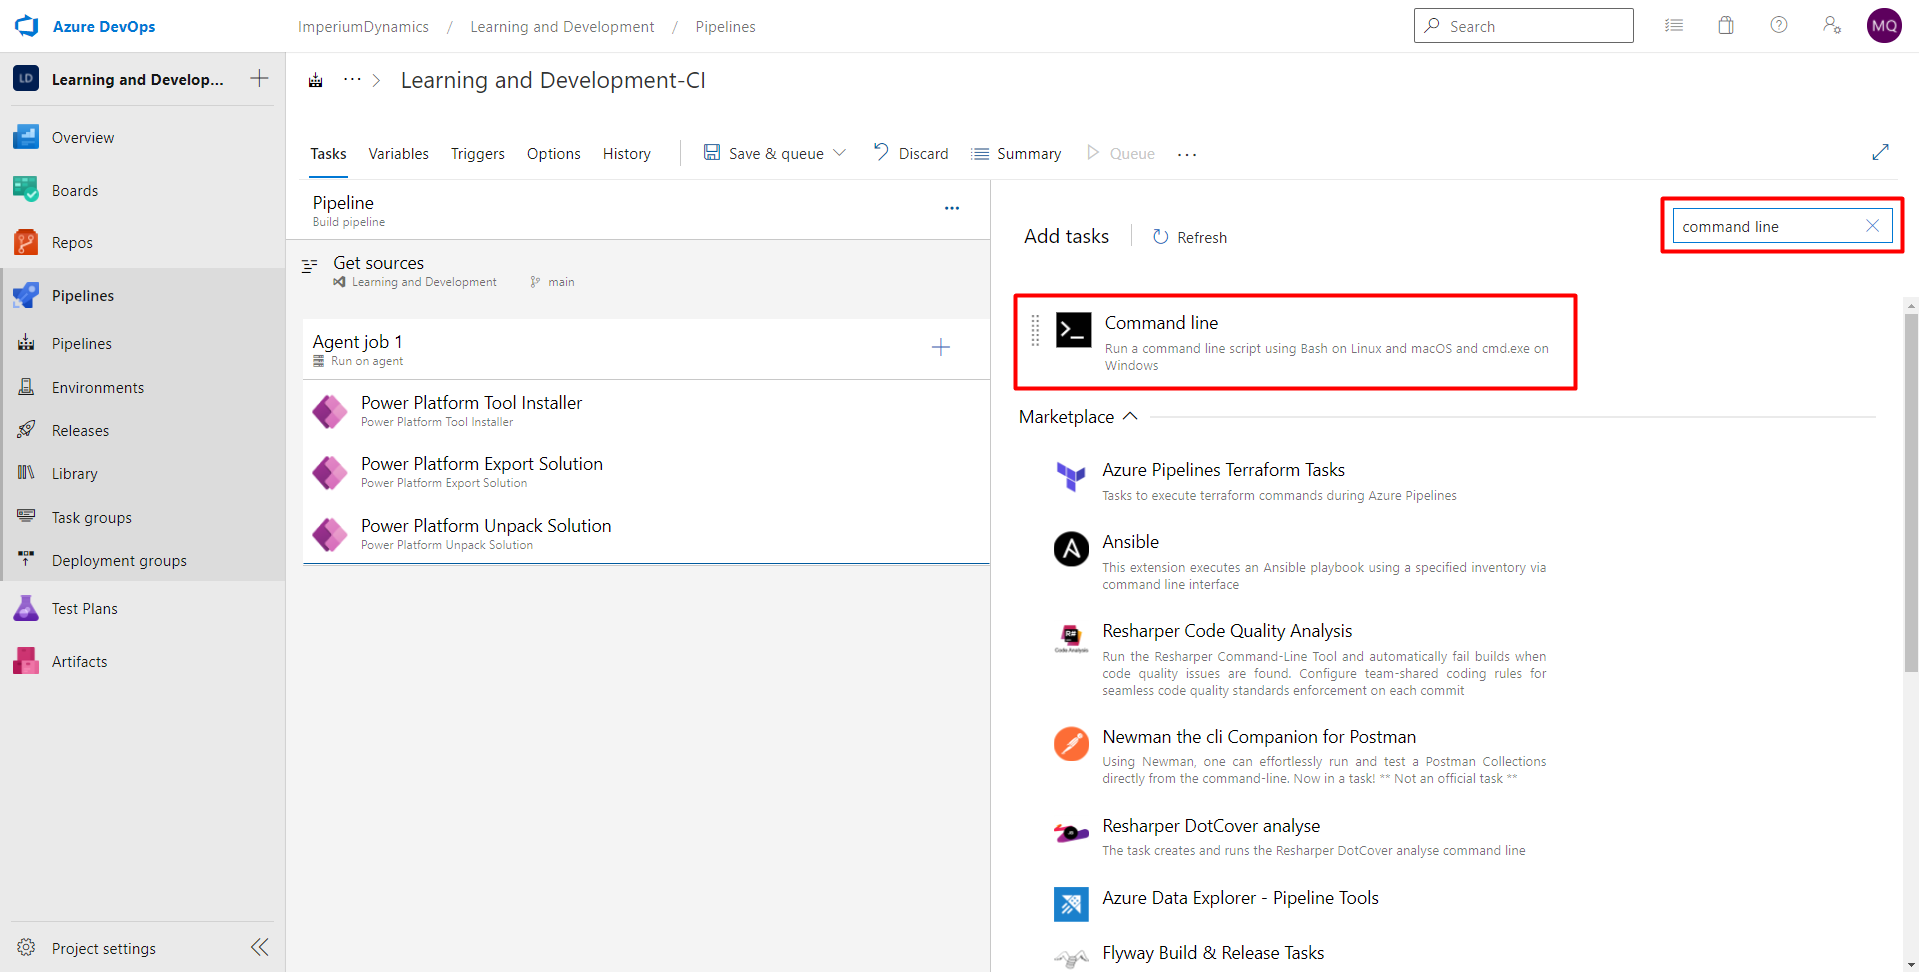
Once we have command line task added to our pipeline, we can rename this task to make it more descriptive. Rename the task to whatever you want to accomplish in that task, like “Push to GIT”.
We will need to add the script that will run the Git commands (add, commit, push) to push the unpacked files to source control. You can cut and paste it from here, you will need to specify your Azure DevOps login (replace example@domain.com in the script.)
echo commit all changes
git config user.email " example@domain.com "
git config user.name "Automatic Build"
git checkout main
git add –all
git commit -m "solution init"
echo push code to new repo
git -c http.extraheader="AUTHORIZATION: bearer $(System.AccessToken)" push origin main
We have now completed all the tasks in our pipeline, but we are missing something. The variables that we have used throughout the pipeline have not been initialized yet. So, we will need to add those variables to our pipeline.
In order to do that, choose “Variables” tab in the pipeline editor, and then “+Add”.
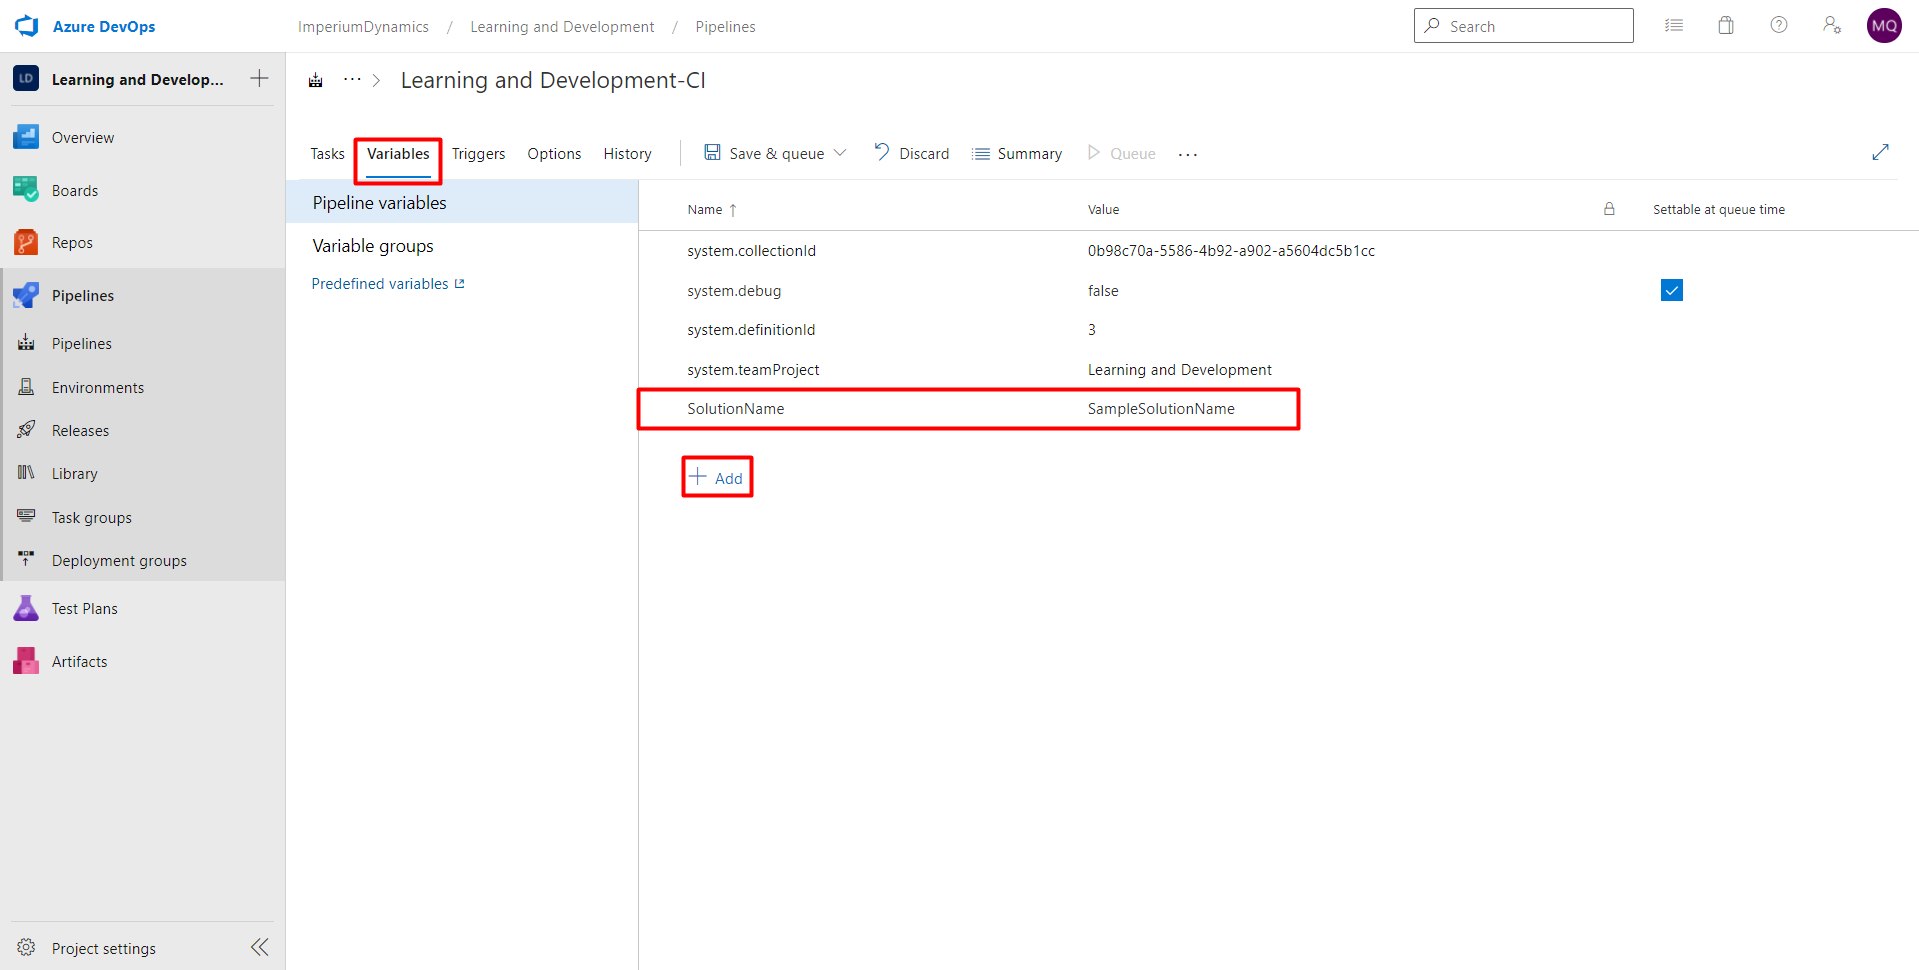
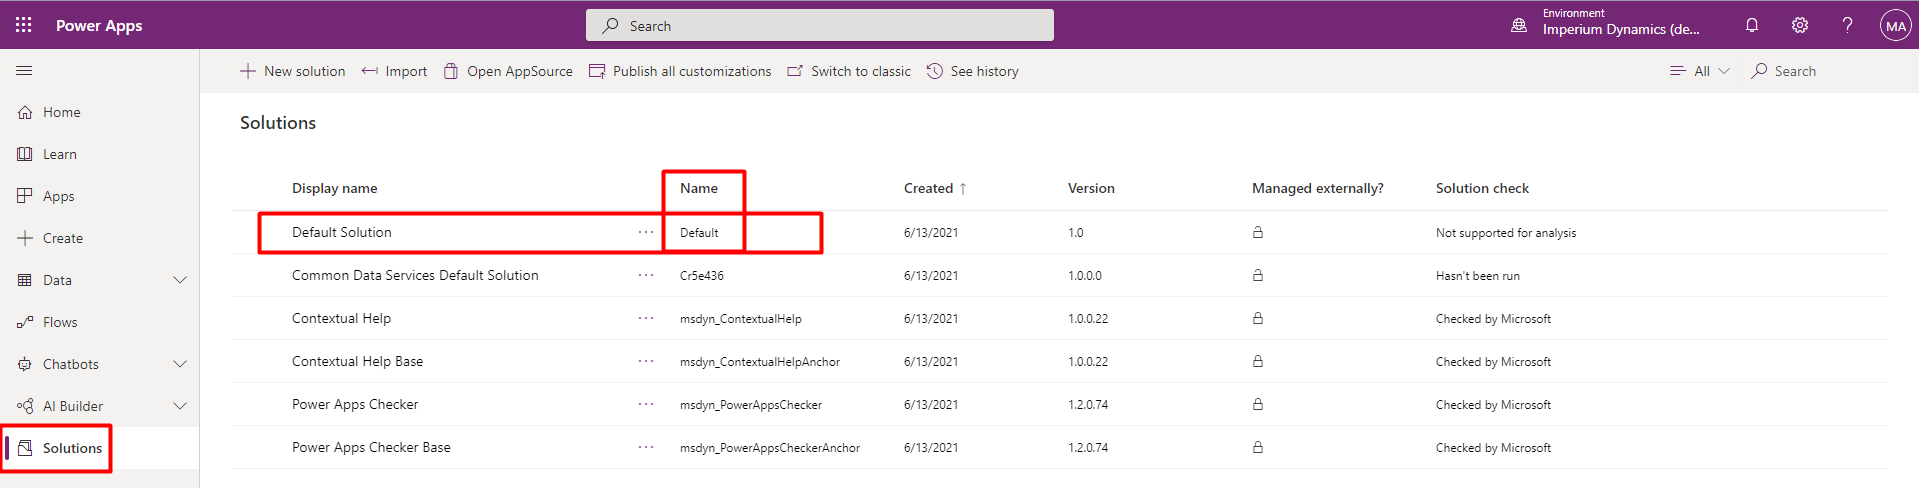
Add a variable named “SolutionName” and for the value, enter the solution name you want to be working with. Remember, we will need the “name” of the solution, not the “display name”. This can be found on PowerApps Portal in the solutions tab, as shown in the following screenshot.
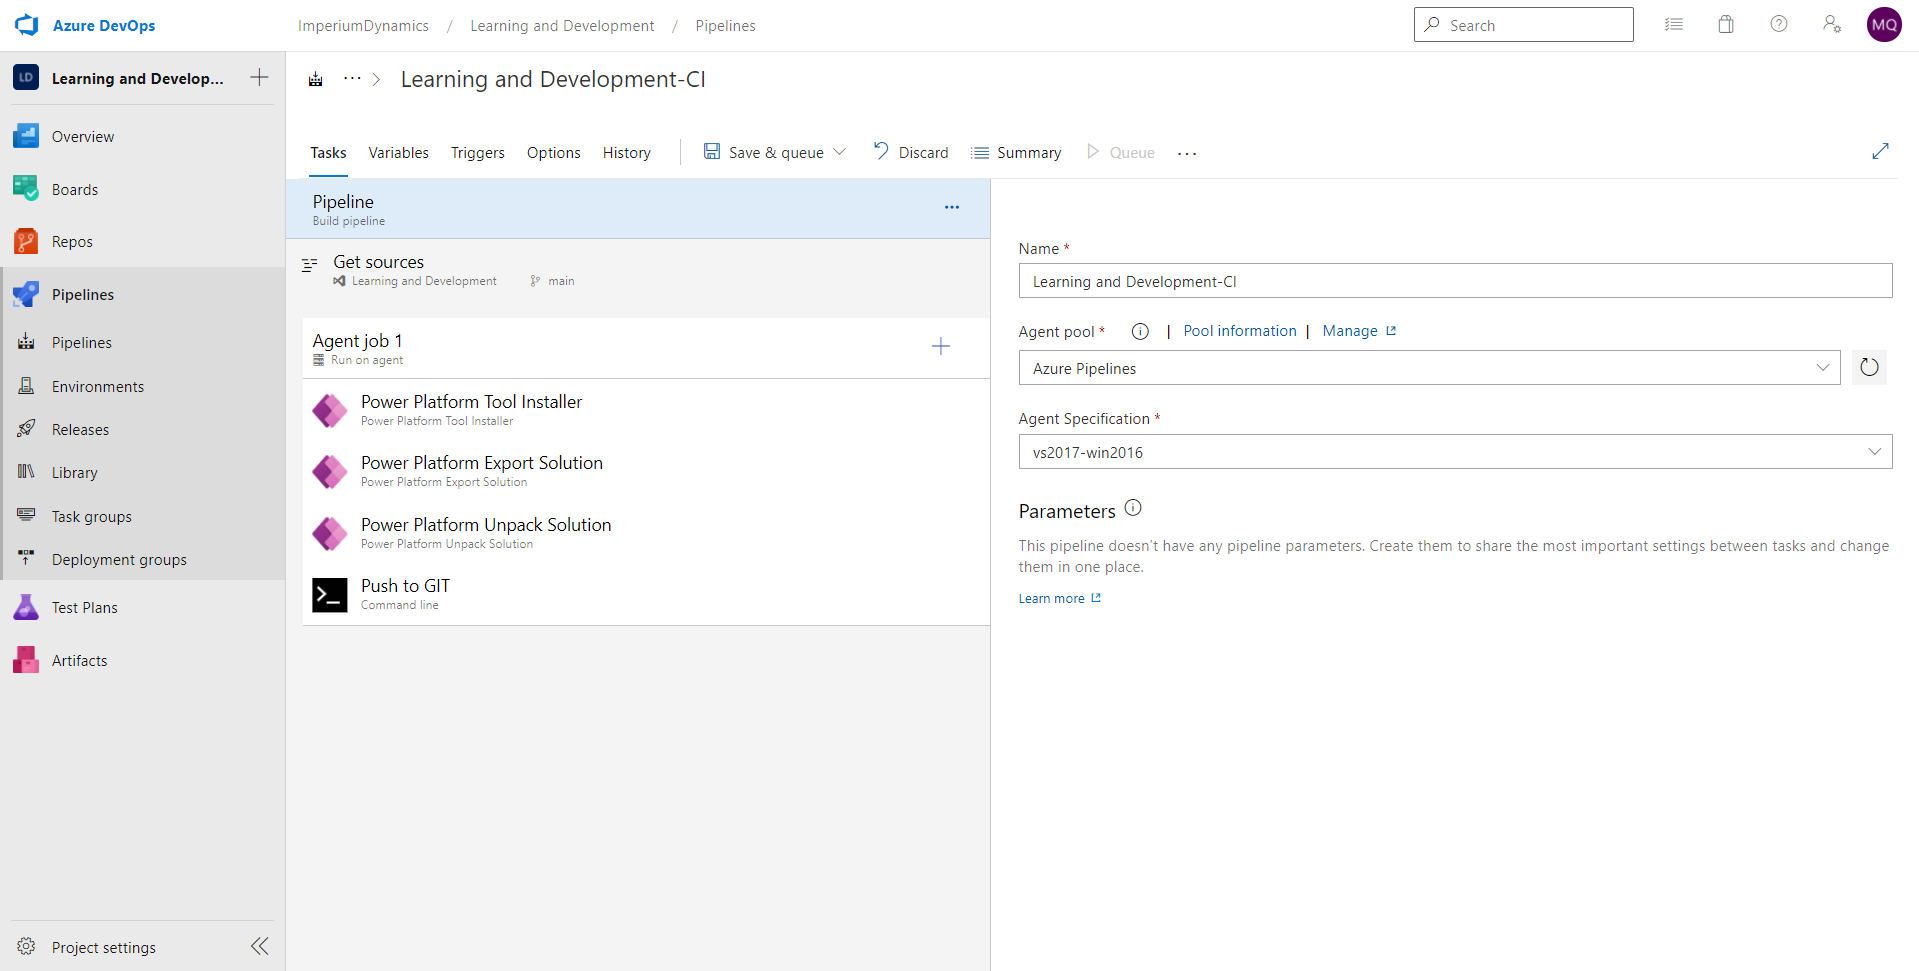
That’s it! We are done with our first pipeline. This is how the pipeline should look like in the end:
Join us in the next blog in this series to continue with our ALM journey.
Learn more about Imperium's Power App Services. We hope this information was useful, and we look forward to sharing more insights into the Power Platform world.