| Mohsin Ahmed
In this blog, we will be looking at custom connectors in Power Platform and how we can add dynamic dropdowns to request parameters in custom connector actions.
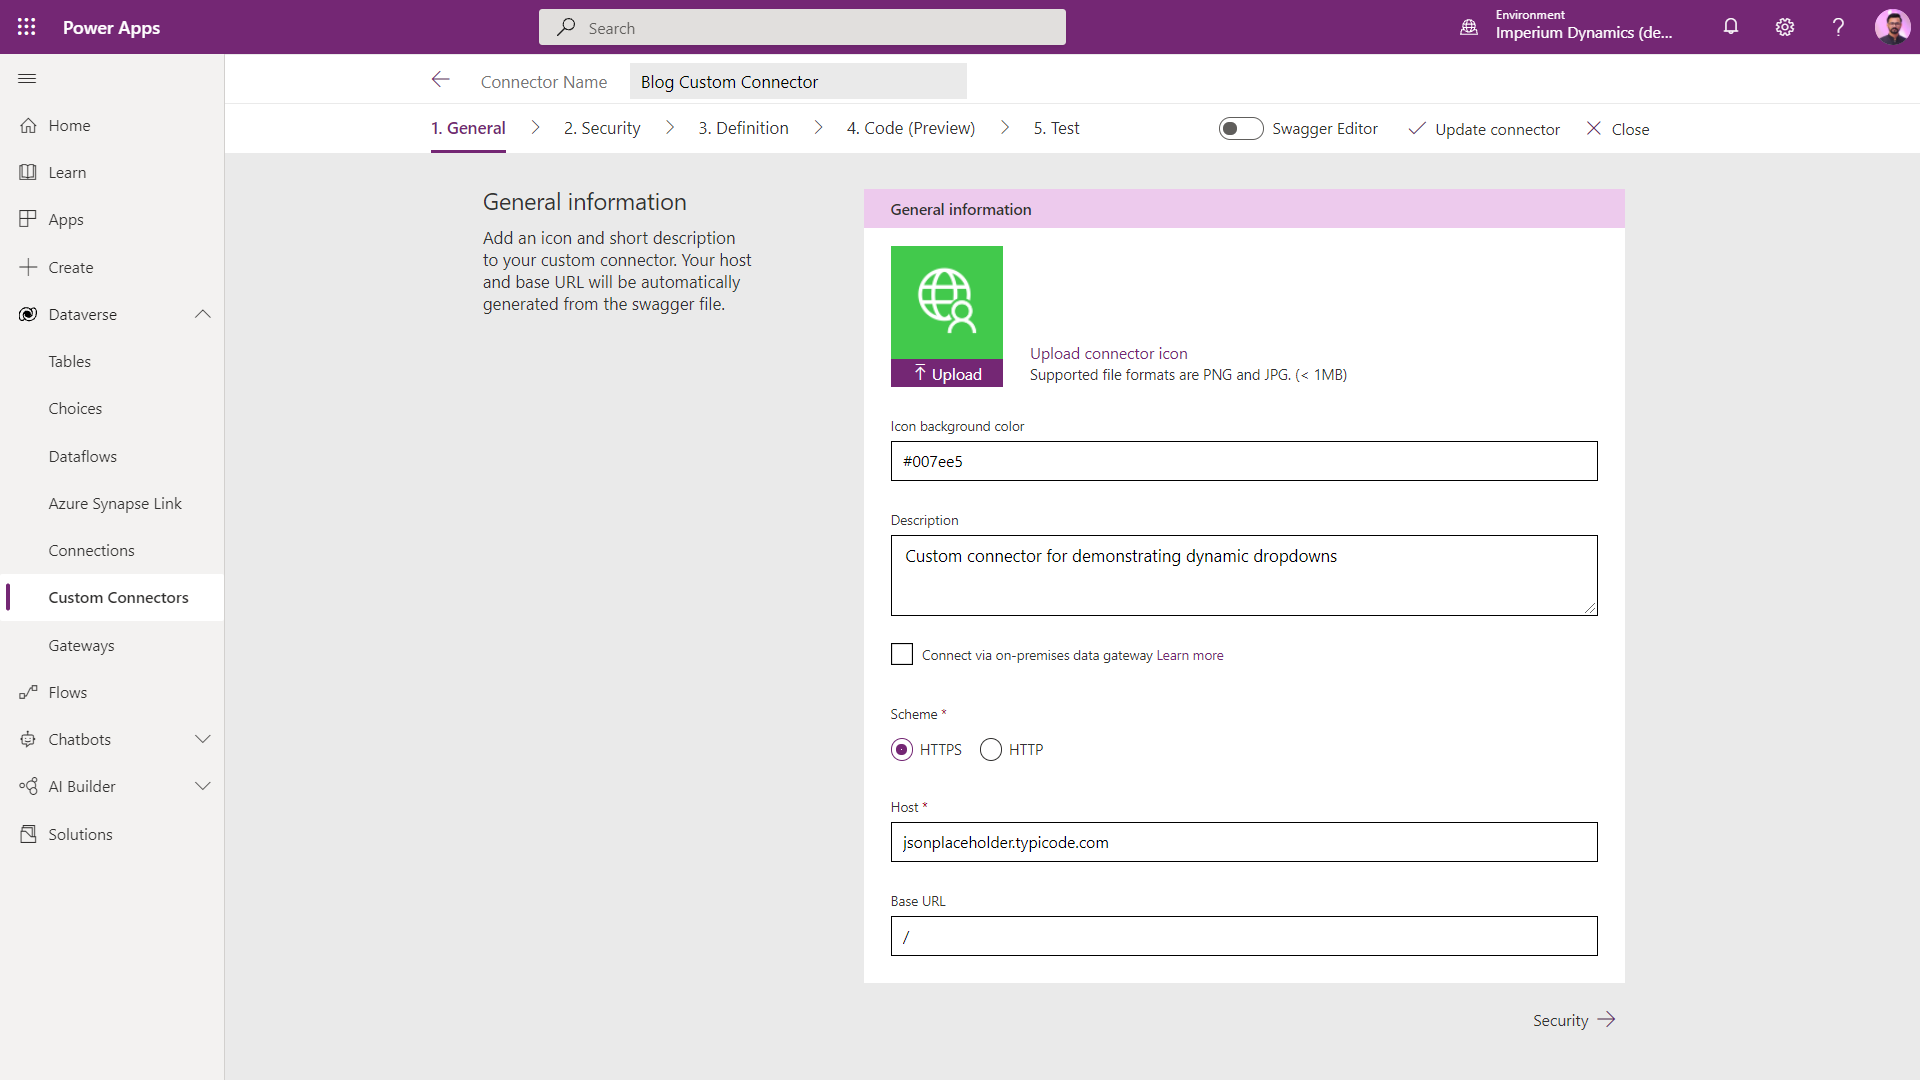
As a starting point, we will create a new custom connector in any environment of our choosing. Give your custom connector a name and description. Now setup the Host URL and Base URL of the custom connector according to your API.
For demonstration purposes, we will be using a dummy REST API provided by https://jsonplaceholder.typicode.com.
To set up the custom connector, the following configuration will have to be made in the “General” tab:
- Scheme: “HTTPS”
- Host URL: “jsonplaceholder.typicode.com”
- Base URL: “/”
The General tab page will look like this after being set up:
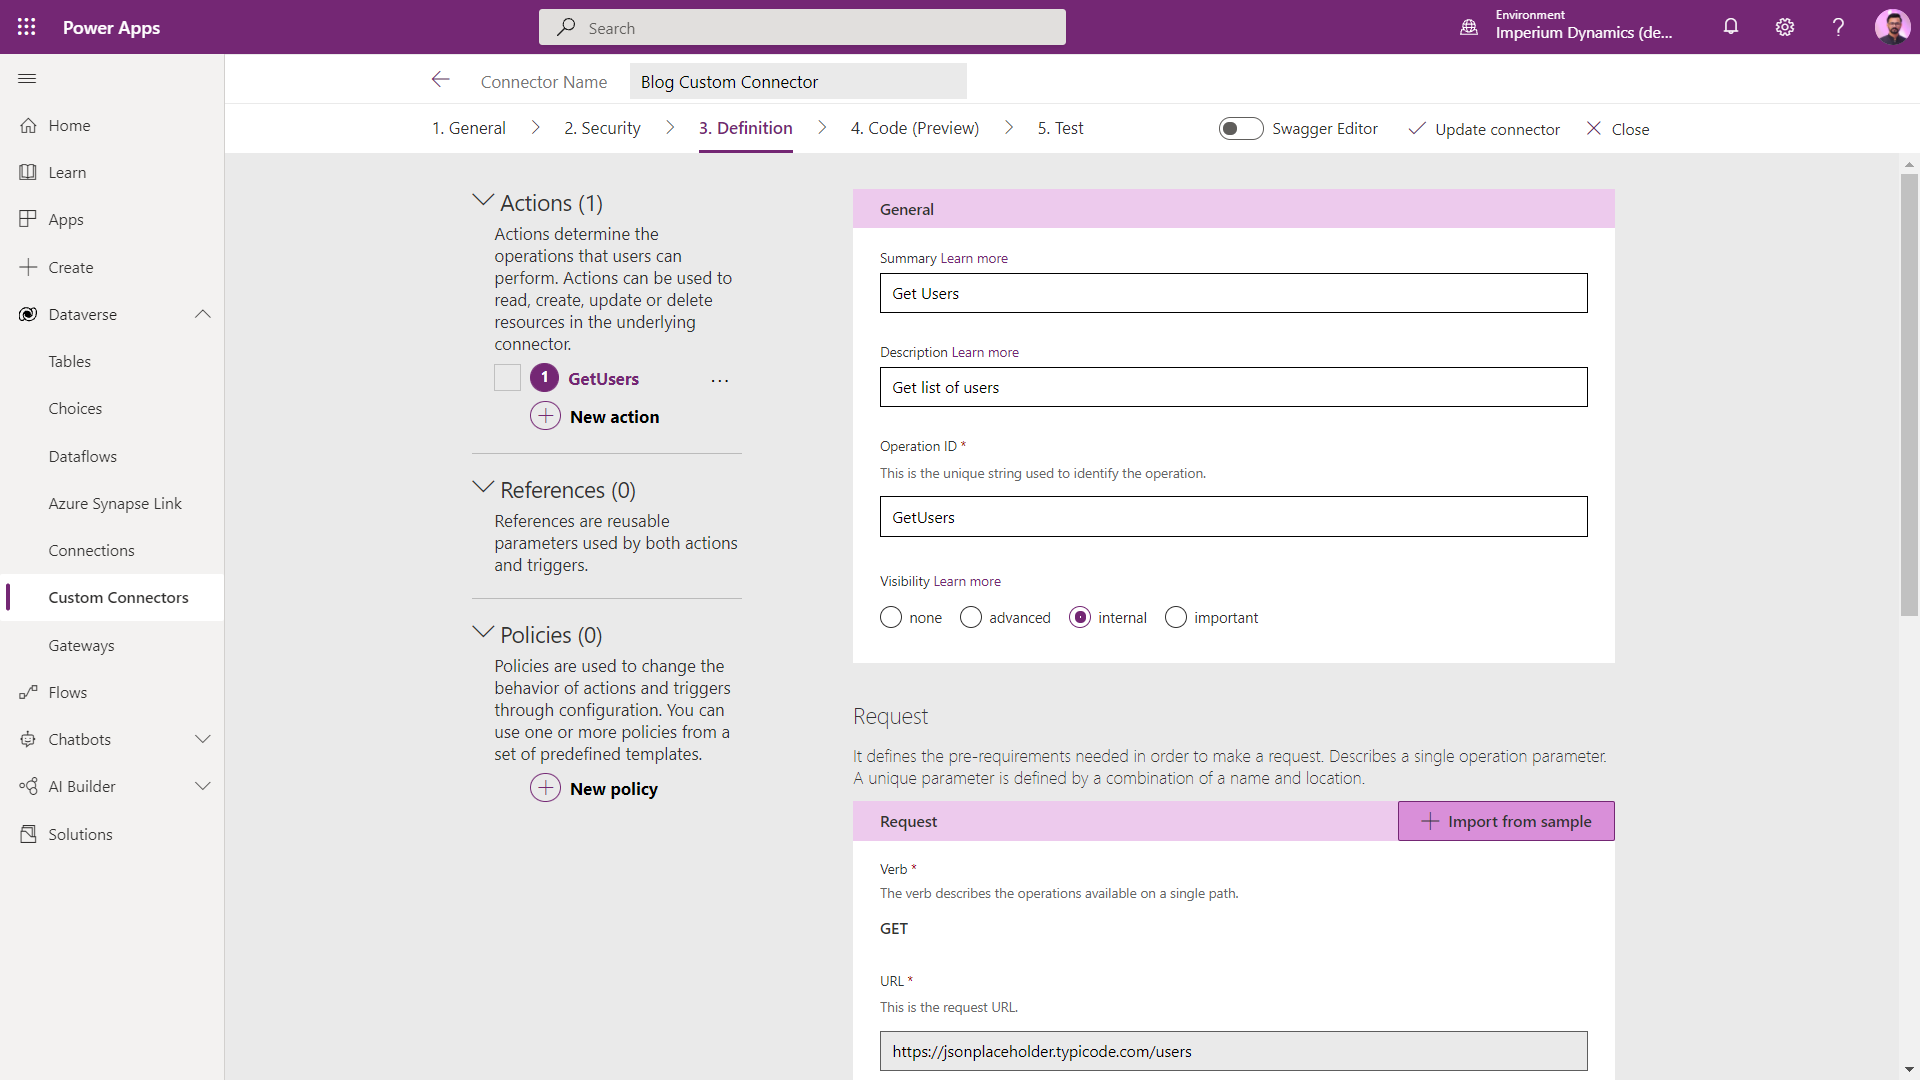
Next, we will add our first action to the custom connector. We will be using the Get Users endpoint (https://jsonplaceholder.typicode.com/users) from the JSON Placeholder API.
To add the action, the following steps will be taken:
- Go to “Definition” tab of the custom connector
- Click “New Action” to add new action
- Enter “Get Users” in the Summary field
- Enter “Get list of users” in the Description field
- Enter “GetUsers” in the Operation ID field
- Set the visibility to “internal” since we would not be exposing this action to end-users
- Click “import from sample” button in the Request section
- Set HTTP Verb to “Get”
- Set URL to https://jsonplaceholder.typicode.com/users
- Click “Import”
- Click “Add default response” in Response section
- Paste in the Body field, the JSON object array returned from URL https://jsonplaceholder.typicode.com/users
- Click “Import”
- Click on “Update Connector” in the header
The finished action should look like this:
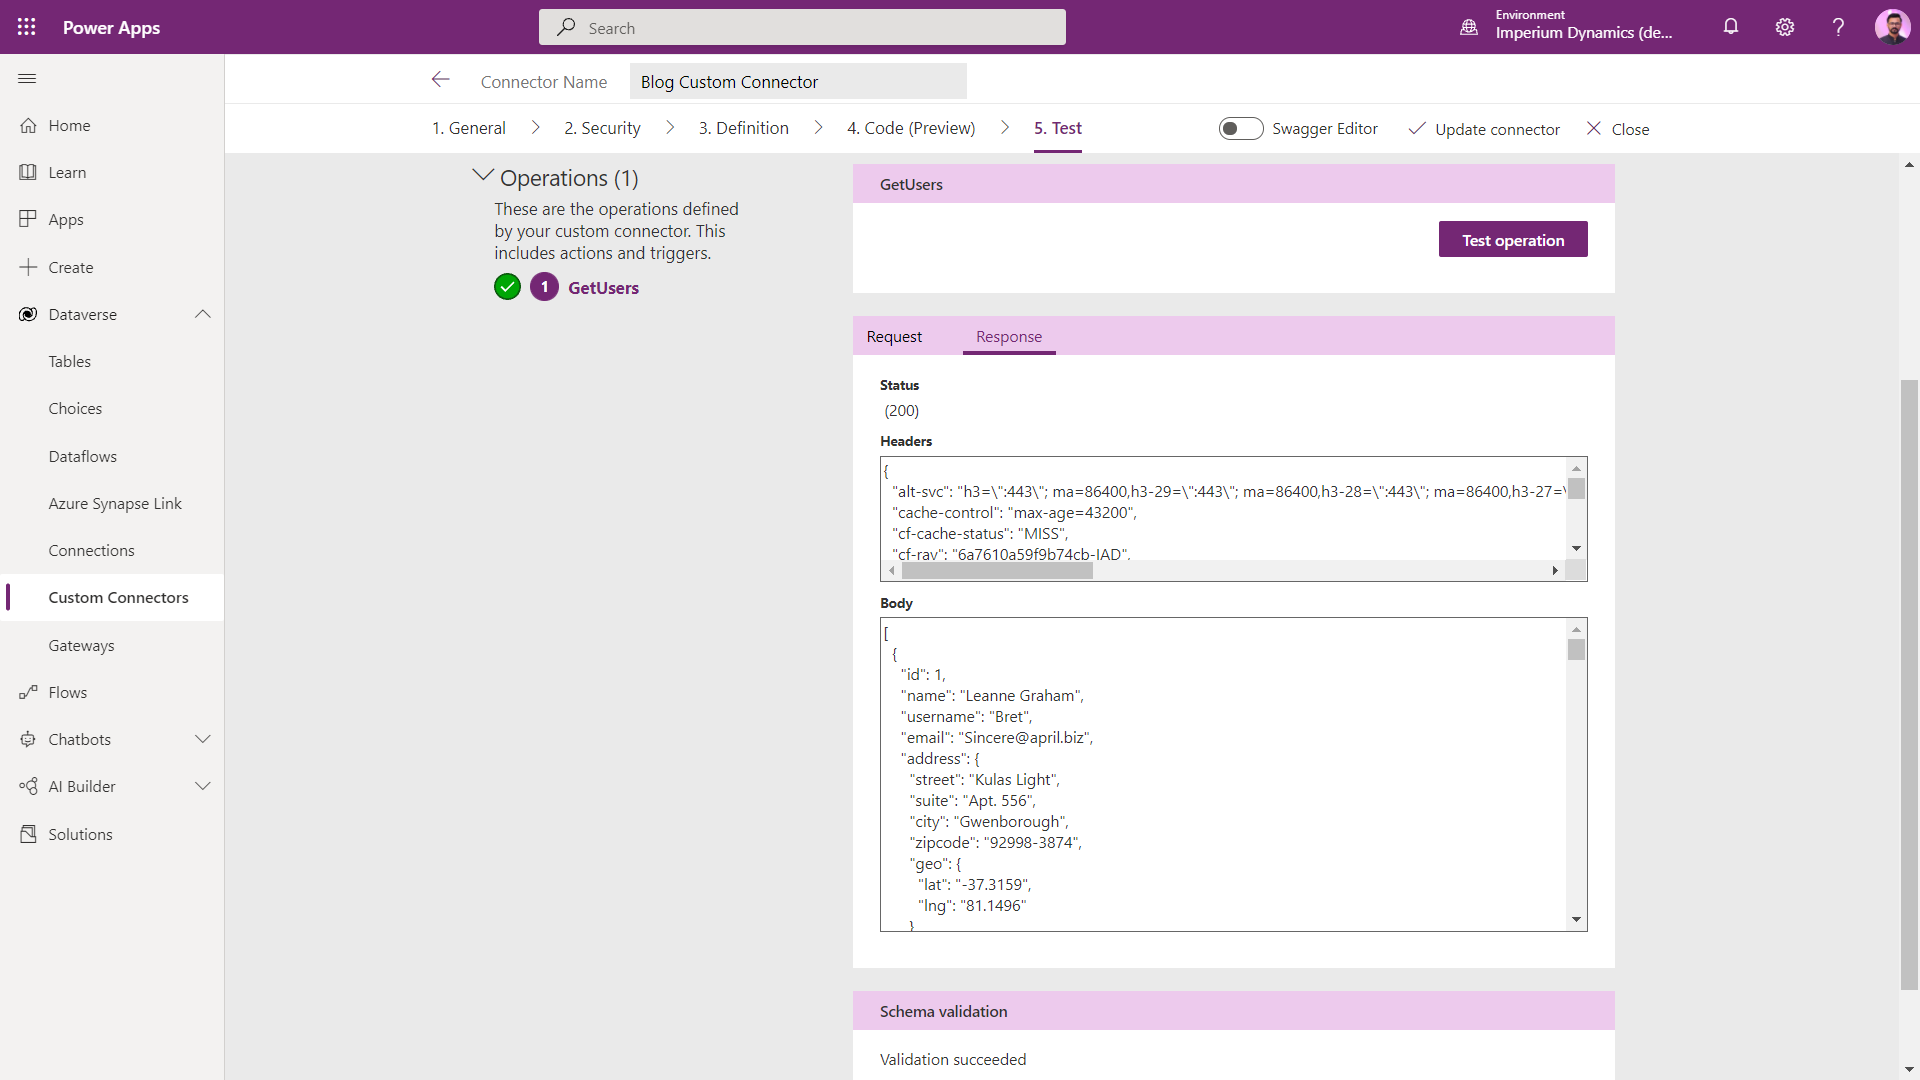
Next, go to the “Test” tab to test this action. We will need to create a new connection for our custom connector as shown in the following picture:

We will validate that testing our action gives the following result:
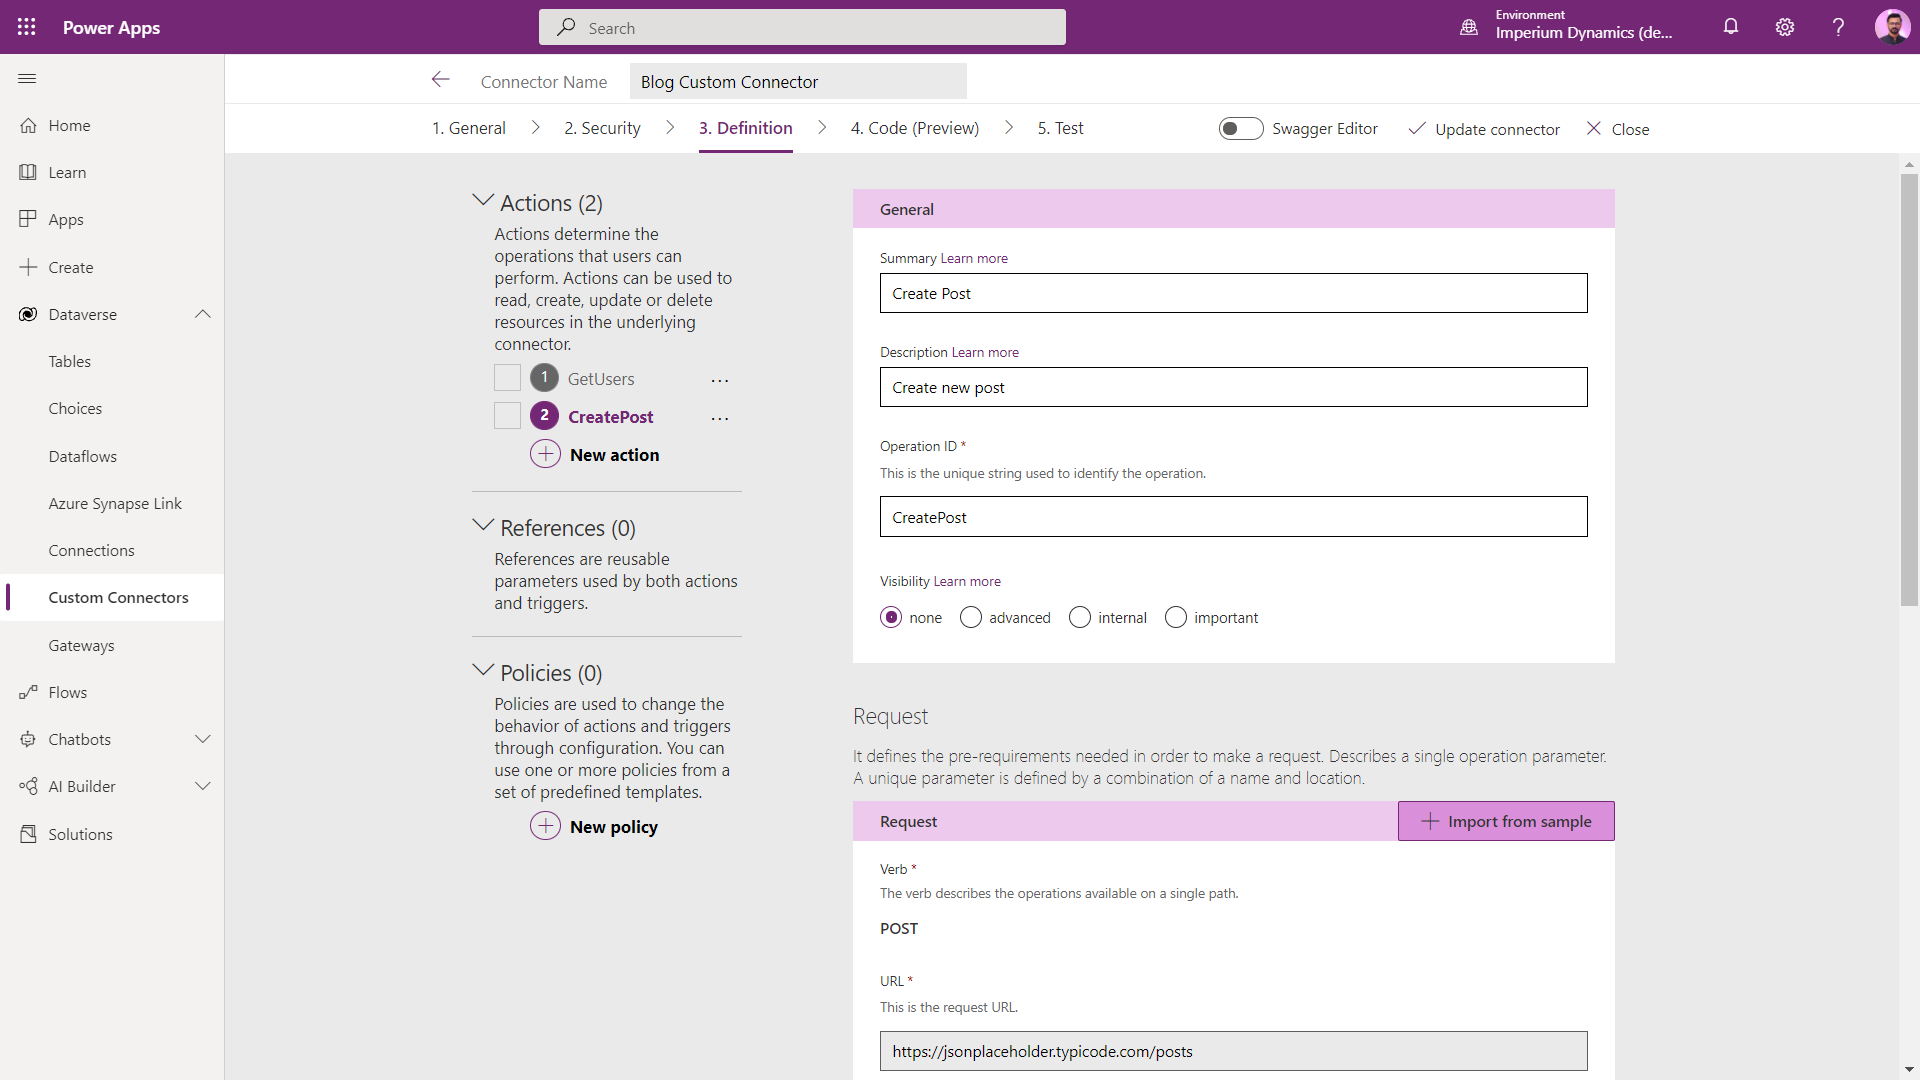
Next, we need to add our next action. Let us head back to the “Definition” tab. Repeat the procedure of adding a new action, use the following values to set it up:
- Summary: “Create Post”
- Description: “Create new post”
- Operation ID: “CreatePost”
- Visibility: none
- Request HTTP Verb: POST
- Request URL: https://jsonplaceholder.typicode.com/posts
-
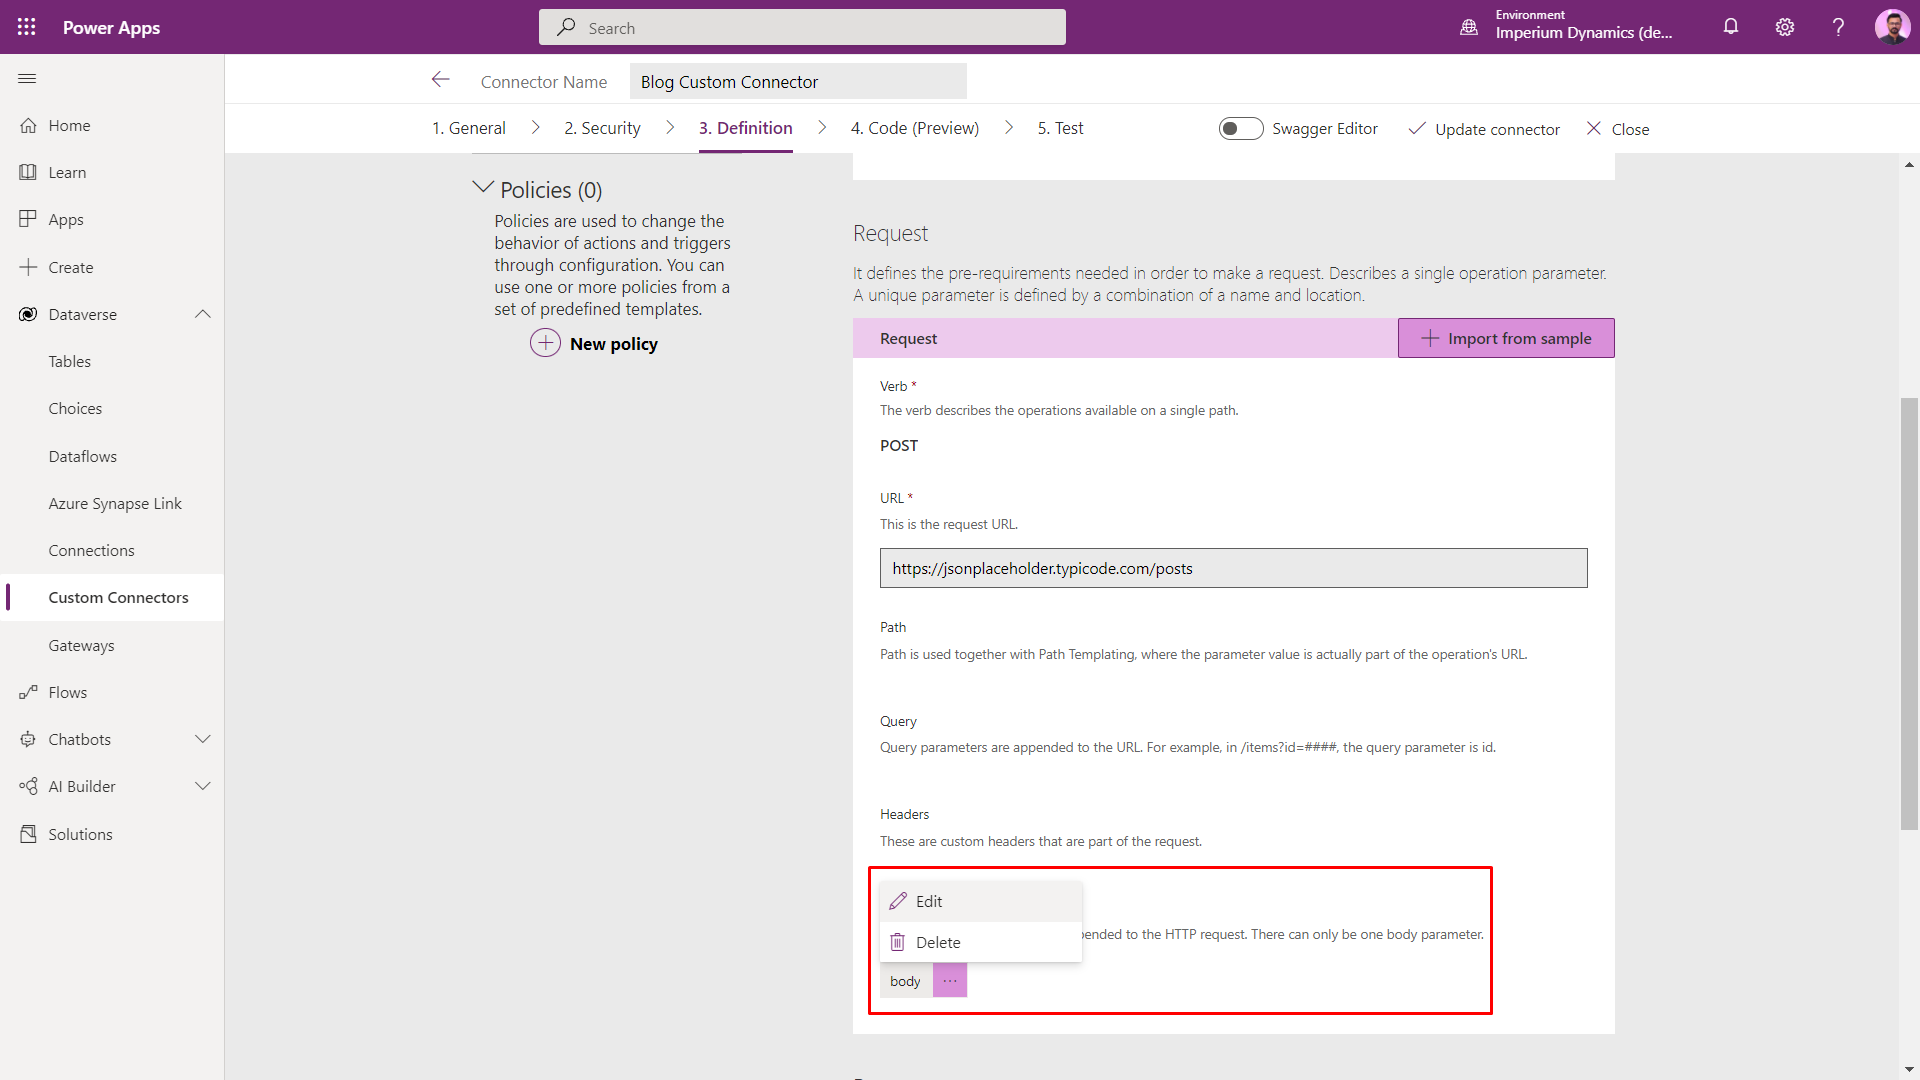
Request Body:
{"title": "foo", "body": "bar", "userId": 1}
After following these steps, update the connector.
The action should look like this upon completion:
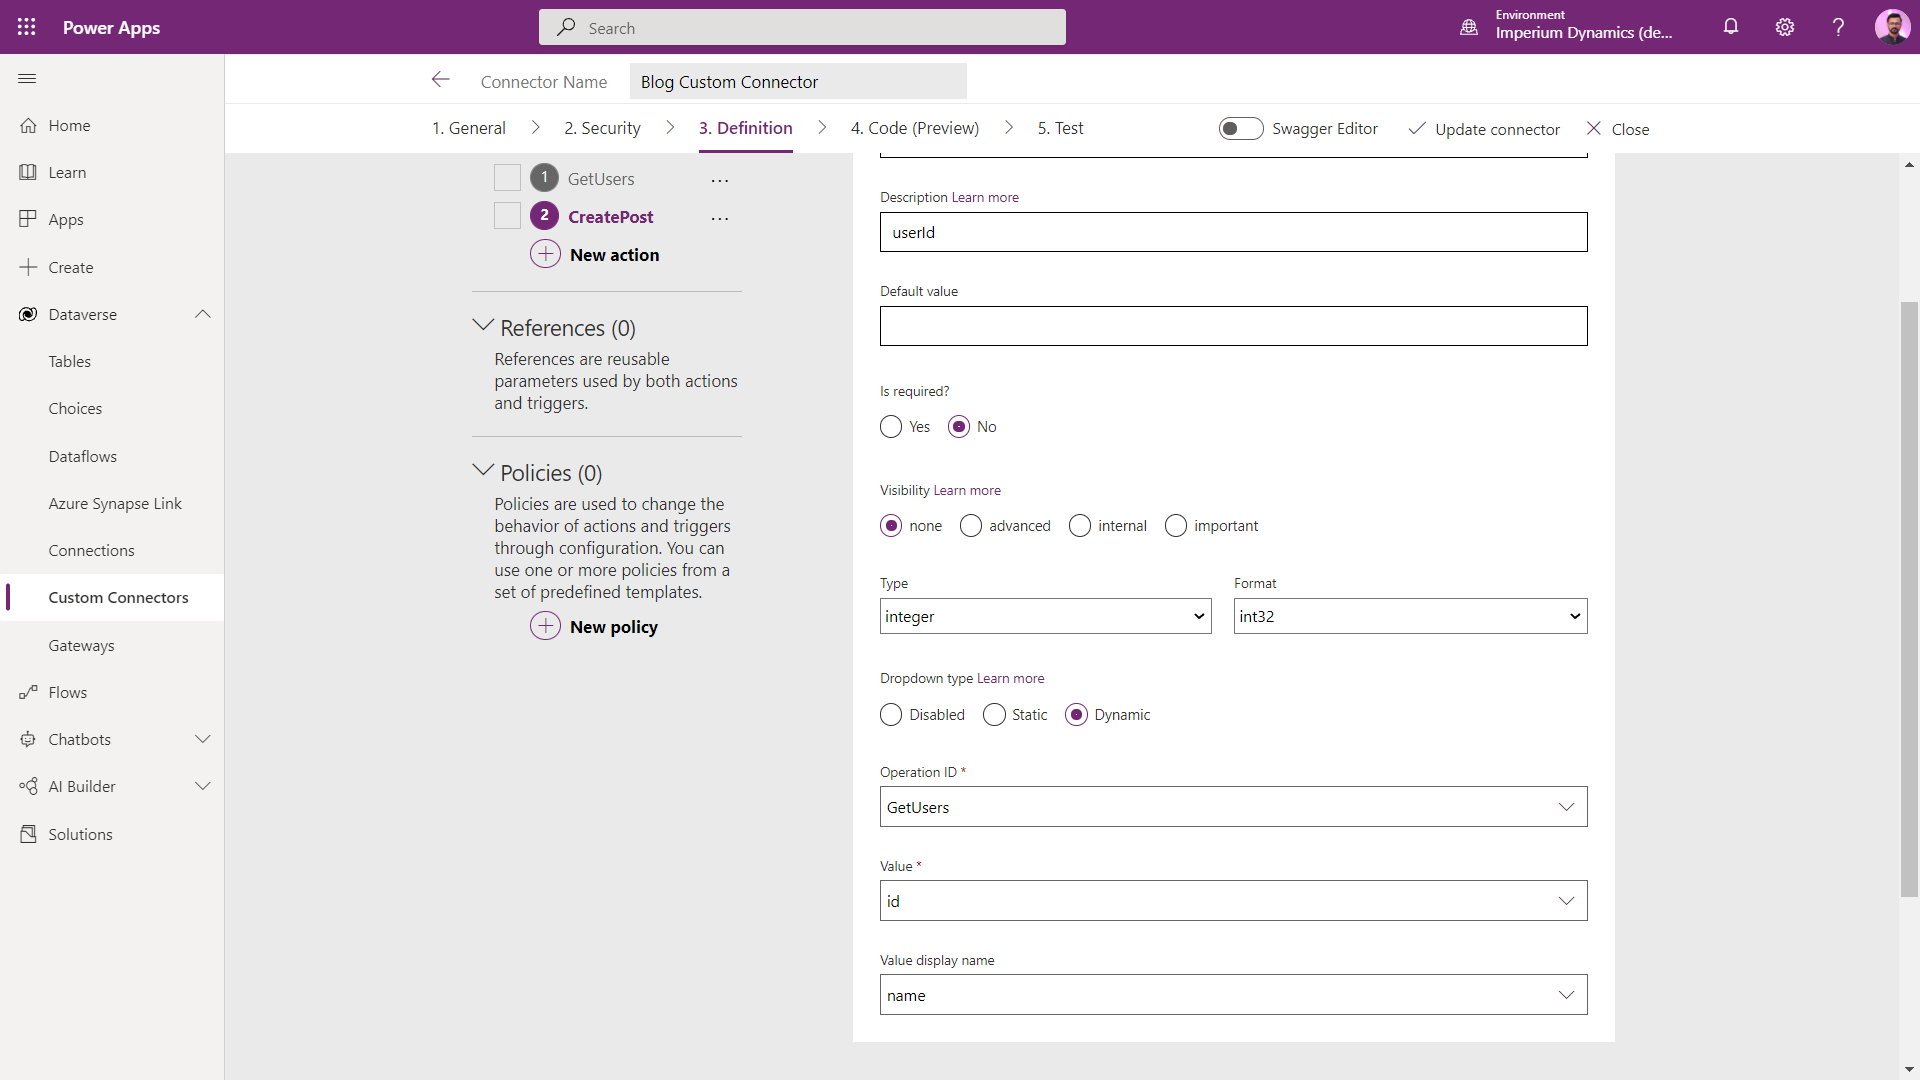
Now we will finally get to the part where we add a dynamic dropdown to one of our request parameters. We will have to edit the “body” parameter in the request body.
We need to edit the “userId” field.
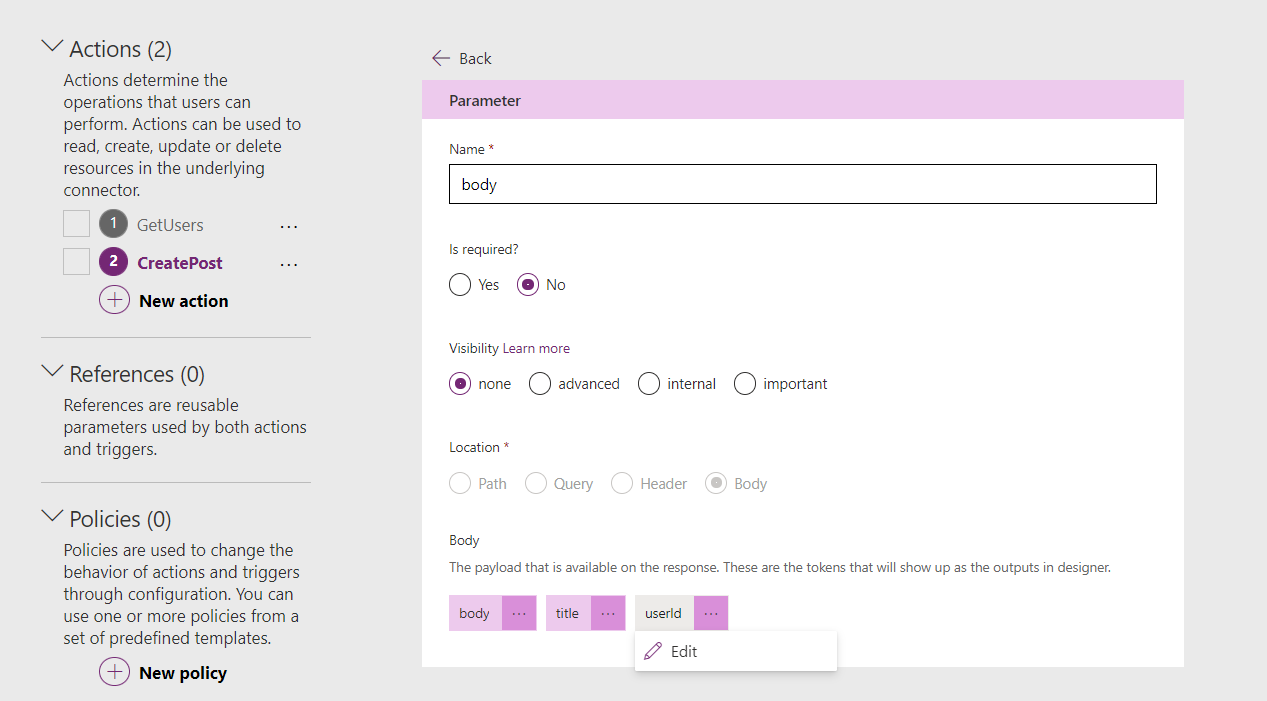
We will need to set up the following fields for the dropdown:
- Dropdown type: Dynamic
- Operation ID: Select “GetUsers” action
- Value: id
- Value display name: name
What we have achieved through this is a dynamic dropdown for Users on the “UserId” parameter of the request body. The Create Post API expects us to pass a User ID to create a post against. The optimal user experience would be to provide a dropdown for selecting one of the users from the API itself to pass into the User ID field.
The operation ID selection enables us to select any action from our custom connector, whose response we need to use as the input for the dropdown of this parameter. The “value” and “value display name” fields also allow us to set separate values, the former for passing value to the API request and the latter for displaying data to the user. Since we need to pass an integer ID to the User ID parameter, therefore we need to use the “ID” field from the “Get Users” API response as the value for our parameter, and we will use the “name” field of the response as the value to be displayed to the user for selection.
The page should look like this eventually:
Now update the custom connector. And we are done with adding dynamic dropdown to our request body parameter.
Here is our custom connector with dynamic dropdown in all its glory:

You can update the connector or create a new connector with the API and Actions of your choice and follow the procedure described in this blog to achieve dynamic dropdowns for your custom connectors.
Thanks for following along!
Join us next time, as we continue our journey of learning canvas apps.Click here to learn more about Imperium's Power Apps Services. We hope this information was useful, and we look forward to sharing more insights into the Power Platform world.