
| Syed Junaid
A plugin is a custom business logic code that you can integrate with Dynamics 365 to modify the standard behaviour of the platform. It’s a fully customized code which you can write in .NET and register that .NET Assembly on various events after which it can be triggered on registered events. It can be registered on events like Update, Create etc which are also known as Sdk Messages.
Required tools to create a plugin are:
- Visual Studio 2017 (Or Later Version)
- .NET Framework 4.6.2
- Prior C# Experience
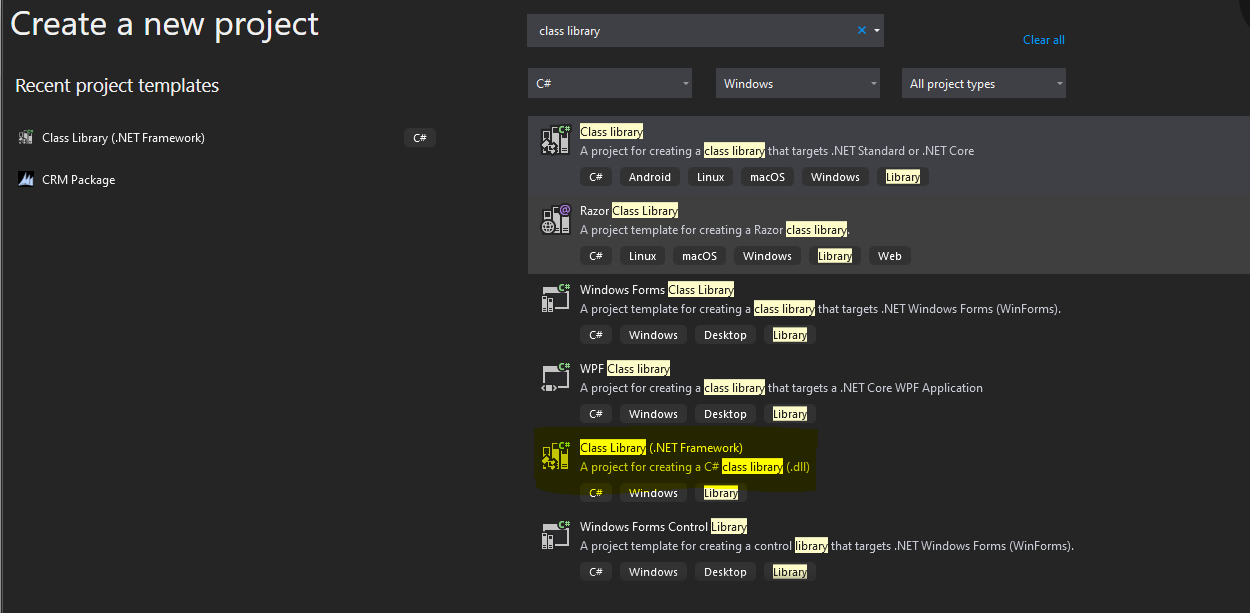
For creating a plugin we have to follow following steps:
-
Open Visual Studio and create a Class Library (.NET Framework) project.
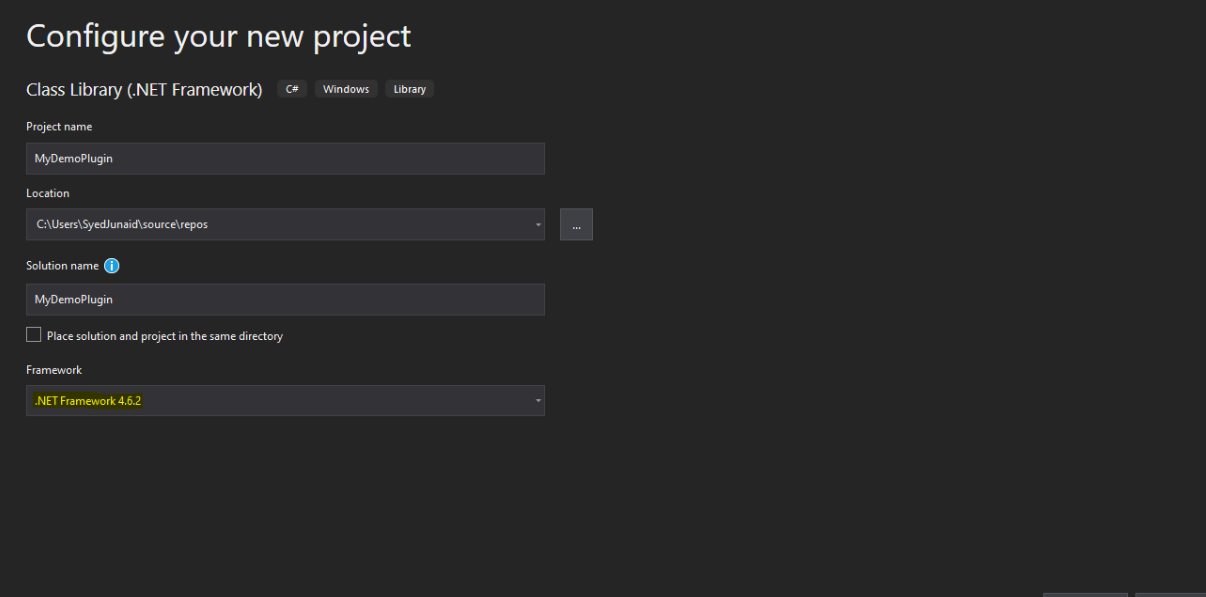
-
Give a meaningful project name and use .NET Framework 4.6.2 as Framework and create the project.
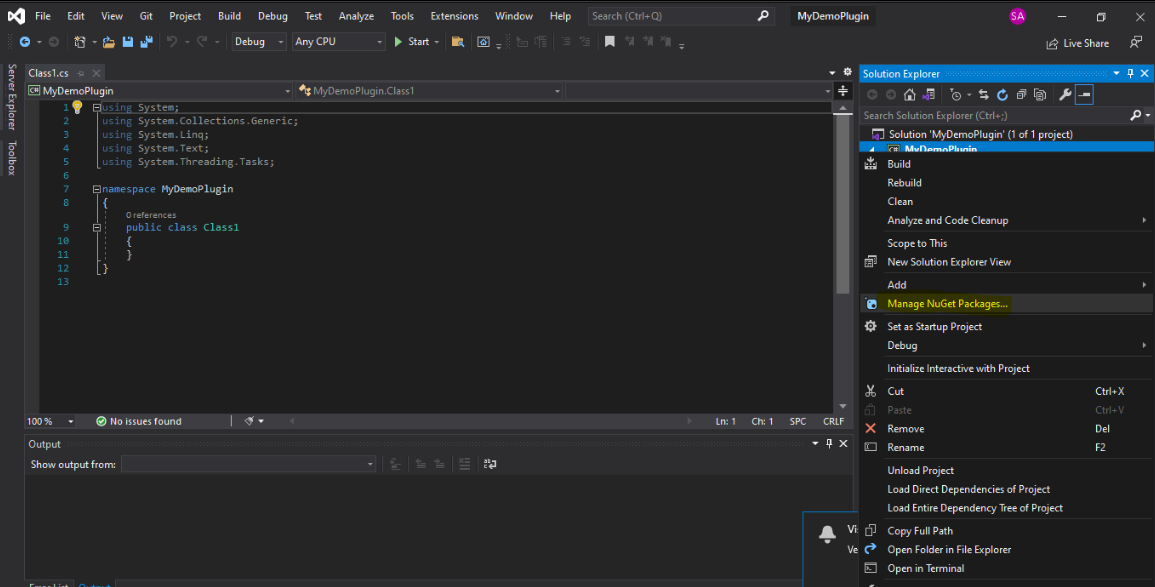
-
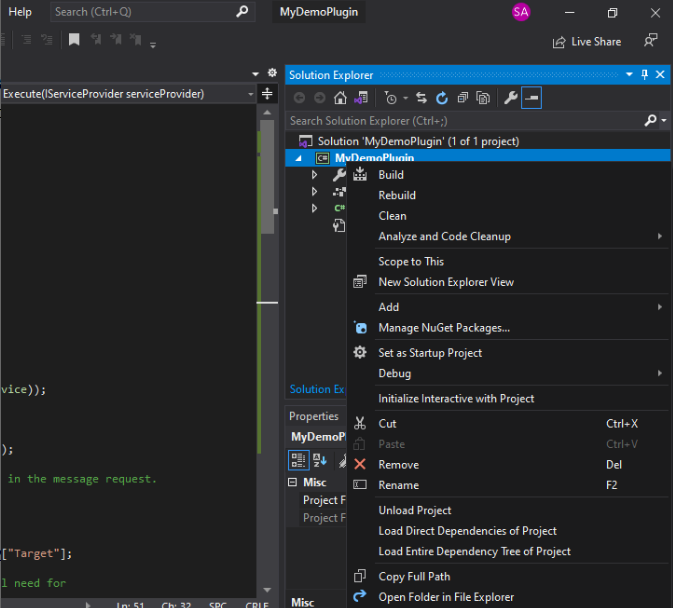
Now go to Manage NuGet Packages by right clicking the project.
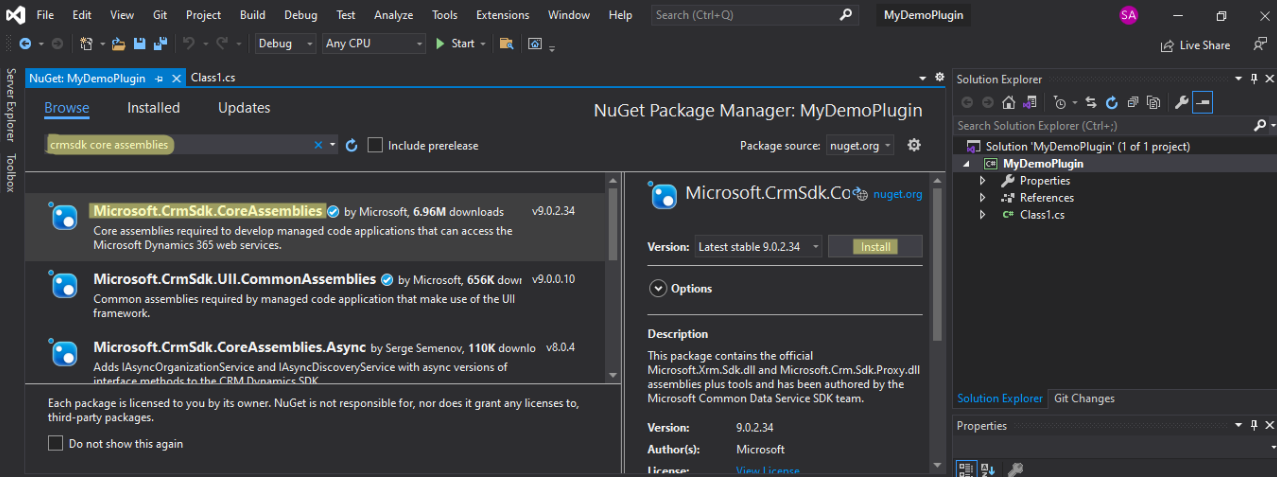
-
After that, search for CrmSdk Core Assemblies and install it and import those.
-
Now we have all the packages required to develop a Plugin. Now we import the namespace which is
required to get all functionality of Crm Sdk and for plugin development.
using Microsoft.Xrm.Sdk;
using System.ServiceModel;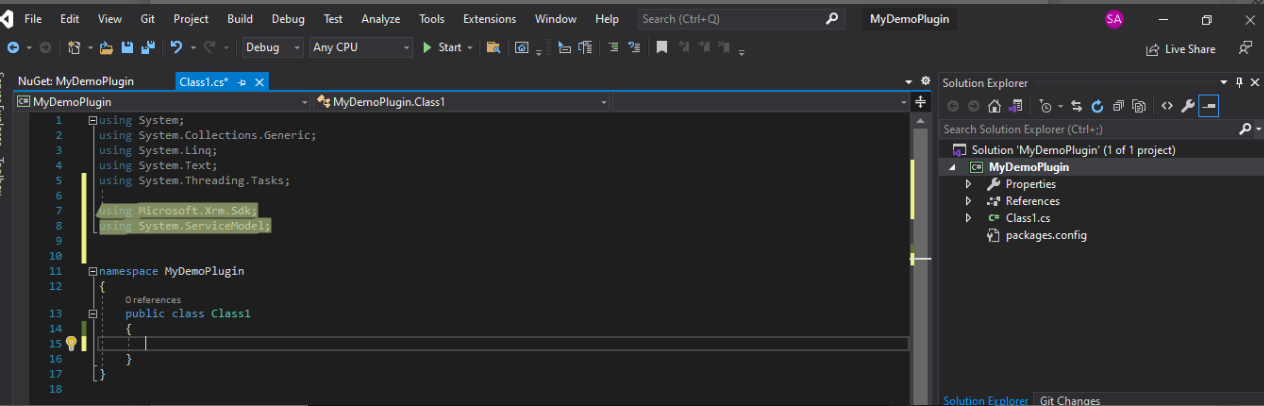
-
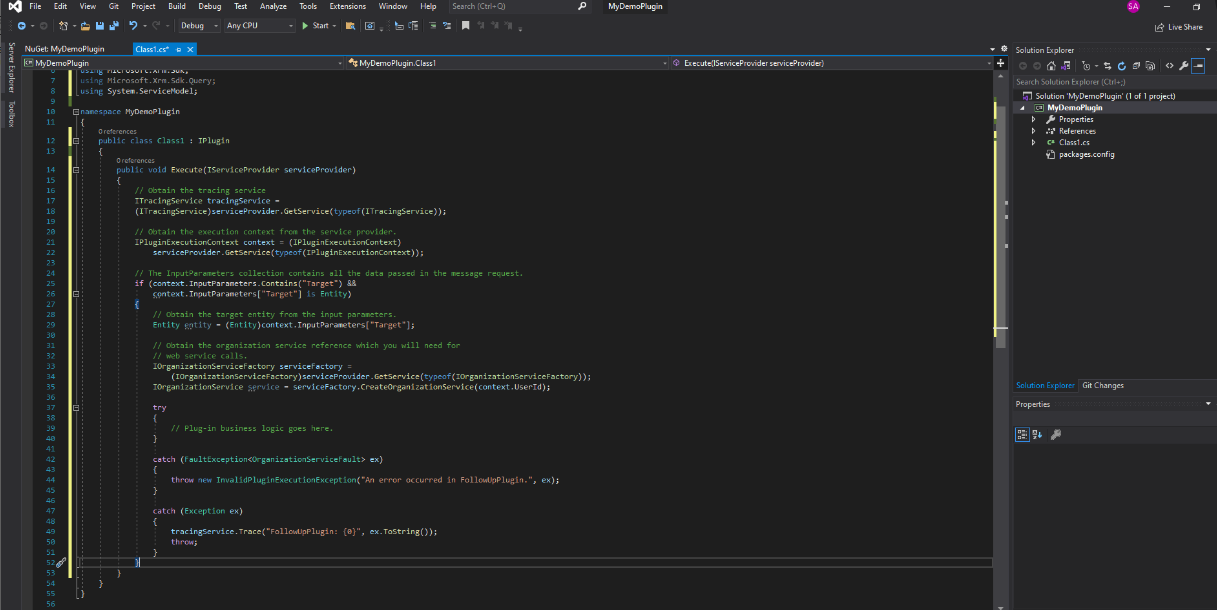
After that, implement the IPlugin interface and add this code to the Execute Method.
// Obtain the tracing service
ITracingService tracingService =
(ITracingService)serviceProvider.GetService(typeof(ITracingService));
// Obtain the execution context from the service provider.
IPluginExecutionContext context = (IPluginExecutionContext)
serviceProvider.GetService(typeof(IPluginExecutionContext));
// The InputParameters collection contains all the data passed in the message request.
if (context.InputParameters.Contains("Target") &&
context.InputParameters["Target"] is Entity)
{
// Obtain the target entity from the input parameters.
Entity entity = (Entity)context.InputParameters["Target"];
// Obtain the organization service reference which you will need for
// web service calls.
IOrganizationServiceFactory serviceFactory =
(IOrganizationServiceFactory)serviceProvider.GetService(typeof(IOrganizationServiceFactory));
IOrganizationService service = serviceFactory.CreateOrganizationService(context.UserId);
try
{
// Plug-in business logic goes here.
}
catch (FaultExceptionex)
{
throw new InvalidPluginExecutionException("An error occurred in FollowUpPlugin.", ex);
}
catch (Exception ex)
{
tracingService.Trace("FollowUpPlugin: {0}", ex.ToString());
throw;
}
}
In this code, First we used ITracing which is a tracing service which enables us to write a log, IPluginExecutionContext gets the context of the event which triggered the plugin. Then we check if we have an entity present in the context. IOrganizationService is the service reference that is responsible for create, update and all other functions for records in CRM. After these steps your code should look like this
-
Now we can write our business logic in the try block. Like if we want to create an account
record we can write this in a try block.
//Create Account Entity Object
Entity accountObject = new Entity("account");
//Set Name, Email, Address Of That Account
accountObject["name"] = "Junaid Zaidi";
accountObject["emailaddress1"] = "syed.junaid@imperiumdynamics.com";
accountObject["address1_line1"] = "45 Street, John Avenue";
//Setting Parent Contact
//Replace new Guid("A6AF4DAB-10C4-E911-A2E2-005056AE4389") with your GUID
accountObject["primarycontactid"] = new EntityReference("contact", new Guid("A6AF4DAB-10C4-E911-A2E2-005056AE4389"));
//Create Account Record. This function returns the GUID of the created account so that if you want to use it further in a code you can save it in a variable.
service.Create(accountObject);
Similarly, we have functions for Update, Delete, Retrieve, Associate etc which you can explore here. -
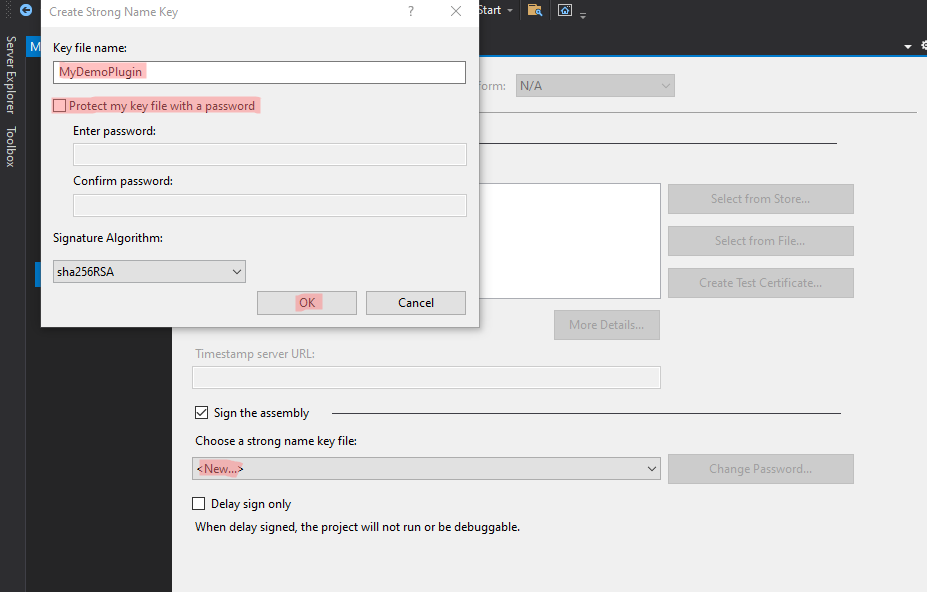
The final step is to sign the plugin. For that follow these steps:
-
Right click the project and go to properties
-
Go to signings and select sign the assembly
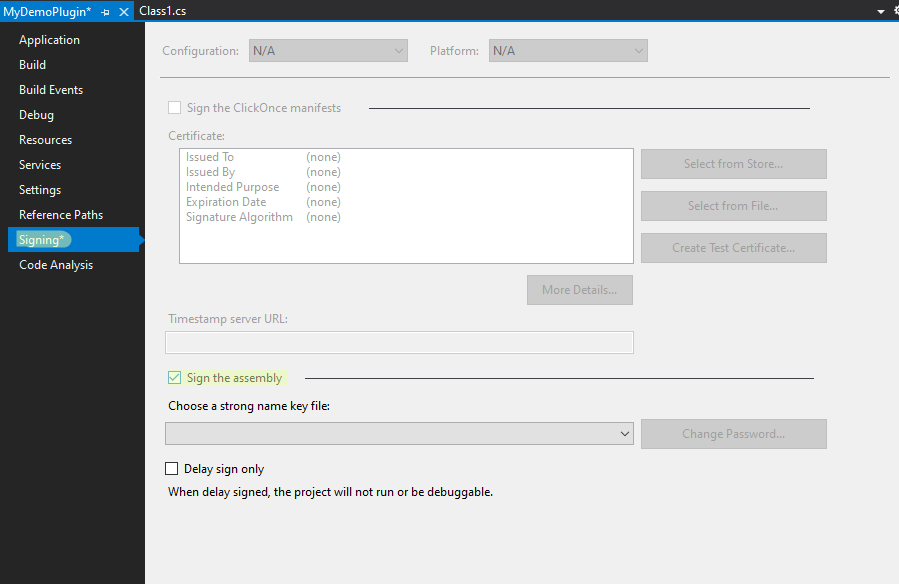
-
Now choose New, write the key file name and uncheck the protect my key file with a password
checkbox and proceed.
-
Right click the project and go to properties
After these steps build your project and your plugin is ready for registration. Registration process of plugins can be found in Part 2 of this series.
Click here to learn more about Imperium's Dynamics Services.
